VIO v4 Super Admin Portal - User Guide
Welcome to the VIO v4 Super Admin Portal! This guide covers all platform-level administrative features for managing tenants, users, and system-wide configurations.
Access Restricted
This portal is only accessible to users with the super_admin role.
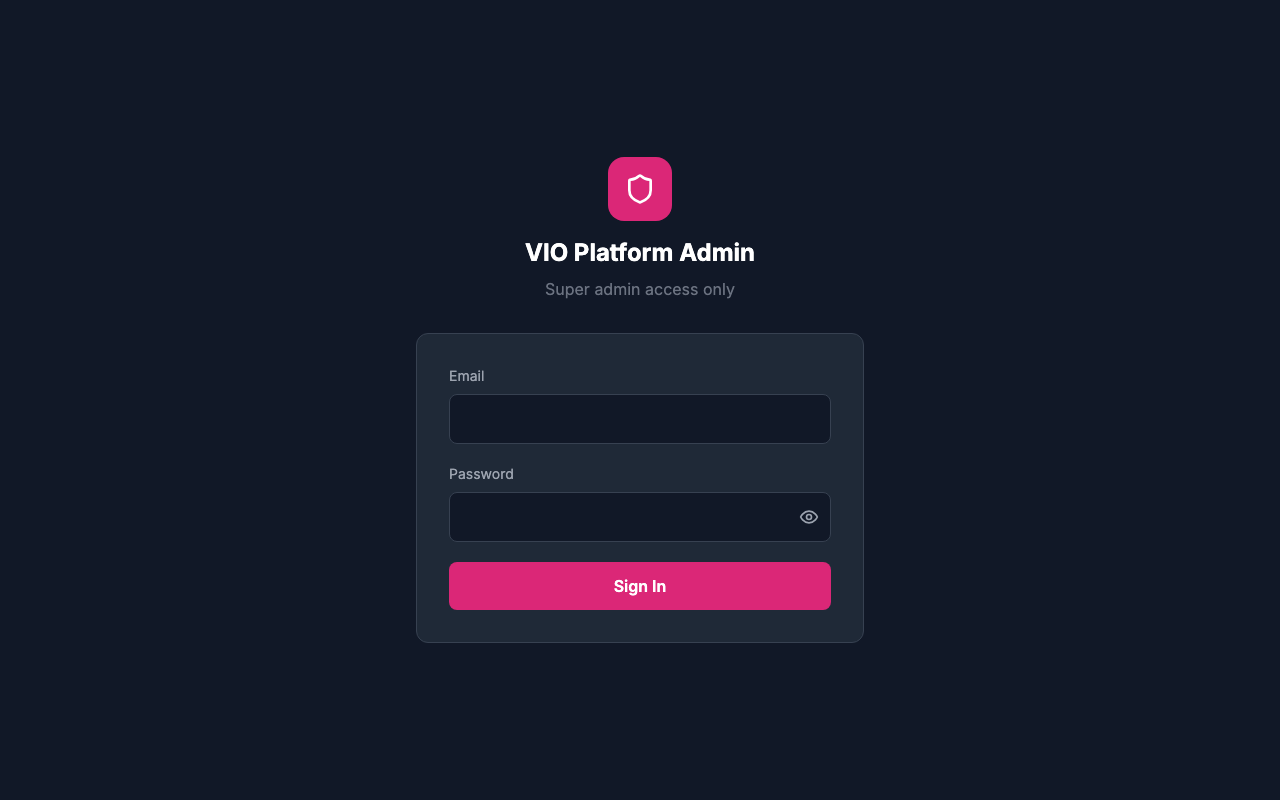
1. Login
The super admin login page for platform administrators.
How to use:
- Navigate to the super admin portal URL
- Enter your super admin email address
- Enter your password
- Click "Sign In" to access the platform dashboard
Session Management
The portal uses a secure token-based authentication system with automatic session refresh:
| Token Type | Duration | Purpose |
|---|---|---|
| Access Token | 15 minutes | Used for API authentication |
| Refresh Token | 7 days | Used to obtain new access tokens |
Automatic Session Refresh
When your access token expires, the system automatically uses your refresh token to obtain a new access token without interrupting your work. This means you can stay logged in for up to 7 days of activity without being logged out.
Multi-Device Support
The super admin account supports concurrent logins from multiple devices. Logging in from a new device will not affect sessions on other devices.
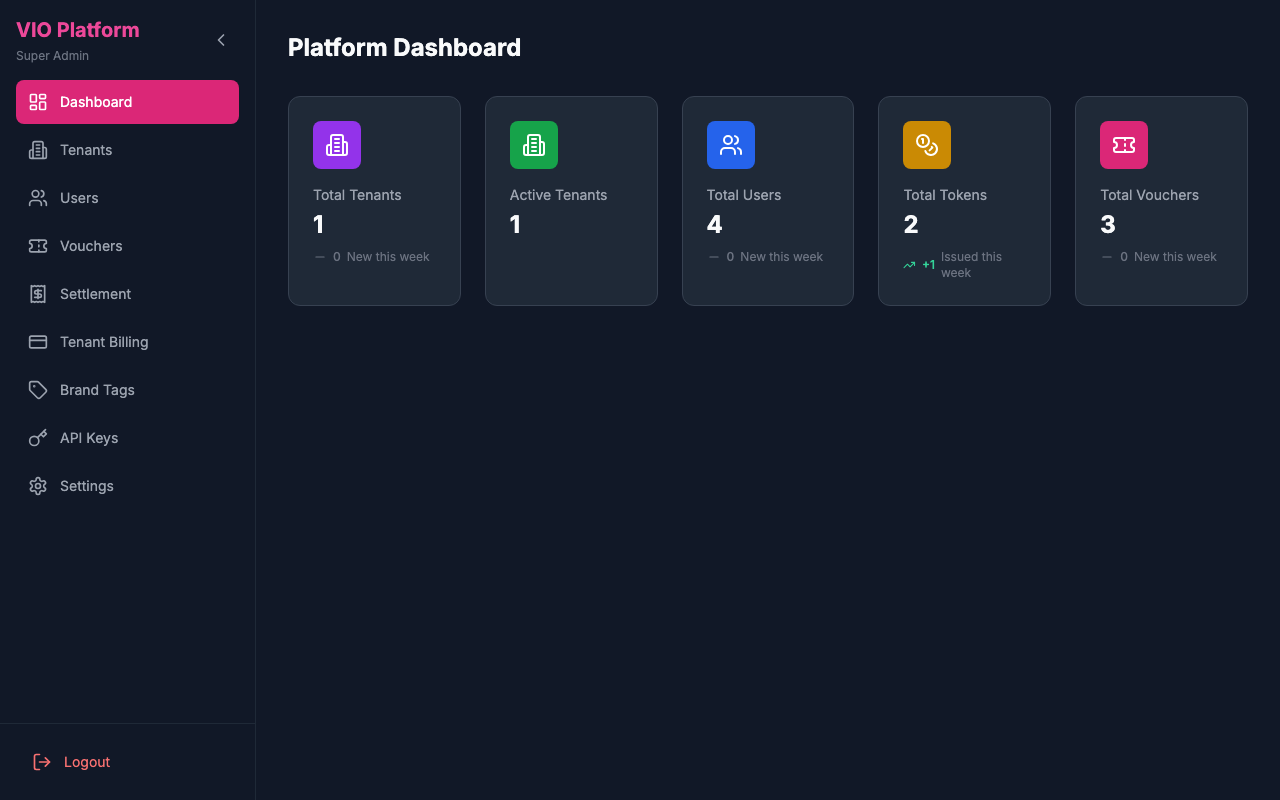
2. Dashboard
Platform-wide dashboard showing all tenants, users, and system metrics.
How to use:
- View total platform statistics
- Monitor tenant activity and health
- See platform-wide transaction volumes
- Access quick links to common admin tasks
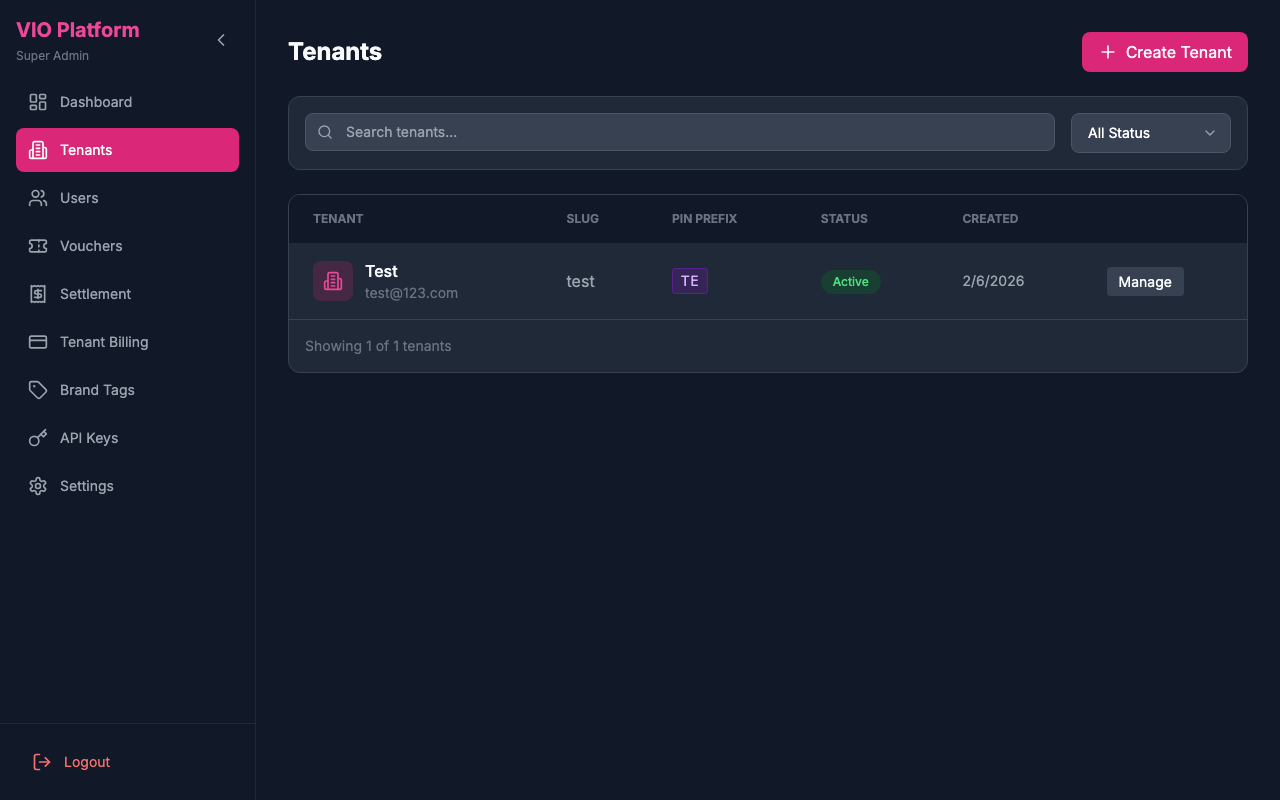
3. Tenants
Manage all tenants on the platform.
How to use:
- View the list of all tenants (including each tenant's auto-assigned PIN Prefix)
- Search and filter tenants
- Create new tenants (a unique 2-character PIN prefix is automatically generated)
- View tenant details and configuration
- Activate or deactivate tenants
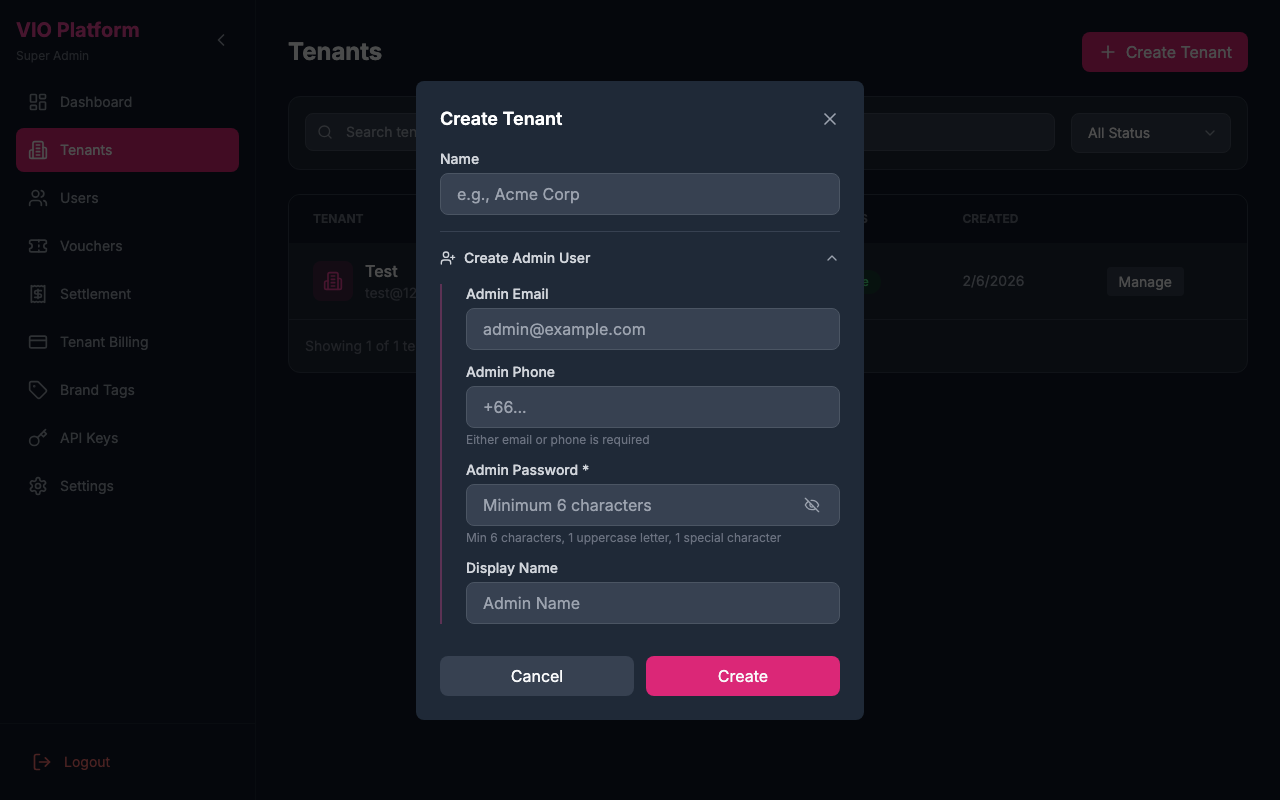
Creating a Tenant with Admin User
When creating a new tenant, you can optionally create an admin user at the same time. The admin user creation section is expanded by default for convenience.
- Click "Create Tenant"
- Fill in the tenant name
- In the "Create Admin User" section (expanded by default), fill in the admin details:
- Admin Email: The login email for the admin (required if creating admin)
- Admin Phone: Alternative login method (either email or phone is required)
- Admin Password: Must be at least 6 characters
- Display Name: Optional name for the admin user
- Click "Create" to create both the tenant and admin user
Optional Admin Creation
Creating an admin user is optional - you can collapse the section if you don't want to create one. You can always add admin users later from the Users module.
Admin Role
The admin user created with the tenant is automatically assigned the tenant_admin role and set as the tenant's owner.
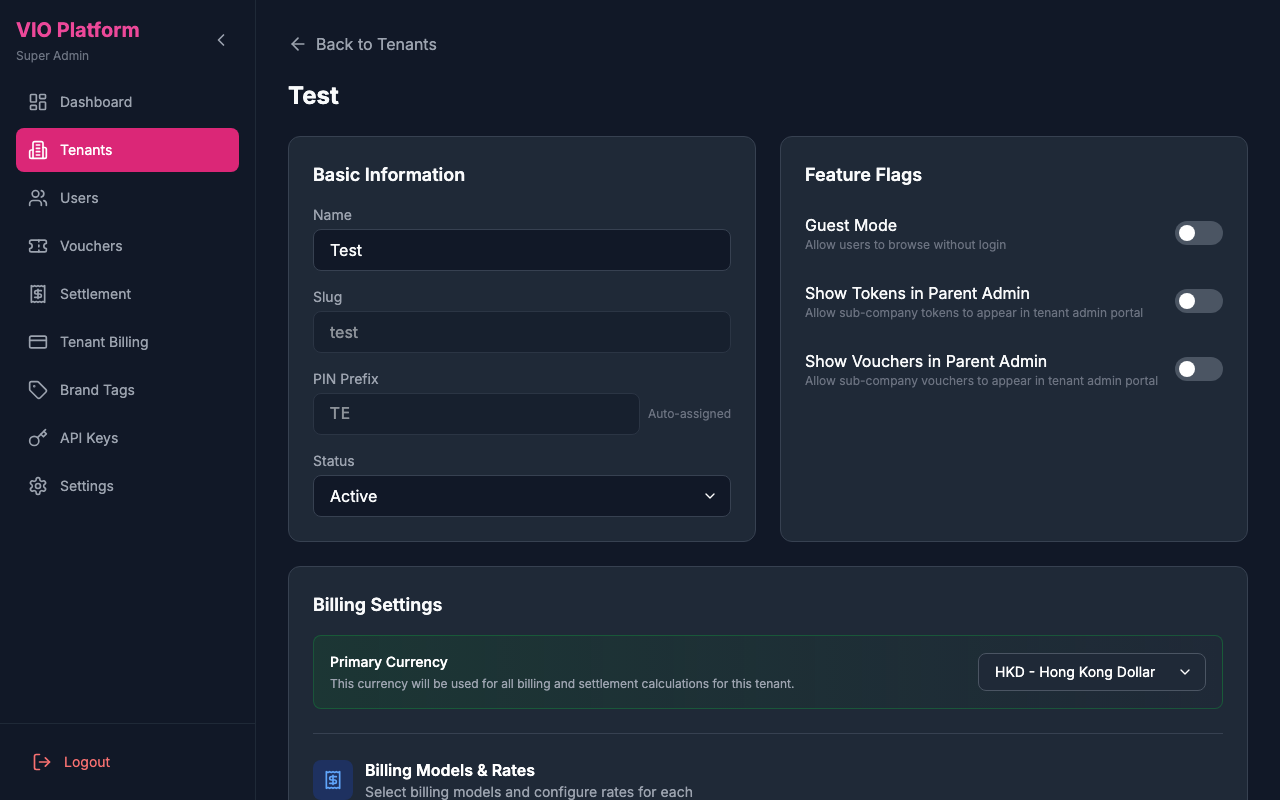
4. Tenant Detail
View and manage details of a specific tenant.
How to use:
- View tenant information and status (including the auto-assigned PIN Prefix in the Basic Information section)
- See tenant usage statistics
- Manage tenant configuration
- View tenant's tokens and users
- Access tenant-specific settings
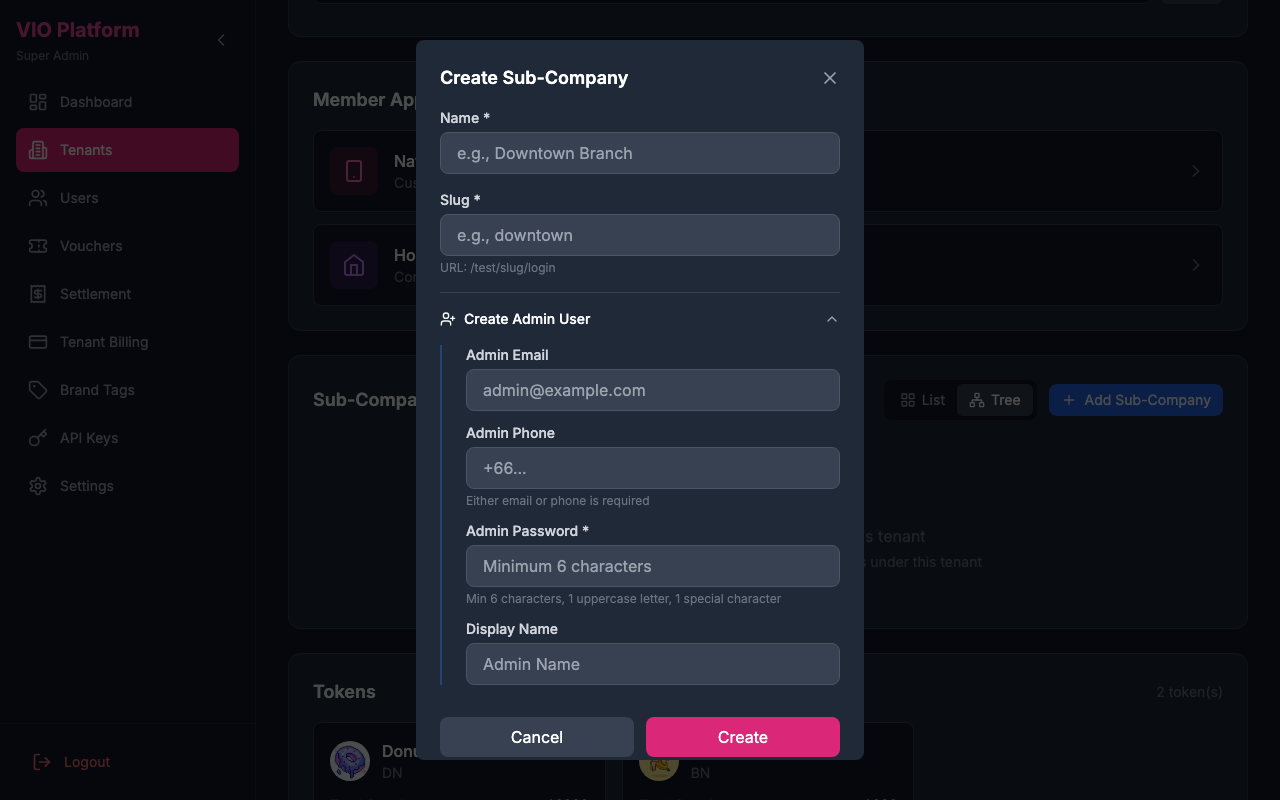
Creating Sub-Companies with Admin User
In the tenant detail page, you can create sub-companies under the tenant. Similar to tenant creation, you can optionally create an admin user for the sub-company at the same time. The admin user creation section is expanded by default for convenience.
- Click "Add Sub-Company" in the Sub-Companies section
- Fill in the sub-company information:
- Name: The sub-company name (required)
- Slug: URL-friendly identifier (auto-generated from name)
- In the "Create Admin User" section (expanded by default), fill in the admin details:
- Admin Email: The login email for the admin
- Admin Phone: Alternative login method
- Admin Password: Must be at least 6 characters
- Display Name: Optional name for the admin user
- Click "Create" to create both the sub-company and admin user
Optional Admin Creation
Creating an admin user is optional - you can collapse the section if you don't want to create one.
Admin Role
The admin user created with the sub-company is automatically assigned the sub_company_admin role and set as the sub-company's administrator.
Creating Tokens
Token creation is a Super Admin responsibility. Tenant admins can manage tokens (edit, mint, transfer, burn) in their Admin Portal, but cannot create new tokens — they must be created here.
In the Tenant Detail page, the Tokens section displays all tokens belonging to the tenant (excluding sub-company tokens and cross-tenant shared tokens). Each token card shows the name, symbol, supply, and status, with buttons to open Details, Holders, and Analytics.
How to create a token:
- In the Tokens section, click Create Token
- Fill in the token details:
| Field | Required | Description |
|---|---|---|
| Name | Yes | Display name for the token (e.g. "Loyalty Points") |
| Symbol | Yes | Short ticker symbol (e.g. "LP") |
| Description | No | Brief description of the token's purpose |
| Icon | Yes | Token icon image (max 2 MB) |
| Fiat Exchange Rate | Yes | The fiat value of one token unit (locked after creation) |
| Fiat Currency | Yes | The fiat currency the rate is pegged to (locked after creation) |
| Access | Yes | Private — only this organization; Public — visible to everyone; Shared — visible to selected peer tenants and/or sub-companies |
- When Shared is selected, use the organization picker to choose which tenants and/or sub-companies can access the token
- Click Create to deploy the token (this also deploys a smart contract on-chain)
Locked After Creation
The fiat exchange rate and fiat currency cannot be changed after the token is created. Ensure these values are correct before creating.
Sub-Company Tokens
You can also create tokens under a specific sub-company from the Sub-Company Detail page. The process is the same, but the token will be scoped to that sub-company.
Token management after creation:
| Action | Where |
|---|---|
| View Details | Super Admin Portal — token configuration, stats, visibility |
| View Holders | Super Admin Portal — holder list with search and CSV export |
| View Analytics | Super Admin Portal — charts, top holders, recent transactions |
| Edit / Mint / Send / Burn | Tenant Admin Portal — full operational management |
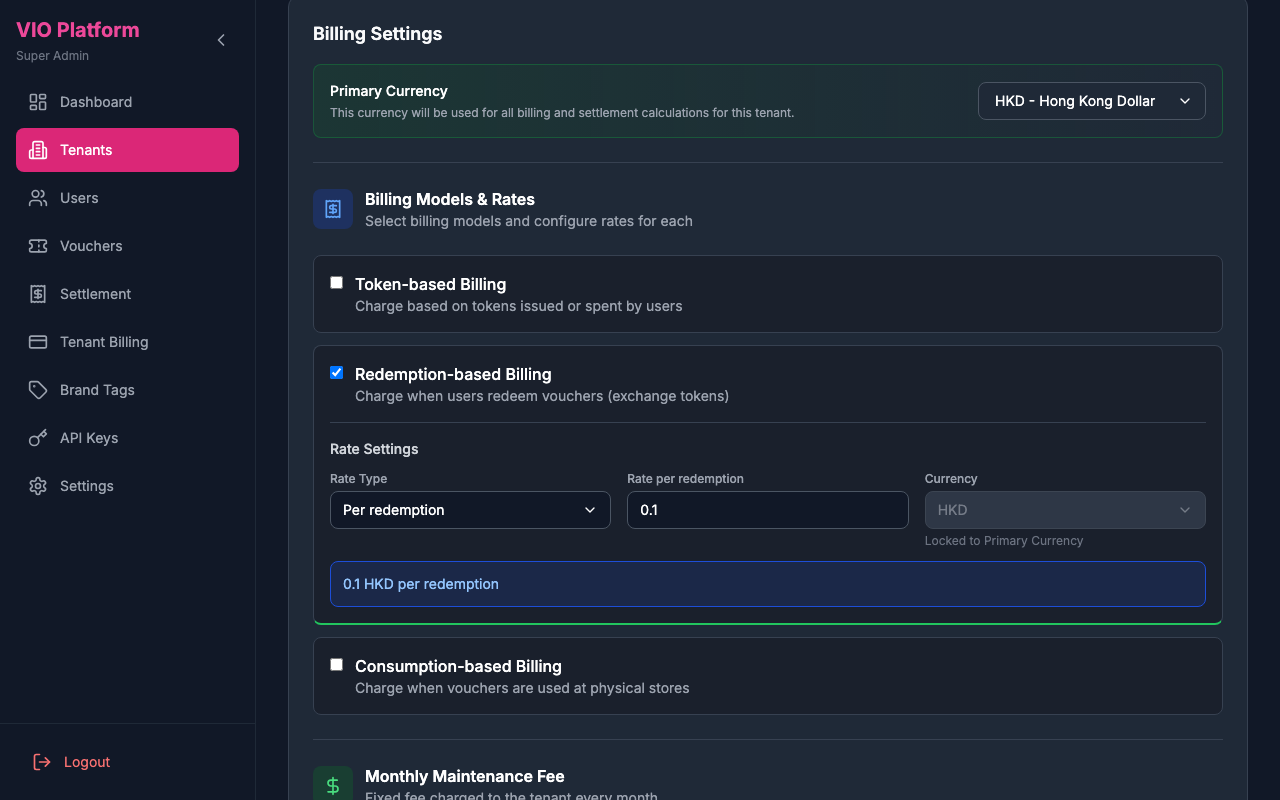
Billing Settings
In the tenant detail page, you can configure the tenant's billing settings:
Primary Currency
Set the primary currency for all billing and settlement calculations. This currency will be used consistently across:
- Maintenance fees
- Variable service fees (per billing model)
- Cross-tenant settlement calculations
- Invoice generation
- Settlement reports
Supported Currencies
The platform supports 14 currencies: HKD, THB, USD, EUR, MYR, SGD, CNY, JPY, KRW, VND, PHP, IDR, AUD, GBP.
Changing Primary Currency
When changing a tenant's primary currency, a confirmation dialog will appear to ensure you understand the implications:
- Click the currency dropdown to select a new currency
- A confirmation dialog will show what will be affected:
- All billing calculations will use the new currency
- Maintenance fees will be charged in the new currency
- Settlement reports will display amounts in the new currency
- Confirm the change to apply the new currency setting
WARNING
Changing the primary currency affects all future billing and settlements. Historical transactions retain their original currency for audit purposes. The maintenance fee currency is locked to the primary currency and cannot be changed independently.
Billing Models
Configure one or more billing models with their respective rates:
- Token-based: Charge based on tokens issued
- Redemption-based: Charge when users redeem vouchers
- Consumption-based: Charge when vouchers are used at stores
Each billing model supports three rate types:
| Rate Type | Description | Example |
|---|---|---|
| Per Unit | Fixed amount charged per transaction | 0.50 HKD per redemption |
| Percentage | Percentage of transaction settlement amount | 2.5% of voucher settlement price |
| Token Value Percentage | Percentage of (voucher token price × token fiat exchange rate), automatically converted to the tenant's billing currency | 1% of token value per redemption |
The Token Value Percentage rate type is useful when the platform fee should scale with the token's fiat equivalent. If the token's pegged fiat currency (e.g. USD) differs from the tenant's billing currency (e.g. HKD), the system automatically converts the token fiat value through HKD as an intermediary before applying the percentage rate. If a voucher has no associated token price, the system falls back to the configured minimum charge.
Each billing model rate also supports a Minimum Charge field — when the calculated fee (for percentage or token value percentage) falls below this floor, the minimum charge is used instead.
Decimal Rates Supported
All billing rate inputs support decimal values. For example, you can set a rate of 0.25 per token or 1.5% for percentage-based billing. The system accepts up to 2 decimal places for precise rate configuration.
Cross-Tenant Marketing Fee
Configure fees charged to the voucher creator tenant when another tenant's users redeem or consume their vouchers. This fee is separate from the standard variable service fees and is paid to the platform.
Marketing fees are configured independently for each event type:
| Event Type | Description |
|---|---|
| Redemption | Fee charged per cross-tenant voucher redemption |
| Consumption | Fee charged per cross-tenant voucher consumption |
Each event type supports two rate types:
| Rate Type | Description | Example |
|---|---|---|
| Fixed | Fixed amount per event | 1.00 HKD per redemption |
| Percentage | Percentage of settlement amount | 5% of settlement value |
Each event type can be independently enabled/disabled and has its own rate, currency, and minimum charge configuration.
Marketing Fee Flow
When Tenant B's user redeems a voucher created by Tenant A, the marketing fee is charged to Tenant A (the voucher creator) and appears in Tenant A's Platform Fees → Cross-Tenant Marketing Fees section in the settlement page.
Maintenance Fee
Set a fixed monthly maintenance fee with configurable billing day.
Feature Flags
The Tenant Detail page includes a Feature Flags section where you can toggle various features for the tenant. Two flags control cross-level token and voucher visibility:
| Flag | Description |
|---|---|
| Show Tokens in Parent Admin | When enabled on an organization (tenant or sub-company) at level A, all SHARED tokens created by any company below level A in its branch will be visible in level A's admin portal. |
| Show Vouchers in Parent Admin | Same behavior as above, but for SHARED vouchers. |
How it works:
- The flag is set on the viewer (the organization that wants to see lower-level items), not on the item creator.
- When a sub-company creates a SHARED token or voucher, the system walks up the organization hierarchy and automatically shares the item with every ancestor that has the corresponding flag enabled.
- Example: In a hierarchy
Tenant → A → B → C, if both Tenant and A haveShow Tokens in Parent Adminenabled, then a SHARED token created by C will be visible to both A and Tenant. If A does not have the flag enabled, C's tokens will only be visible to Tenant.
TIP
These flags only affect items with SHARED visibility. PRIVATE items remain private to their creating organization, and PUBLIC items are always visible to everyone.
The same feature flags are also available on individual sub-companies in the Sub-Company Detail page, where they control visibility for that sub-company's descendants.
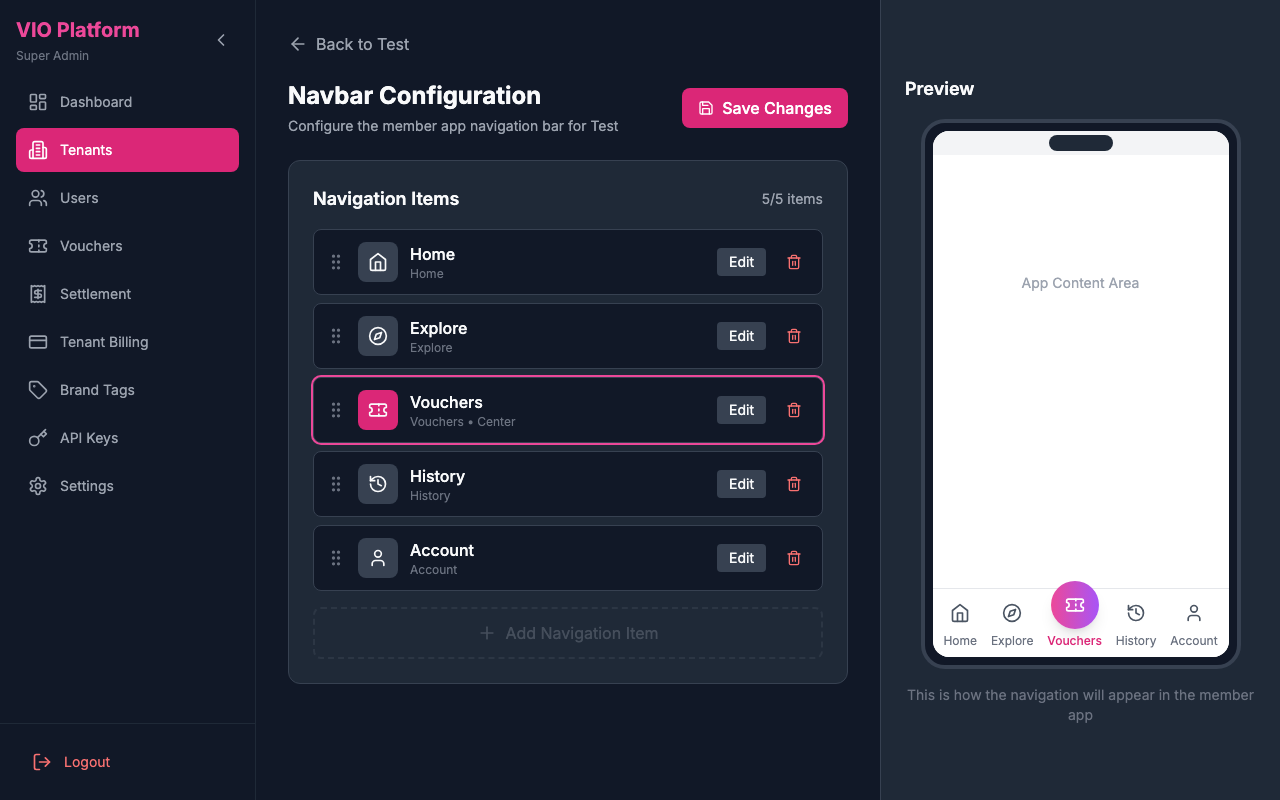
5. Member App Configuration
Configure the member app experience for a tenant, including navigation bar layout and home page content.
How to access:
Navigate to Tenants → click on a tenant → select "Navbar Configuration" or "Home Page Configuration" in the Member App Configuration section of the Tenant Detail page.
Navbar Configuration
- View current navbar configuration with a live preview of the member app navigation
- Add or remove navigation items by clicking "+ Add Navigation Item"
- Drag and reorder navigation items
- Click "Edit" on any item to configure its label, icon, and visibility
- Click "Save Changes" to publish the updated navbar
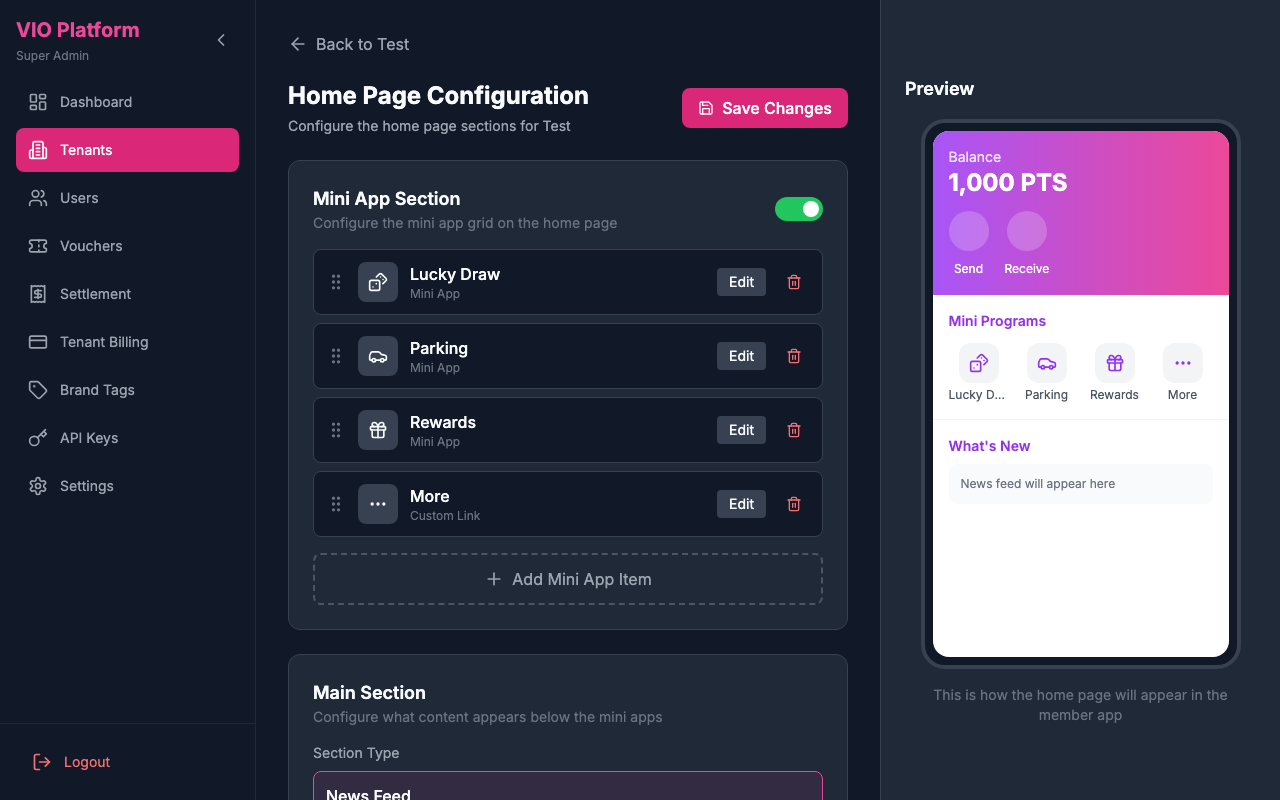
Home Page Configuration
- View current home page sections
- Add or remove content blocks
- Configure featured items and banners
- Set display order and visibility
- Preview and publish changes
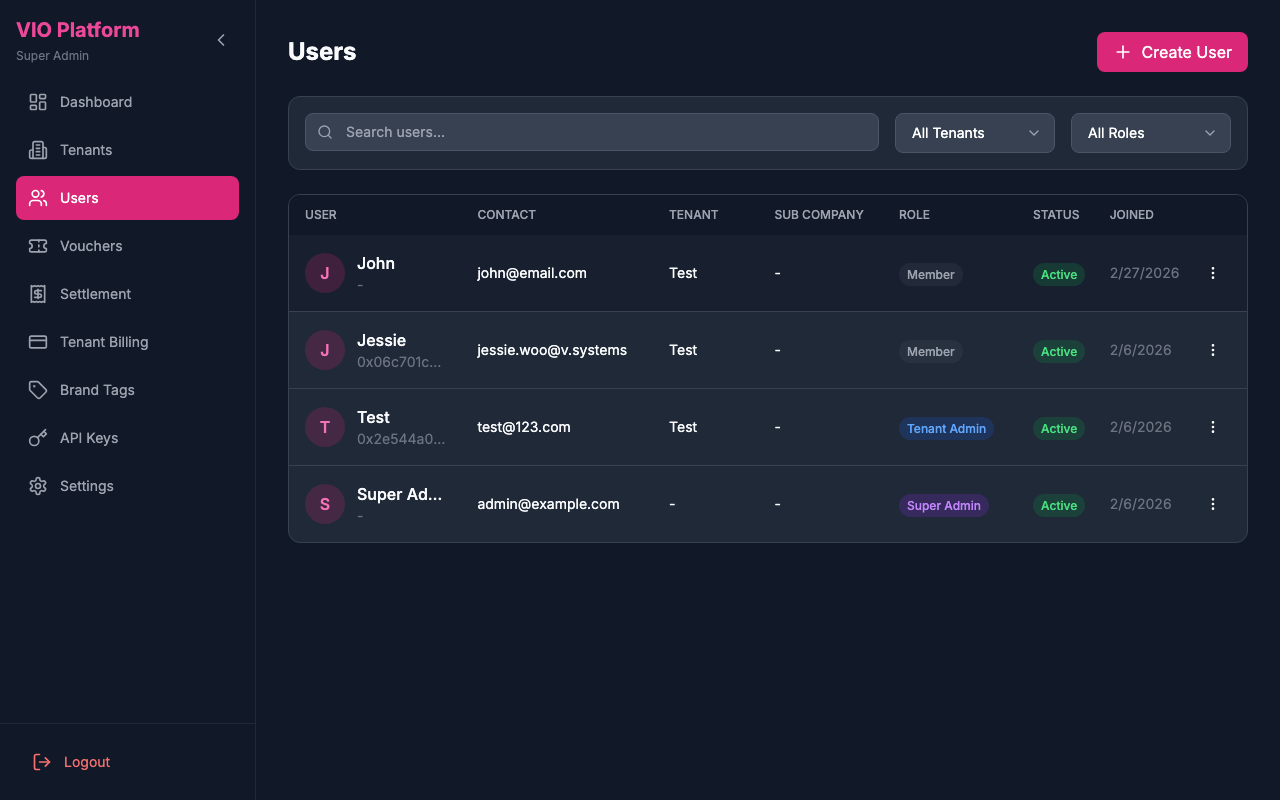
6. Users
View and manage all users across the entire platform.
How to use:
- View all platform users
- Search users by name, email, or tenant
- Filter users by role or status
- View user details and activity
- Manage user accounts
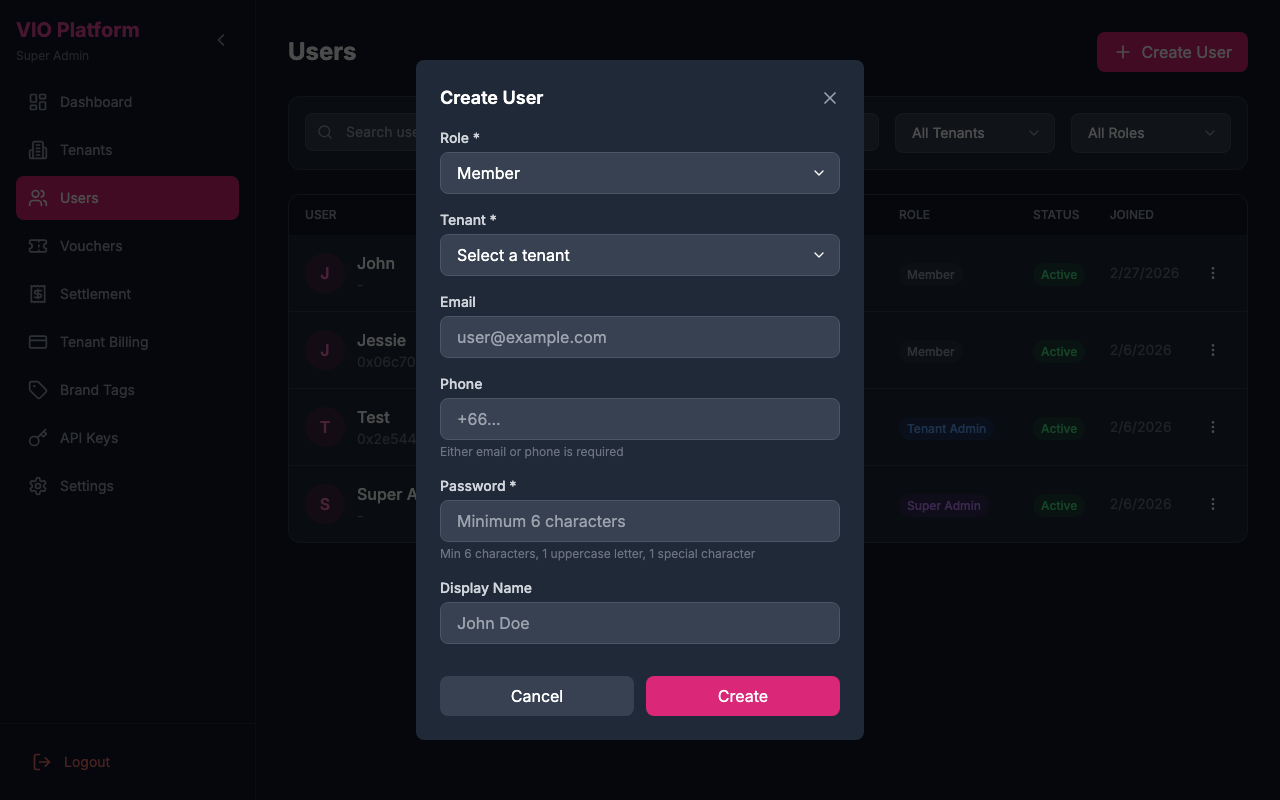
Creating a User
- Click "+ Create User" at the top right
- Fill in the user details:
| Field | Required | Description |
|---|---|---|
| Role | Yes | Select the user's role: Member, Tenant Admin, or Super Admin |
| Tenant | Yes | Select which tenant the user belongs to |
| Either email or phone | The user's email address | |
| Phone | Either email or phone | The user's phone number (with country code) |
| Password | Yes | Account password (min 6 characters, 1 uppercase letter, 1 special character) |
| Display Name | No | The user's display name |
- Click "Create" to finalize
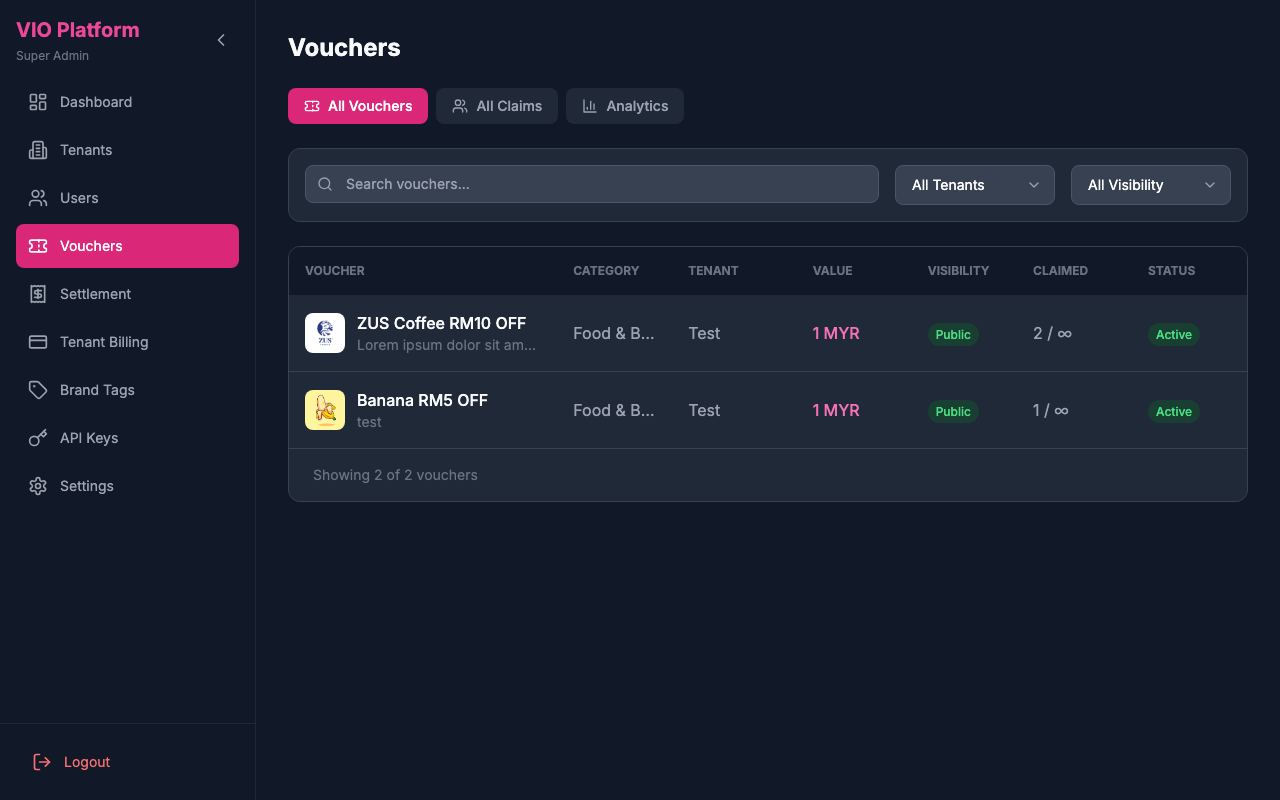
7. Vouchers
View all vouchers across all tenants on the platform. The Vouchers module includes three tabs:
| Tab | Description |
|---|---|
| All Vouchers | View and search all vouchers across tenants, with filters by tenant and visibility (Private, Shared, Public) |
| All Claims | Track all voucher claims and redemptions across the platform |
| Analytics | View platform-wide voucher performance metrics and statistics |
How to use:
- View platform-wide voucher list
- Search vouchers by name
- Filter vouchers by tenant or visibility
- View voucher details including category, value, claimed count, and status
- Switch between tabs to view claims and analytics
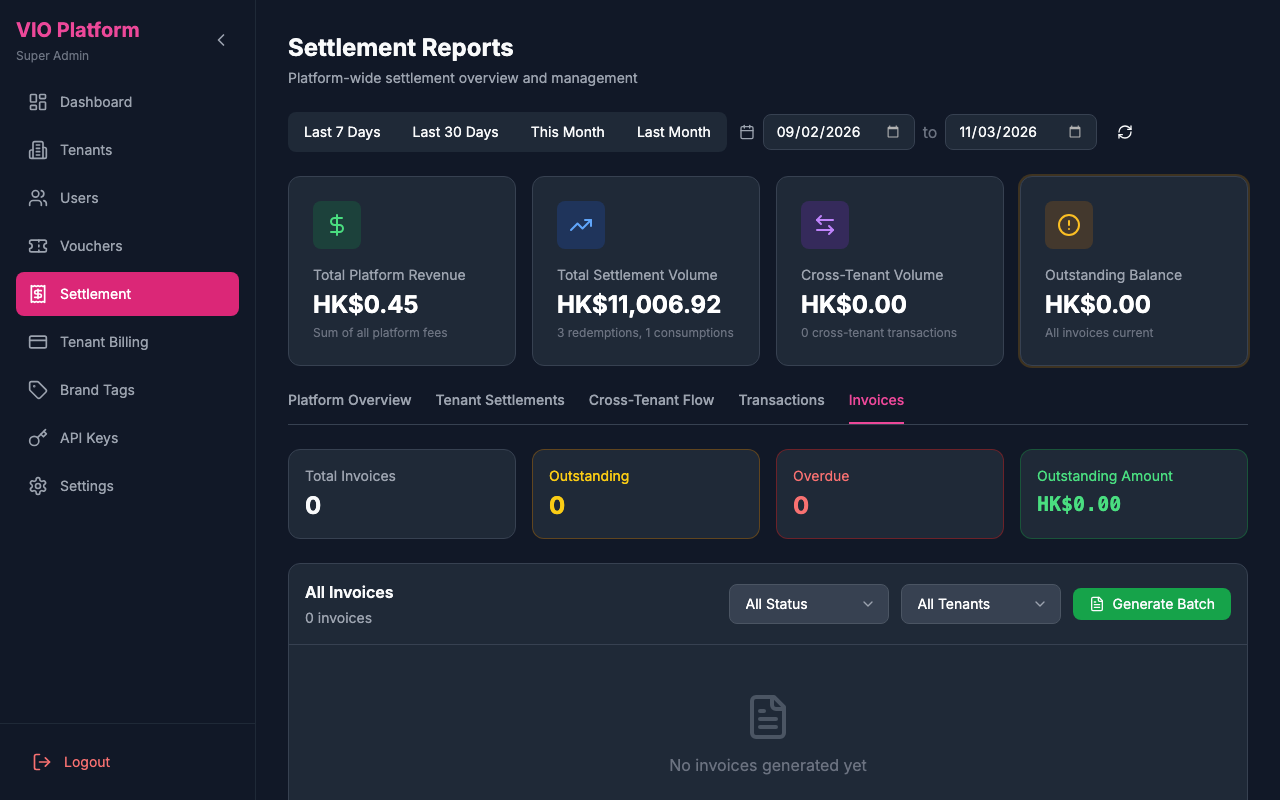
8. Settlement Reports
View and manage settlement reports across all tenants.
How to use:
- View platform-wide settlement summaries
- Filter settlements by tenant or period
- Generate consolidated reports
- Process pending settlements
- Export financial data
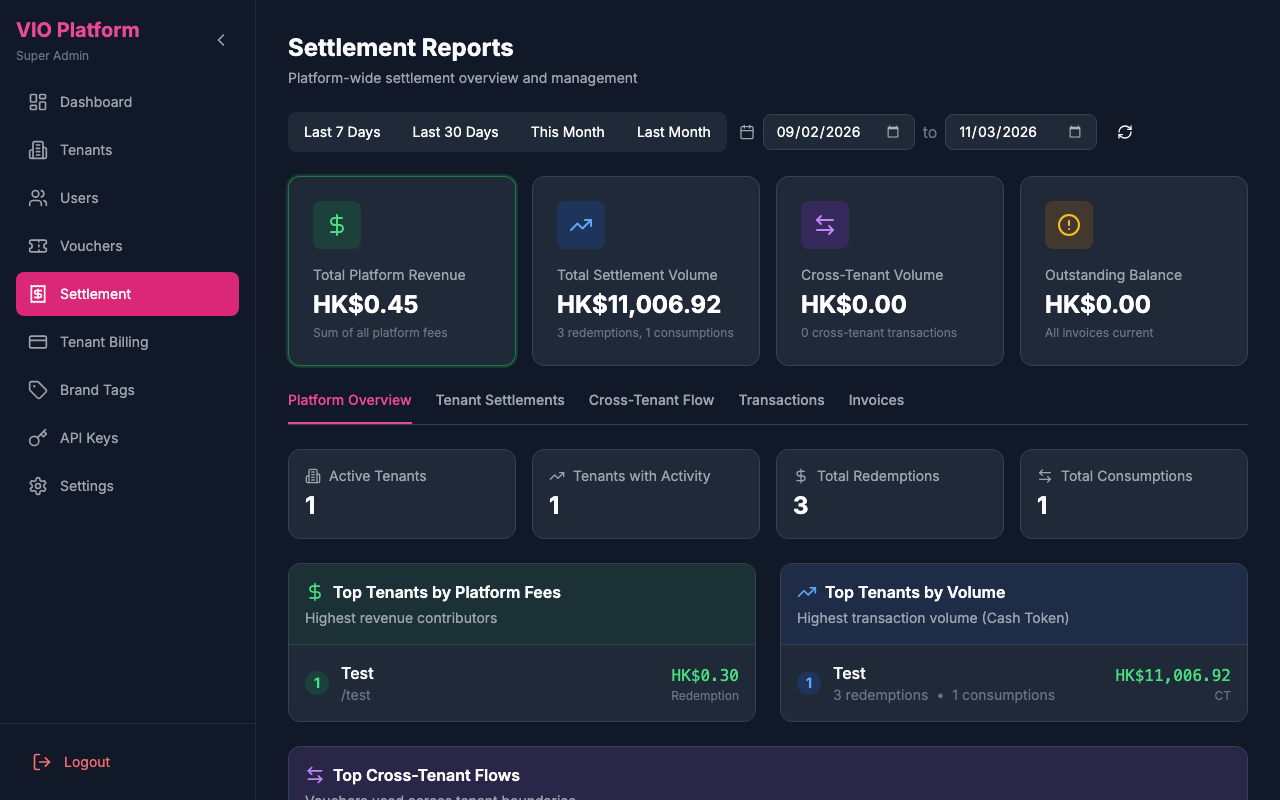
Report Tabs
The settlement reports page includes multiple tabs for comprehensive financial analysis:
| Tab | Description |
|---|---|
| Platform Overview | High-level metrics including total platform revenue, settlement volume, and key performance indicators |
| Tenant Settlements | Detailed breakdown of settlements for each tenant |
| Cross-Tenant Flow | Visualization and details of cross-tenant voucher usage and settlements |
| Transactions | Detailed transaction list with pagination and filtering |
| Invoices | Generated invoices for tenant billing |
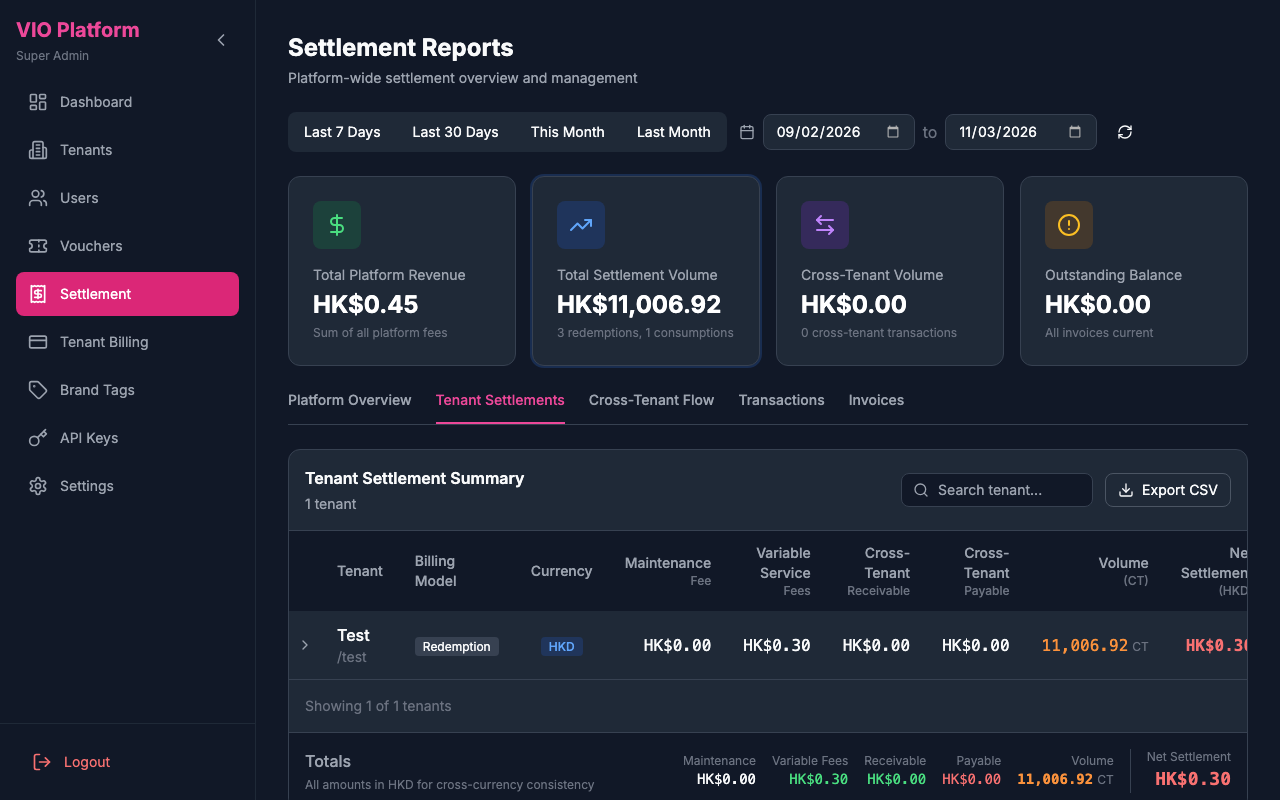
Tenant Settlements Tab
The tenant settlements tab shows a comprehensive breakdown for each tenant and their sub-companies:
| Column | Description |
|---|---|
| Tenant | Tenant name and slug (or sub-company name when expanded) |
| Billing Model | Active billing model(s) |
| Currency | Tenant's primary currency |
| Maintenance Fee | Fixed monthly platform fee |
| Variable Service Fees | Transaction-based fees (sum of all billing model fees) |
| Marketing Fees | Cross-tenant marketing fees (charged to voucher creator when other tenants' users use their vouchers) |
| Cross-Tenant Receivable | Amount owed by other tenants |
| Cross-Tenant Payable | Amount owed to other tenants |
| Volume (CT) | Cash Token volume (1 CT = 1 HKD) |
| Net Settlement | Final settlement amount |
| Actions | Generate Invoice button for the tenant or sub-company |
Sub-Company Settlements: When you expand a tenant row, sub-companies with settlement activity are shown as nested rows under the tenant. Each sub-company displays its own settlement metrics (maintenance fee, variable service fees, cross-tenant receivable/payable, volume, net settlement) and has its own Generate Invoice button. Sub-companies without settlement data in the selected period do not appear.
Data Consistency
The settlement numbers shown here match exactly what each tenant sees in their own Admin Portal Settlement page. The system uses the same calculation methodology:
- Maintenance Fee: From tenant's billing settings, converted to HKD for platform aggregation
- Variable Service Fees: Sum of all platform fees from transactions, using tenant's billing currency
- Cross-Tenant Receivable: All receivable amounts (vouchers used by other tenants)
- Cross-Tenant Payable: Amounts owed to voucher owners
Currency Display
All monetary amounts are displayed in each tenant's configured primary currency. The Currency column shows which currency is being used for that tenant.
Cross-Tenant Settlement Details
When viewing settlement details for a tenant with cross-tenant activity, additional contextual information is displayed:
- Cross-Tenant Context: Shows when a settlement involves vouchers used across different tenants
- HKD Equivalents: For accurate aggregation across different currencies, amounts are also shown in HKD (Cash Token) equivalent
- Exchange Rate Info: The exchange rate used at transaction time is displayed for transparency
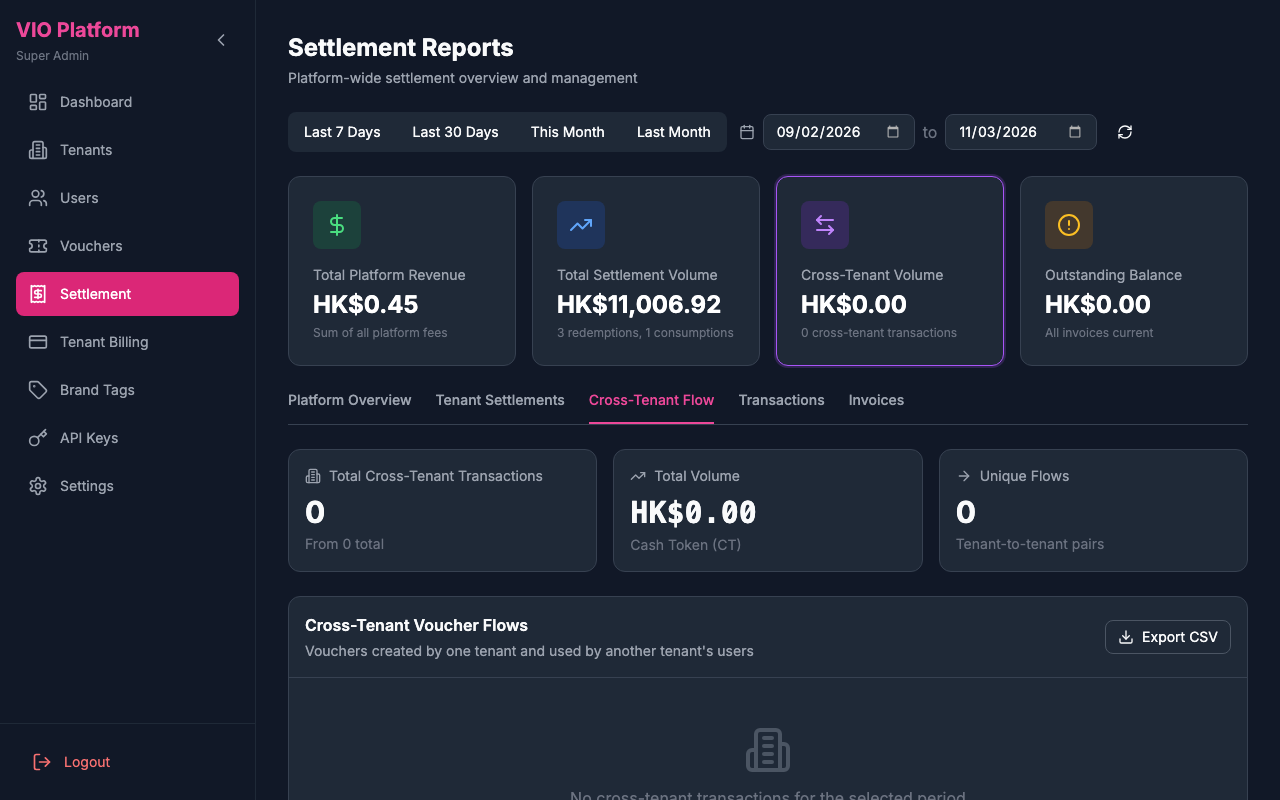
Cross-Tenant Flow Tab
The cross-tenant flow tab visualizes voucher usage and settlement flows between different tenants on the platform.
Settlement Calculation Methodology
The Super Admin portal uses a consistent calculation methodology to ensure settlement numbers match what tenants see in their Admin Portal:
Platform Fee Calculation
Maintenance Fee: Extracted from tenant's billing settings in their configured billing currency, then converted to HKD for platform-wide aggregation.
Variable Service Fees: Sum of all
platformFeevalues from transactions. These fees are calculated based on the tenant's billing model rates (per unit, percentage, or token value percentage) and stored in the tenant's billing currency. For percentage and token value percentage rate types, if the token's fiat peg currency differs from the tenant's billing currency, the system converts the token fiat value through HKD before applying the rate. When a minimum charge is configured, the system uses the higher of the calculated fee or the minimum charge.Cross-Tenant Marketing Fees: Sum of all
marketingFeevalues from cross-tenant RECEIVABLE transactions (where the tenant is the voucher owner). These are charged separately from variable service fees and grouped by redemption/consumption event type.Net Settlement Formula:
Net Settlement = Platform Fees + Cross-Tenant Payable - Cross-Tenant Receivable

Where:
- Platform Fees = Maintenance Fee + Variable Service Fees + Cross-Tenant Marketing Fees
Currency Conversion Flow
Settlement amounts are automatically converted to each tenant's primary currency. HKD (Cash Token) is used as the intermediary for cross-currency conversion:
Original Currency → HKD (Cash Token intermediary) → Tenant's Primary CurrencyWhen a voucher's settlement currency differs from the tenant's primary currency, the system converts the amount at transaction time and stores the result in the primary currency.
For token value-based fee calculations (percentage and token_value_percentage rate types), if the token is pegged to a currency different from the tenant's billing currency (e.g. token pegged to USD, billing in HKD), the token fiat value is also converted through HKD before applying the fee rate:
Token Fiat Value (e.g. USD) → HKD → Billing Currency (e.g. HKD)
Fee = Converted Value × Rate / 100
Cross-Tenant Settlement & Exchange Rates
When vouchers are used across tenants with different currencies, the system ensures accurate settlement through automatic exchange rate conversion:
How It Works
Transaction Recording: When a transaction occurs, the settlement amount is automatically converted to the tenant's primary currency (configured in Billing Settings). The HKD equivalent (Cash Token amount) is also calculated for cross-currency aggregation. If the voucher or token was created in a different currency, the system converts the amount through HKD as an intermediary.
Primary Currency Enforcement: All settlement records for a tenant are stored in that tenant's primary currency. For cross-tenant transactions, the using tenant's record uses the using tenant's primary currency, while the voucher owner's receivable record uses the owner's primary currency.
HKD as Aggregation Currency: All cross-tenant amounts are also stored as HKD (Cash Token) equivalents for accurate aggregation across different currencies.
Display Conversion: When viewing settlement reports, amounts are displayed in each tenant's configured primary currency.
Cross-Tenant Example
- Tenant A (THB) creates a voucher worth 1,000 THB
- Tenant B's (HKD) user redeems the voucher
- System converts: 1,000 THB → 220 HKD (Cash Token) using current rate
- Tenant B's transaction record: stored as 220 HKD (their primary currency)
- Tenant A's receivable record: stored as 1,000 THB (their primary currency)
- Both records also store the Cash Token (HKD) equivalent for accurate cross-tenant aggregation
Summary Totals
The footer totals in the settlement report are always displayed in HKD to ensure cross-currency consistency. This allows accurate platform-wide aggregation regardless of individual tenant currencies.
Consistent Aggregation
When calculating totals for cross-tenant receivables and payables, the system uses cashTokenAmount (HKD equivalent) to ensure accurate summation across different currencies. This prevents calculation errors that would occur when summing amounts in different currencies directly.
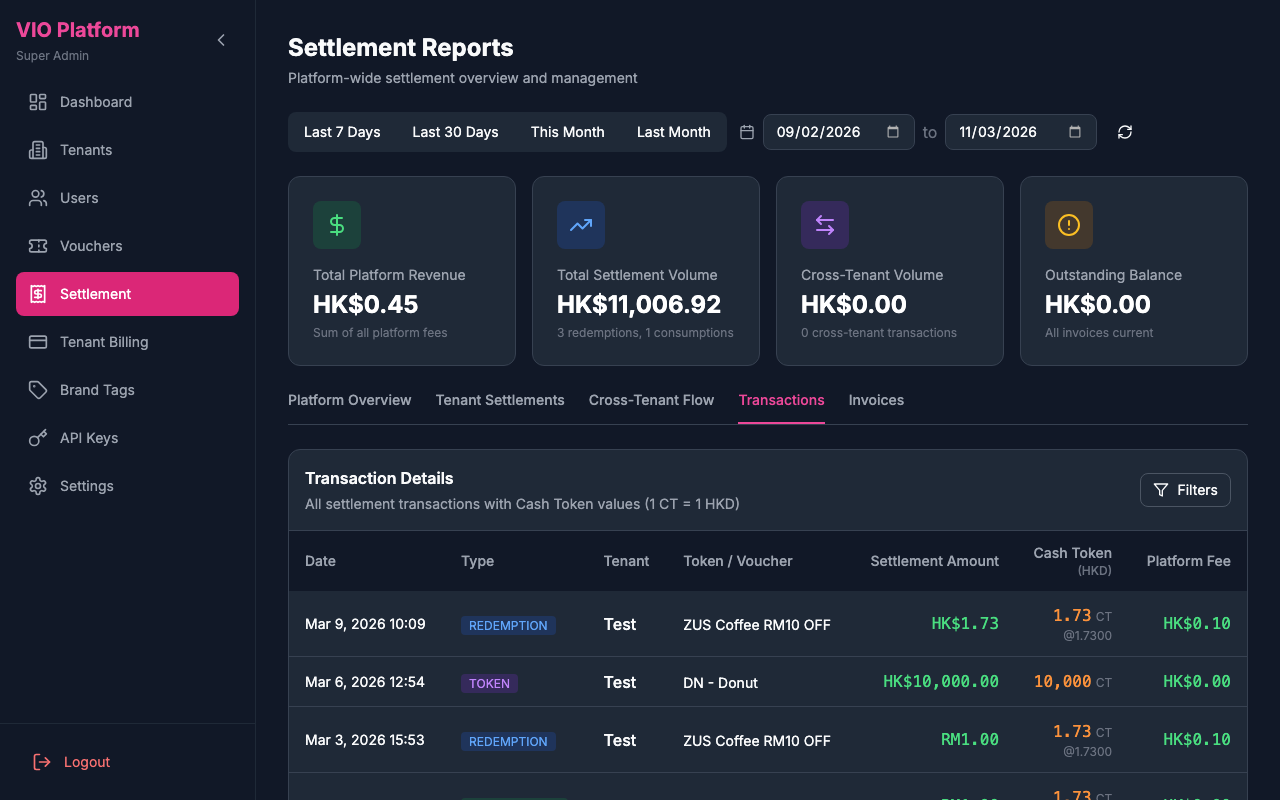
Transactions Tab
The transactions tab provides a detailed list of all settlement-related transactions across the platform, with search, filtering, and pagination.
Expanded Row Details
Click on any tenant row to expand and see:
- Sub-Company Breakdown (if applicable): A table showing settlement metrics for each sub-company under the tenant
- Platform fees breakdown (maintenance + variable)
- Cross-tenant settlement details with HKD equivalents
- Billing activity (transactions count)
- Net settlement formula
- View Invoices button to quickly navigate to the Invoices tab
Generating Invoices
You can generate invoices for individual tenants or sub-companies from the Tenant Settlements tab:
- For a tenant: Click Generate Invoice in the Actions column for that tenant row
- For a sub-company: Expand the tenant row, then click Generate Invoice in the Actions column for the sub-company row
A modal will appear prompting you to select the billing period (Start and End dates). The invoice will be generated only for the selected tenant or sub-company. To generate invoices for all tenants at once, use the Generate Batch button in the Invoices tab.
Invoice Numbering
Invoices are assigned globally unique numbers in the format INV-YYYYMM-XXXX:
YYYY- Four-digit yearMM- Two-digit monthXXXX- Sequential number (platform-wide, resets each month)
Example: INV-202603-0001, INV-202603-0002, etc.
Invoice PDF
Generated invoice PDFs include:
- Header: Invoice number, date, due date, status
- Bill To: Tenant name, email, address
- Billing Period: Start and end dates, billing model(s)
- Usage Summary: Total redemptions, consumptions, cross-tenant transactions
- Line Items: Detailed breakdown of all charges
- Summary: Platform fees, cross-tenant payable/receivable, total amount due
Currency Display
Invoice PDFs display all monetary amounts in the tenant's configured primary currency. The system uses standard currency symbols (e.g., HK$ for HKD, $ for USD) for clear readability.
Invoices Tab
The invoices tab displays all generated invoices across the platform, with options to view, download, and manage invoice records.
9. Tenant Billing
Manage billing for all tenants on the platform.
How to use:
- View billing status for all tenants
- Generate tenant invoices
- Configure billing plans and pricing
- Track payment status
- Handle billing disputes
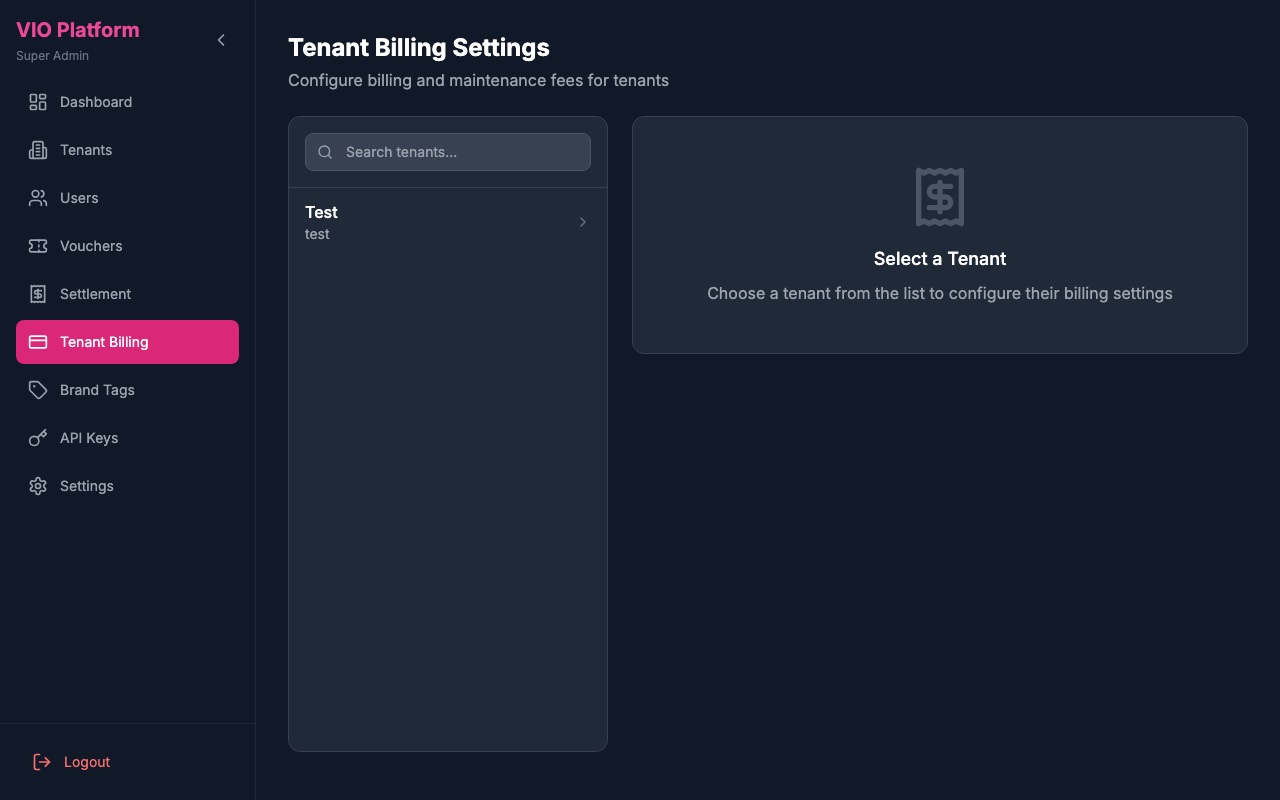
Configuring Tenant Billing
Each tenant's billing is configured in their Tenant Detail page with:
- Primary Currency - The unified currency for all billing items
- Billing Models - Select which transaction types generate fees
- Rate Configuration - Set per-unit, percentage, or token-value-percentage rates (decimal values supported, e.g., 0.25 or 1.5%). Each rate supports a minimum charge floor.
- Cross-Tenant Marketing Fee - Configure fees charged to the voucher creator when other tenants' users redeem/consume their vouchers (per-event fixed or percentage of settlement amount)
- Maintenance Fee - Fixed monthly platform fee (decimal values supported)
Currency Consistency
When you set a tenant's primary currency:
- All settlement records are stored in this currency (amounts are automatically converted at transaction time)
- New vouchers default their settlement currency to this currency when created
- Platform fees are calculated using amounts in this currency
- Settlement reports display amounts in this currency
- Invoices are generated in this currency
- Cross-tenant settlements are converted appropriately (each tenant's records use their own primary currency)
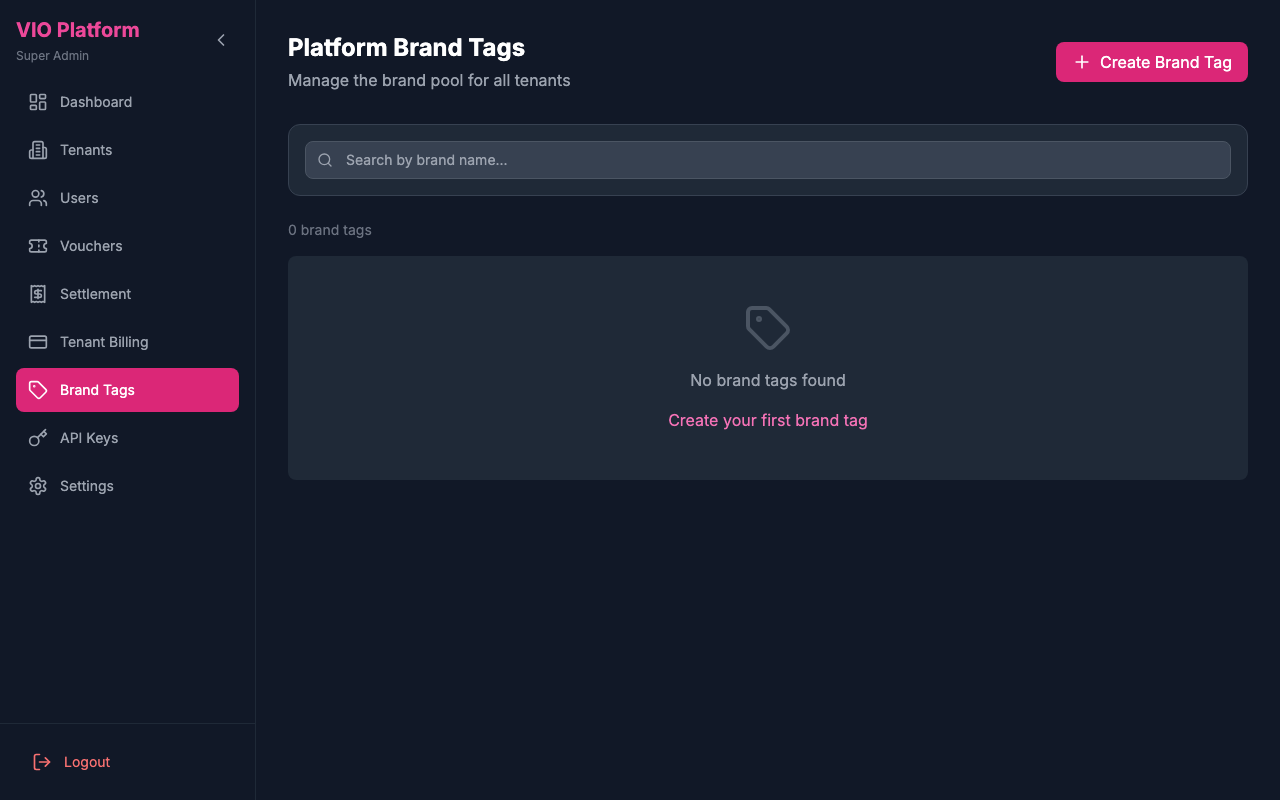
10. Brand Tags
Manage the centralized brand pool that tenants can select from for their vouchers. All brand tags are platform-level resources - tenants cannot create their own brands but can select from this pool.
How to use:
- View all platform brand tags in the brand pool
- Create new brand tags with name, description, and logo image
- Edit existing brand tags (name, description, logo, active status)
- Delete brand tags (will also remove from all tenant selections)
- View which tenants are using each brand tag
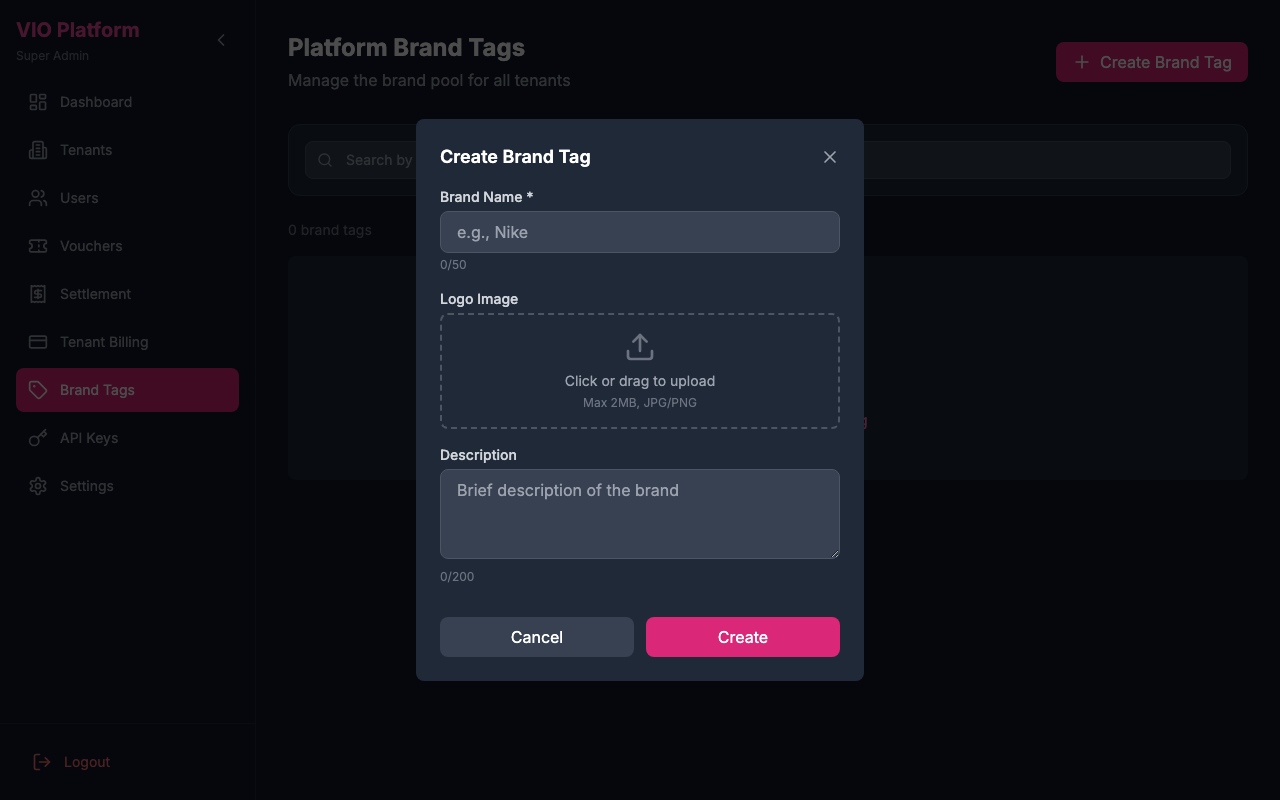
Creating Brand Tags
When creating a new brand tag:
- Click "Create Brand Tag"
- Enter the brand name (required, max 50 characters)
- Upload a brand logo image (optional, max 2MB, JPG/PNG)
- Add a description (optional)
- Click "Create" to add to the platform pool
Image Upload Only
Brand logos must be uploaded as image files. URL-based logos are not supported for better security and consistency.
Viewing Tenant Usage
To see which tenants are using a specific brand:
- Click the "View Tenants" button on any brand card
- A modal will display:
- List of tenants that have added this brand to their selection
- Date when each tenant added the brand
- Status (Active/Inactive)
- Total count of tenants using this brand
Brand Tag Lifecycle
| Action | Result |
|---|---|
| Create | Brand becomes available in the platform pool for all tenants |
| Edit | Changes apply immediately across all tenants using the brand |
| Deactivate | Brand remains in tenant selections but won't appear in platform pool for new selections |
| Delete | Brand is removed from all tenant selections and the platform pool |
Deleting Brands
When you delete a brand tag, it will be automatically removed from all tenants who have selected it. This action cannot be undone. Consider deactivating instead if you want to preserve existing tenant associations.
Tenant Workflow
- Super Admin creates brands in this Brand Tags page
- Tenant admins browse the "Platform Brand Tag" tab in their Admin Portal
- Tenant admins add desired brands to "My Brand Tag" (their selection)
- When creating vouchers, tenants can only select brands from their "My Brand Tag" list
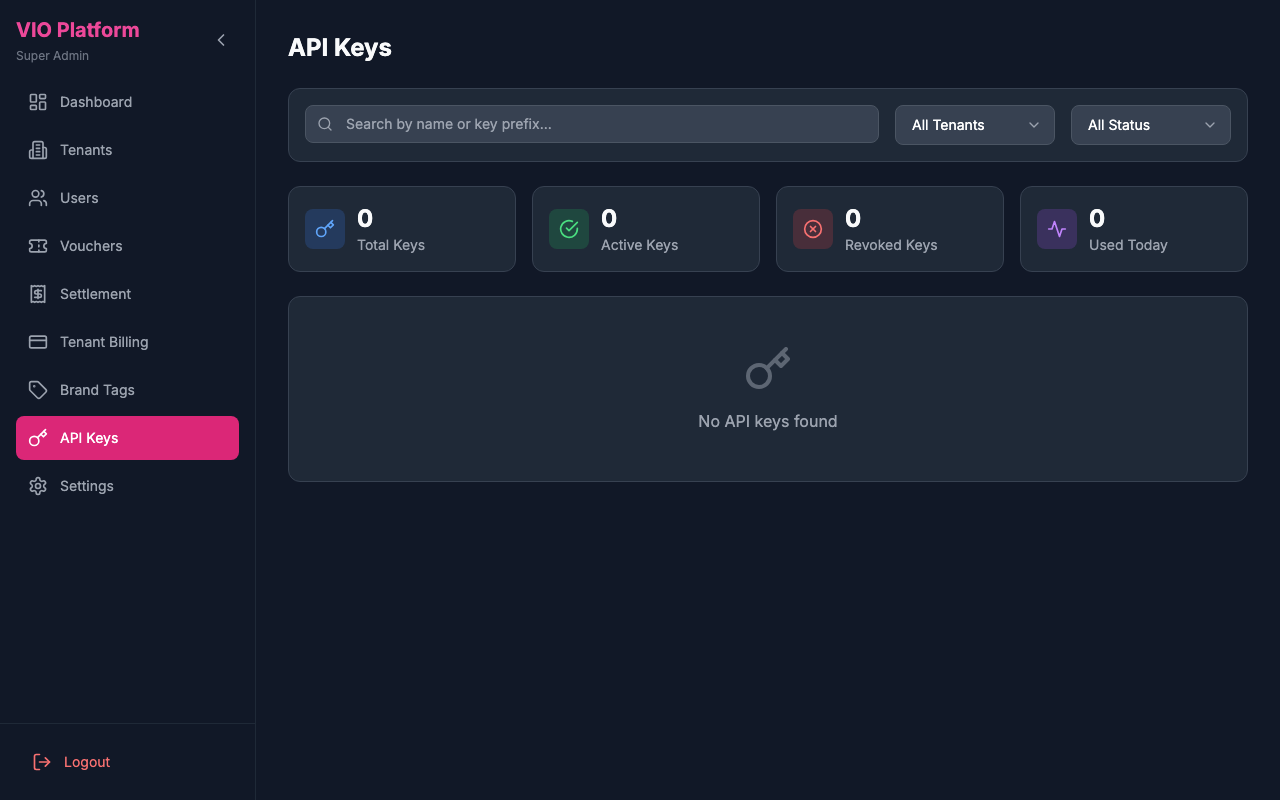
11. API Keys
Manage platform-level API keys and access.
How to use:
- View all platform API keys
- Generate new API keys
- Set key permissions and scopes
- Revoke compromised keys
- Monitor API key usage
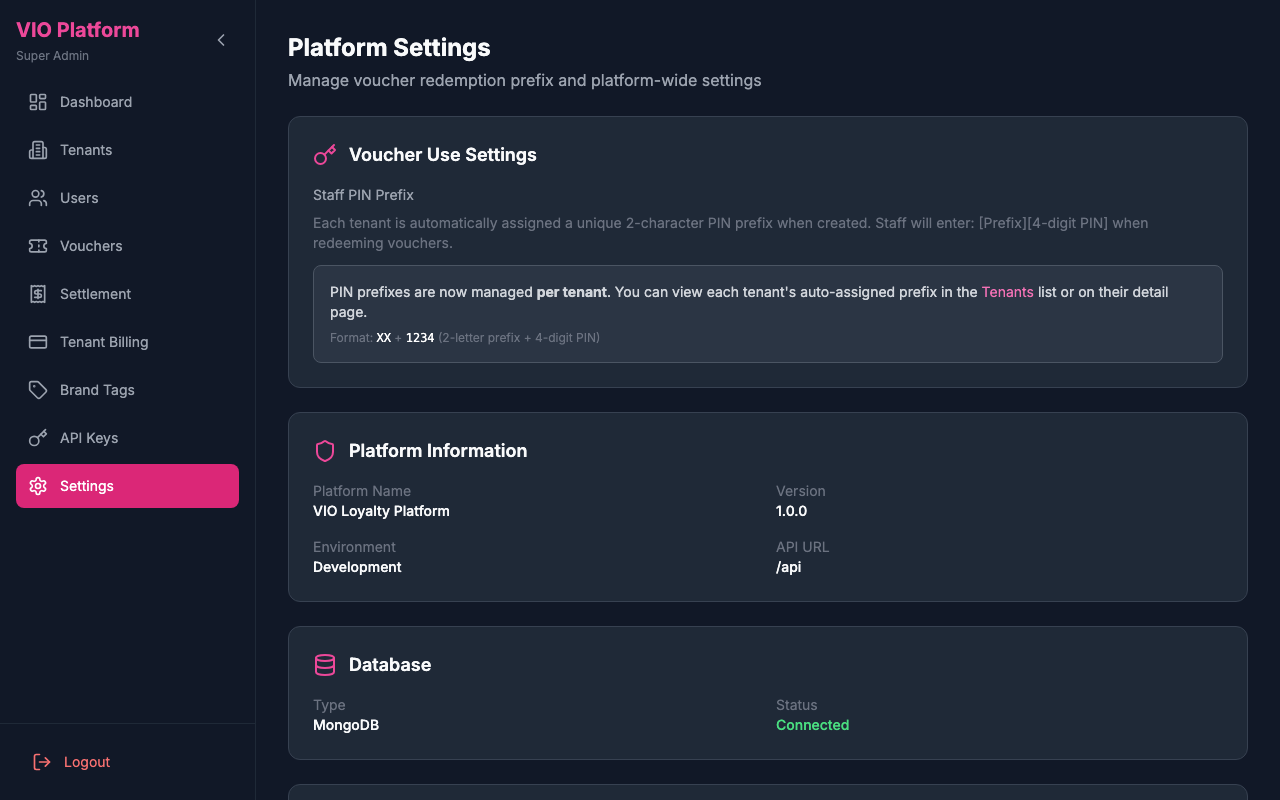
12. Settings
Configure platform-wide settings and defaults.
How to use:
- View voucher use settings — PIN prefixes are now managed per tenant (auto-assigned at creation). Each tenant's unique 2-character prefix is visible in the Tenants list and Tenant Detail page.
- View platform information (name, version, environment)
- View database connection status
- Configure Web3 Asset Service settings (Token, NFT, and Wallet management)
Need Help?
For platform-level support, please contact the VIO technical support team.