VIO v4 Admin Portal - User Guide
Welcome to the VIO v4 Admin Portal! This comprehensive guide covers all administrative features for managing your tenant, users, tokens, vouchers, and more.
Table of Contents
- Login
- Forgot Password
- Dashboard
- Users
- Tokens
- Token Holders
- Token Analytics
- Vouchers
- Campaigns
- Airdrop
- Transactions
- Settlement
- Sub-Companies
- Branding
- Roles
- Staff
- Store Management
- Notifications
- News
- PIN Access
- API Docs
- Settings
- Membership Tiers
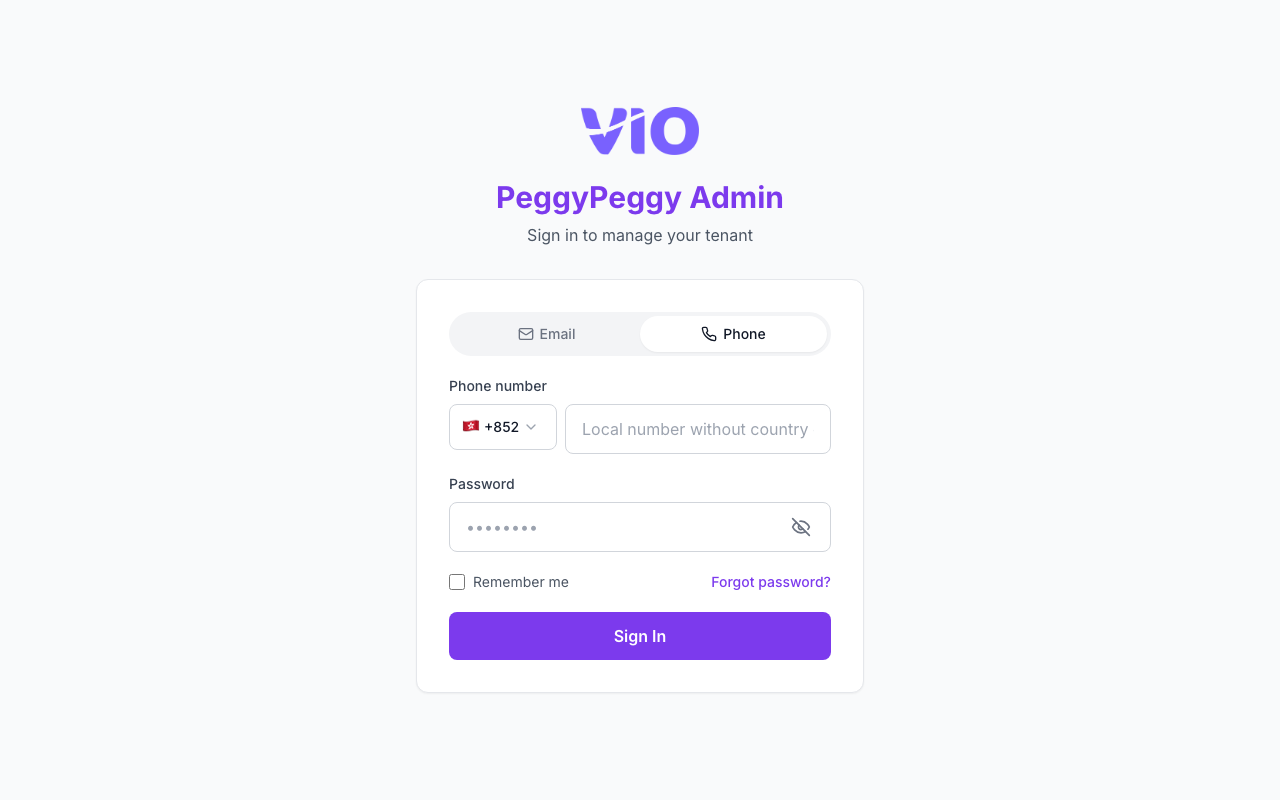
1. Login
The admin login page for tenant administrators and sub-company admins. You can sign in with a registered email address or phone number, plus your password.
How to use:
- Navigate to the admin portal URL with your tenant slug
- Choose Email or Phone using the tab selector at the top of the form
- For email: enter your admin email. For phone: select the country code, then enter your mobile number (digits only)
- Enter your password
- Optional: enable "Remember me" to stay signed in, or use "Forgot password?" if you need to reset
- Click "Sign In" to access the dashboard
Email tab

Phone tab (country / region code selector, then mobile number)
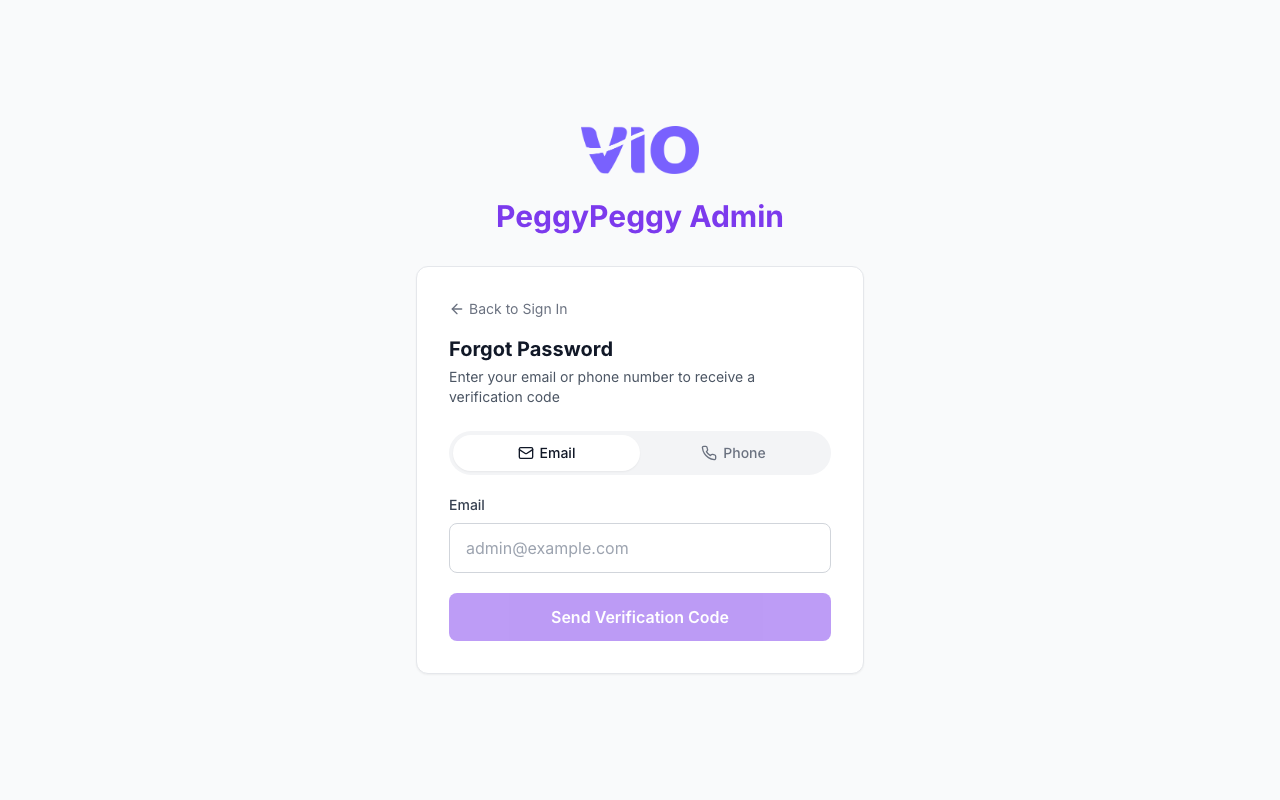
2. Forgot Password
Reset your admin password if you forgot it. The flow supports both email and phone: request a one-time verification code, confirm with a 6-digit OTP, then set a new password (minimum 6 characters).
How to use:
- From the login page, click "Forgot password?" (or open the forgot-password URL for your tenant)
- Choose Email or Phone, then enter your registered email or phone number (with country code for phone)
- Click "Send verification code" and check your email or SMS for the 6-digit code
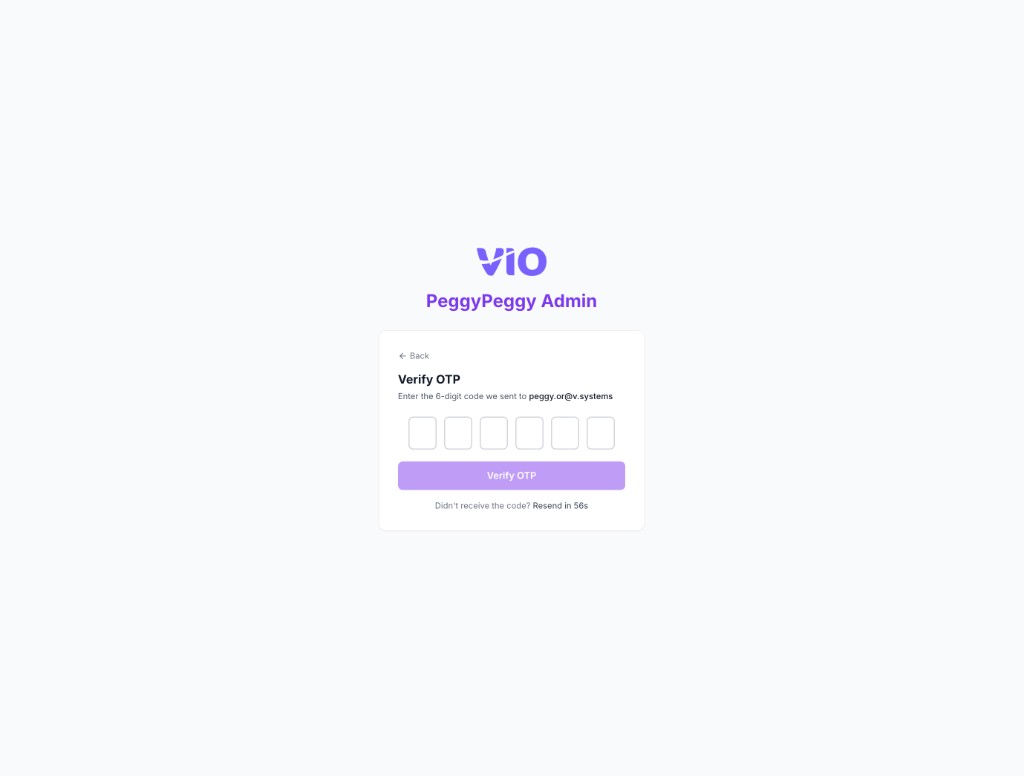
- Enter the OTP in the six boxes (you can paste the full code)
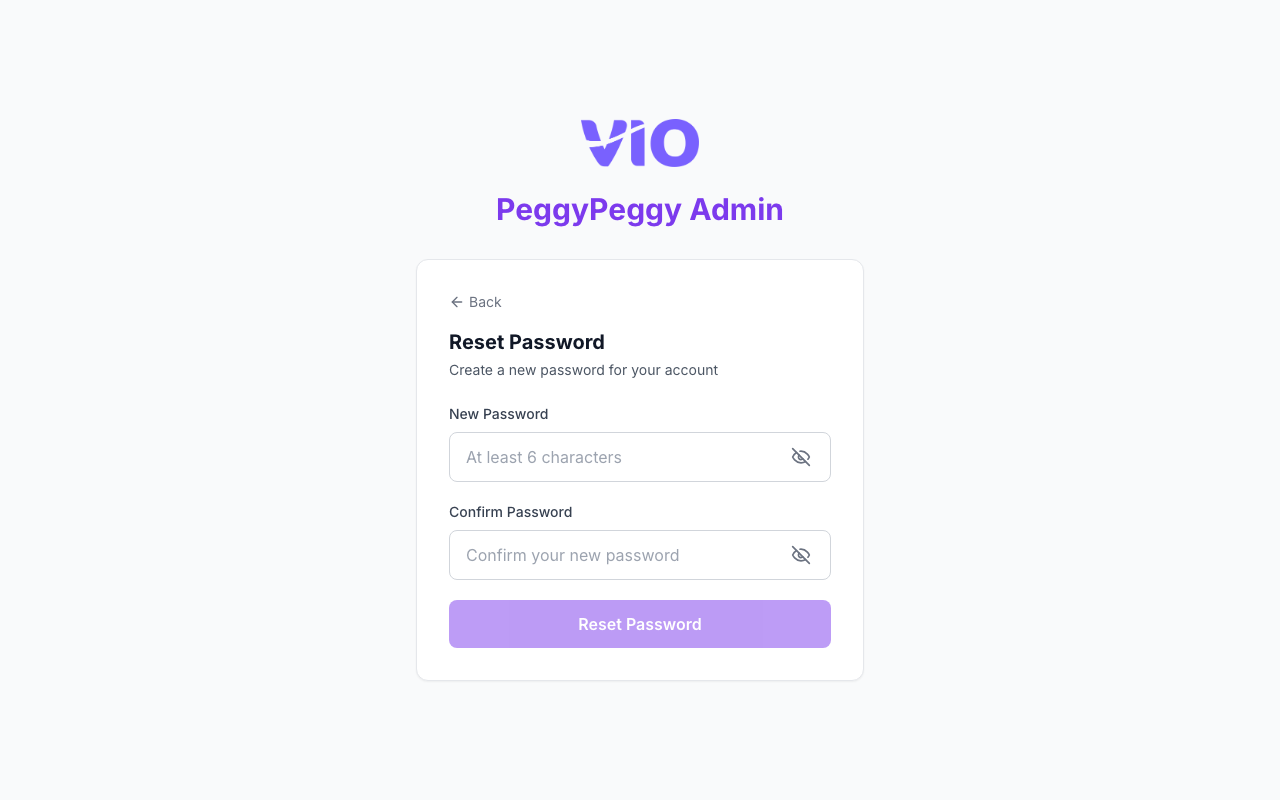
- Enter your new password and confirm it, then submit to complete the reset
- Use "Back to Sign In" on the success screen, then log in with your new password
Request verification code (choose Email or Phone, enter your identifier, then send the code)
Enter verification code (six-digit OTP; paste the full code or type each digit)
Set new password (minimum length as shown; confirm must match)
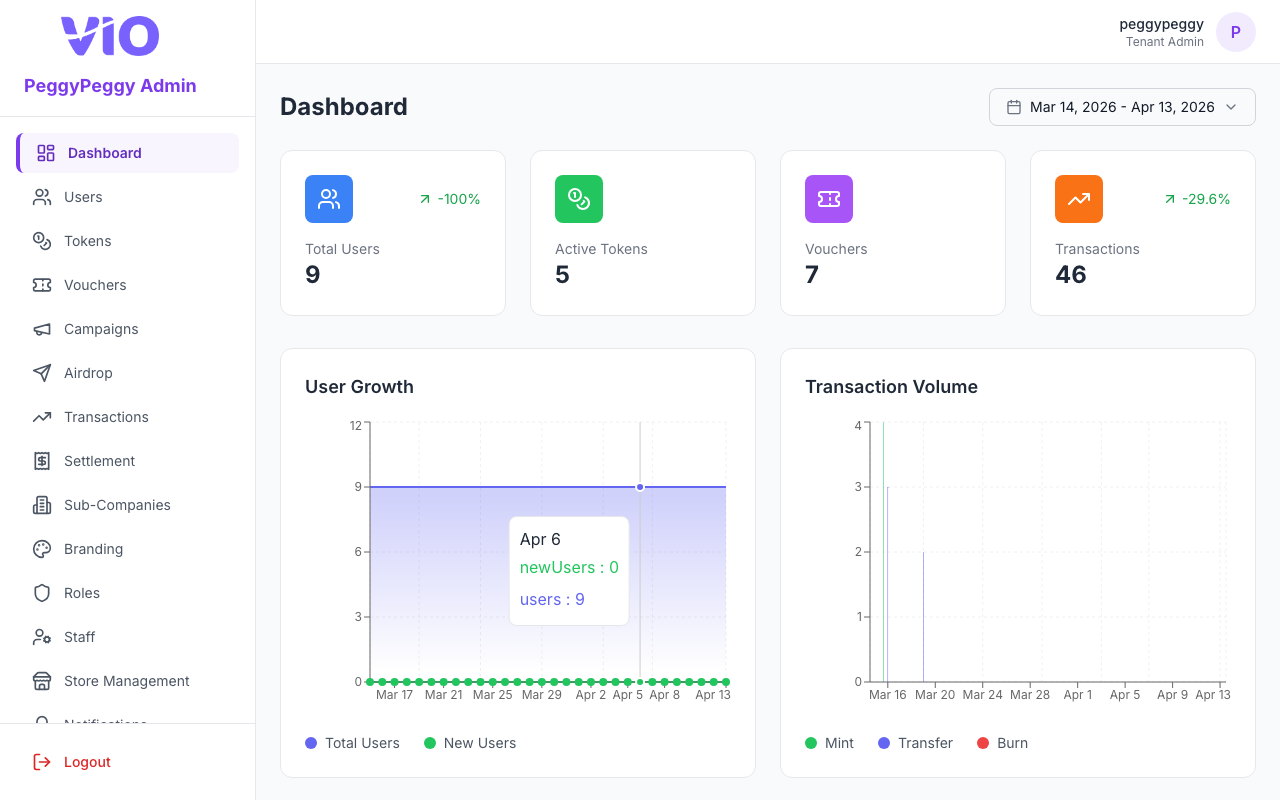
3. Dashboard
Home overview: KPI stat cards, analytics charts for the selected date range, recent token activity, optional mini-app shortcuts, and quick-action links to Users, Tokens, Vouchers, and Branding.
How to use:
- Use the date range picker (top right) to change the period; figures and charts reload for that window
- Click any of the four stat cards — Total Users, Active Tokens, Vouchers, Transactions — to open that section
- Read the User Growth chart (total vs new users) and Transaction Volume bars (mint, transfer, burn)
- Review the Token Distribution pie chart and the Recent Activity list; use View all to open the full Transactions page
- If your tenant exposes mini apps with an admin URL, open them from the Mini Apps grid
- Use Quick Actions: Manage Users, Manage Tokens, Create Voucher, or Customize Brand to jump straight to those pages
4. Users
Manage tenant member accounts: browse, search, filter, create users (with Role explained below), export CSV, and row actions.
How to use:
- Use the search field (top right of the filter bar) — search matches display name, email, phone, and wallet address (same scope as the in-app hint: user, wallet, email, etc.)
- Use the Role and Status dropdowns to narrow the list; use the date range picker to filter users by account creation date; click Clear to reset filters
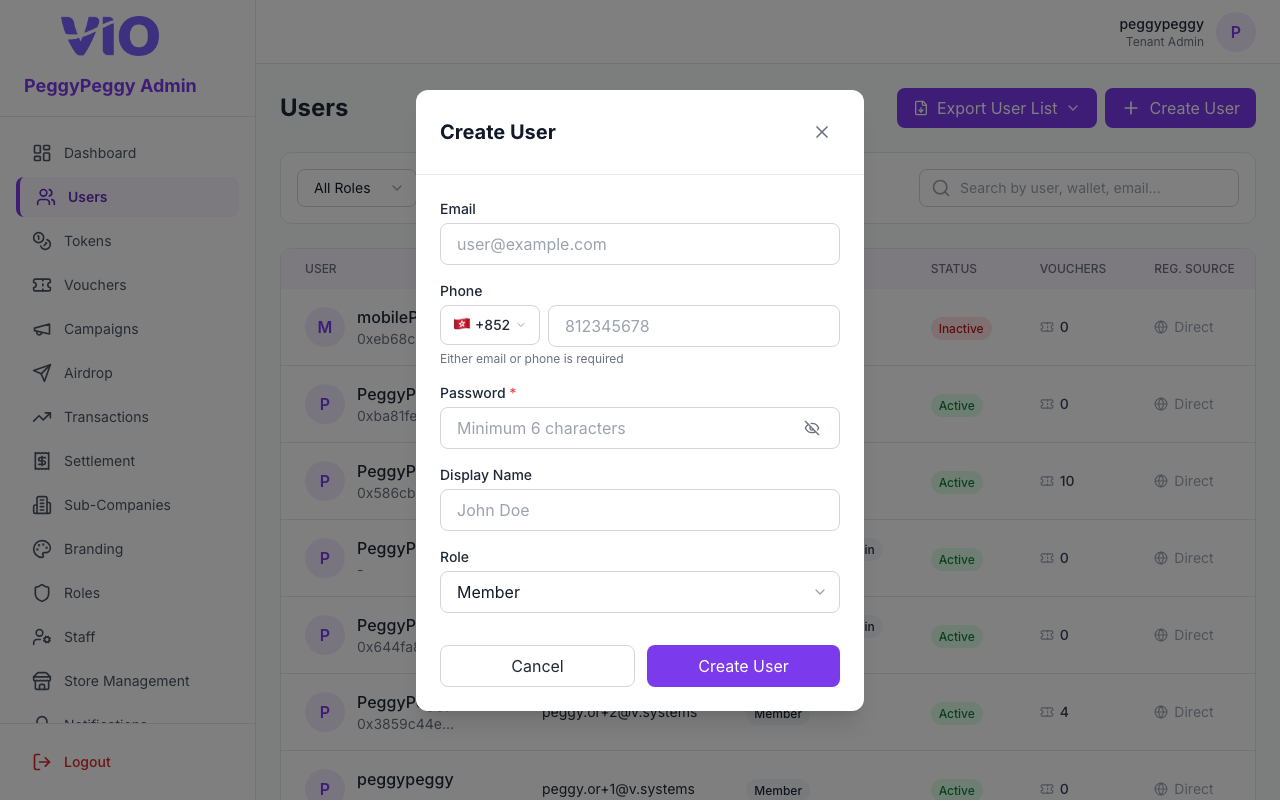
- Click Create user (top right, next to export) when permitted. Enter email or phone, password, and display name.
- Role (required): Member — standard member-app user; you may assign an optional sub-company if your tenant uses branches. Sub-company admin — administers one branch; you must select which sub-company (required for this role). Tenant admin — can administer the whole tenant; only tenant-level admins can assign this when creating users (sub-company admins cannot create another tenant admin).
- Click Export User List to open export modes: User Summary (CSV) or Token Expiry Detail (CSV) with token and period options — then click Export to download
- For each row, use the ⋮ (three-dot) button on the far right — View opens details (contact, wallet, balances, vouchers), Edit changes profile and role, Deactivate or Activate controls account status
- Optional: use sidebar or bookmarks to Subscribed users or Active members (
/users/subscribed,/users/active-members) for pre-filtered lists when your navigation exposes them
Users list

Create user (modal — credentials, display name, Role, optional sub-company)
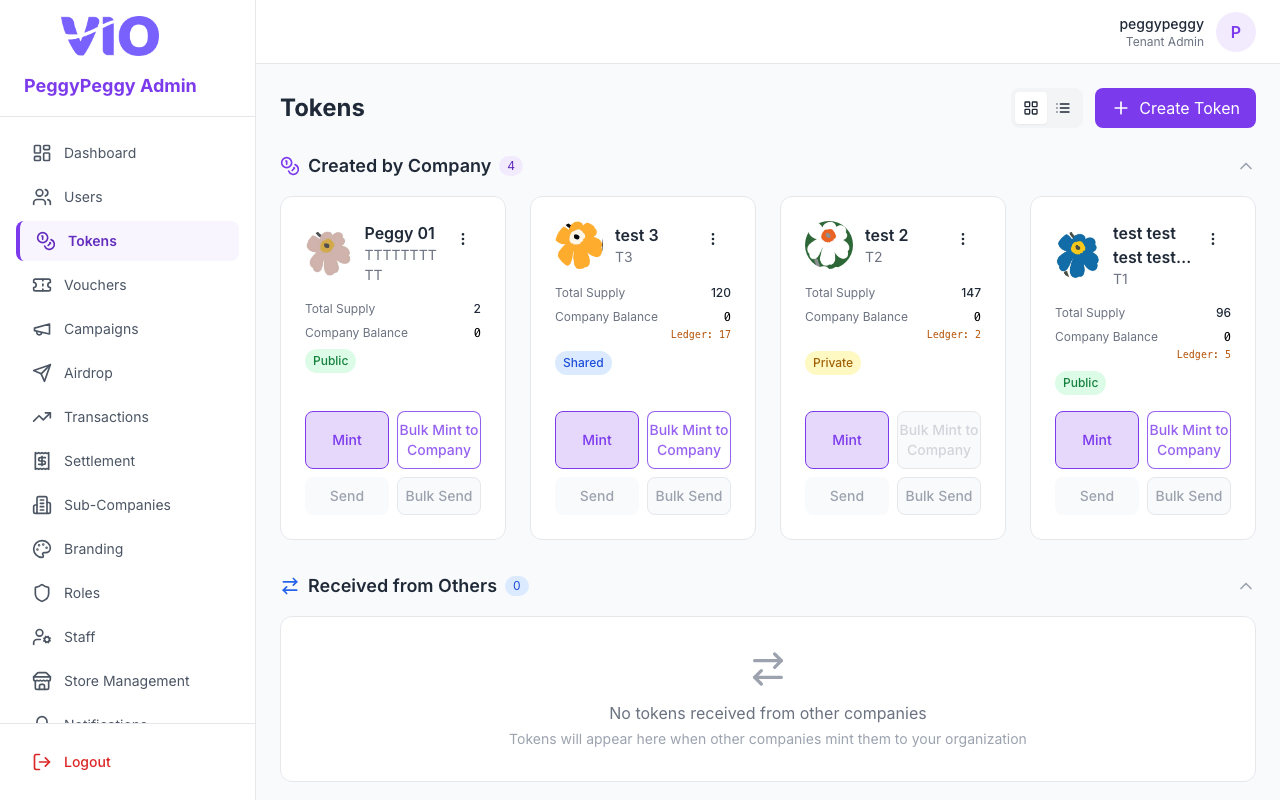
5. Tokens
Manage token types, supply, company balance, minting, and sharing. Toggle grid or list view, search tokens, and use each row’s ⋮ menu for View details, Edit (created tokens), View analytics, View holders, Set as default, and Burn tokens.
Token Creation
Token creation is managed by Super Admins in the Super Admin Portal. If you need a new token, please contact your Super Admin or platform support. Once a token is created, it will appear in your Tokens list for management.
How to use:
- Switch between grid and list layout and use the search field to find a token by name or symbol
- For tokens you issue, use mint / batch tools in the token flow as shown in the UI to allocate supply to users (including CSV or pasted lists where available)
- Click ⋮ on a row — View details for full info; on created tokens use Edit, View analytics, or View holders
- Set as Default (star) sets the tenant default token for members; the current default row cannot be chosen again until another token is default
- Burn tokens opens a modal: pick a holder, amount, optional memo, confirm — or use other row actions as your permissions allow
Tokens list
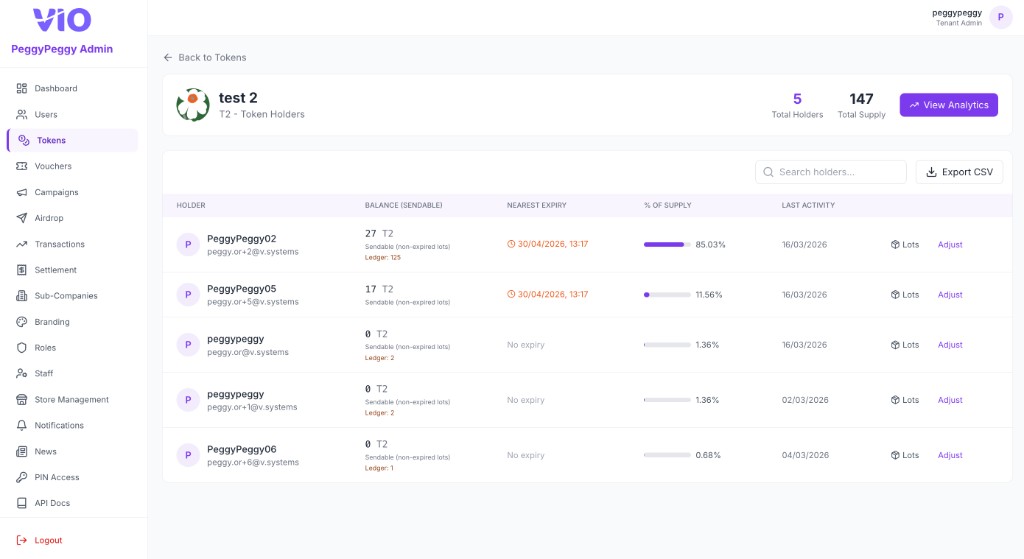
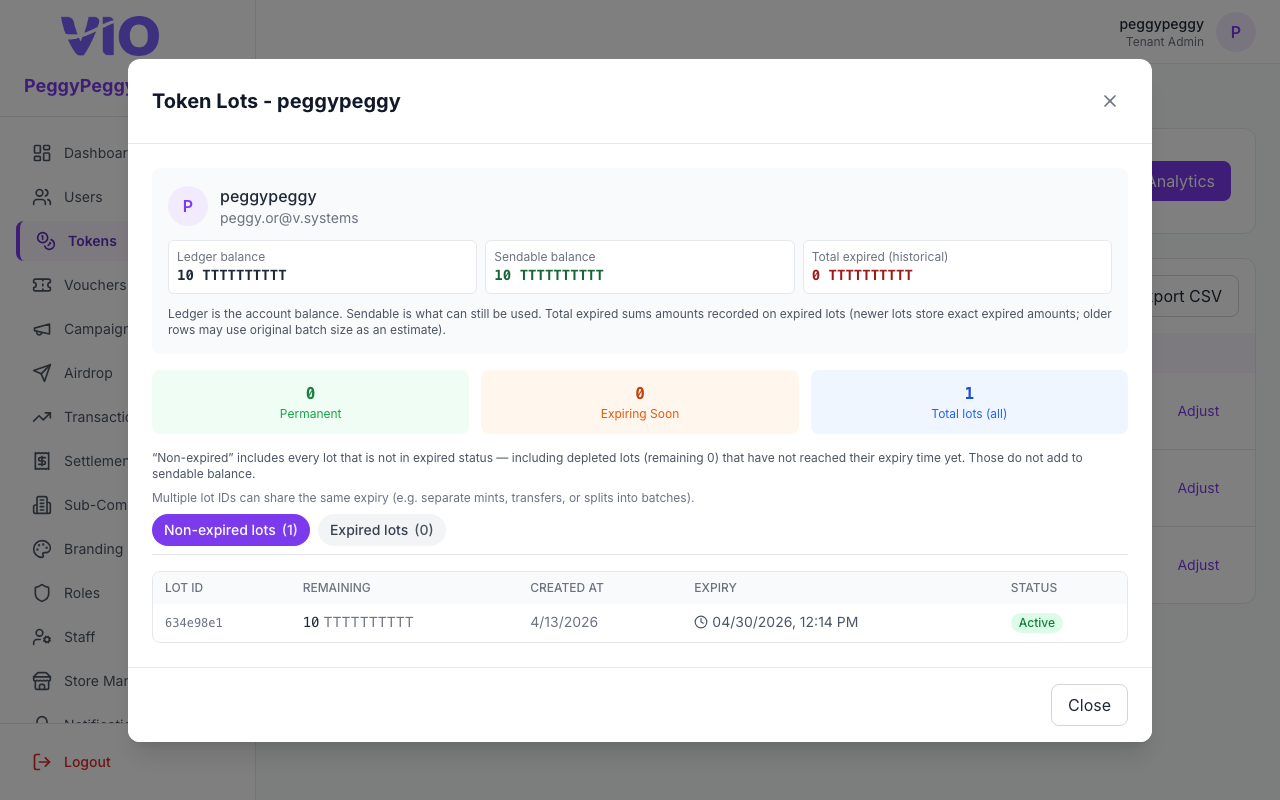
6. Token Holders
For one token: header with token name/symbol, Total holders and Total supply, and a View analytics button. The table lists each holder with Balance (sendable) (and ledger total), Nearest expiry, % of supply, Last activity, plus Lots and Adjust actions. Includes search, Export CSV, and Back to Tokens.
How to use:
- Open from Tokens → ⋮ → View holders, or go to
/tokens/{tokenId}/holders. Use Back to Tokens to return to the token list - Read the summary: Total holders and Total supply; click View analytics (top right) to open analytics for this token
- Use Search holders… to filter the table; use pagination at the bottom when there are many rows
- Review columns: Holder (name and email), Balance (sendable) with sendable amount and ledger total, Nearest expiry (date/time or “No expiry”), % of supply with progress bar, Last activity
- Per row: click Lots to open lot detail (batches, expiry); click Adjust to change balance when your role allows
- Click Export CSV to download the holder list for reporting
Holders table
Lots (modal — per-holder lot breakdown, active vs expired tabs, balance reconciliation)
Adjust balance (modal — Send or Recall, amount, reason)

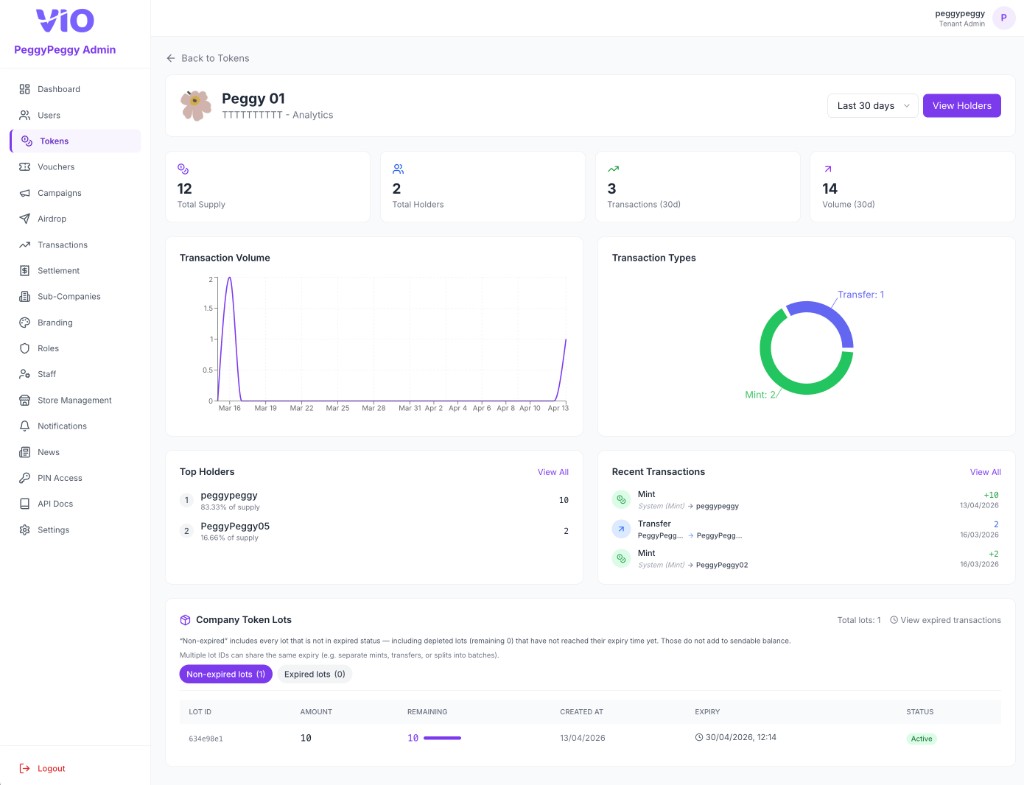
7. Token Analytics
Per-token analytics: Back to Tokens, date range (e.g. Last 30 days), View holders button, summary cards (Total supply, Total holders, Transactions and Volume for the period), Transaction volume chart, Transaction types donut, Top holders and Recent transactions (each with View all), and Company token lots with Non-expired / Expired tabs and a lots table.
How to use:
- Open from Tokens → ⋮ → View analytics, or go to
/tokens/{tokenId}/analytics. Use Back to Tokens to return to the list - Set the date range — summary tiles and charts refresh for that window. Click View holders to open the Token holders page for this token
- Read the four summary tiles: Total supply, Total holders, Transactions (count in the selected period), Volume (total amount in that period)
- Review Transaction volume (line chart) and Transaction types (donut: mint, transfer, etc.). Use Top holders and Recent transactions; follow View all for full lists when shown
- In Company token lots, check the total lot count and View expired transactions if present. Use Non-expired lots vs Expired lots tabs; the table shows lot ID, amount, remaining, created at, expiry, and status
- Read the note under the tabs: non-expired includes depleted lots that have not reached their expiry time yet
8. Vouchers
Full voucher lifecycle: four top-level areas (catalog, claims, analytics, brand tags), status filters, grid/list view, search, bulk actions on your own vouchers, Redeem by Code in the page header, charts on Analytics, and a multi-step create/edit wizard.
The English UI uses four main tabs at the top of the page:
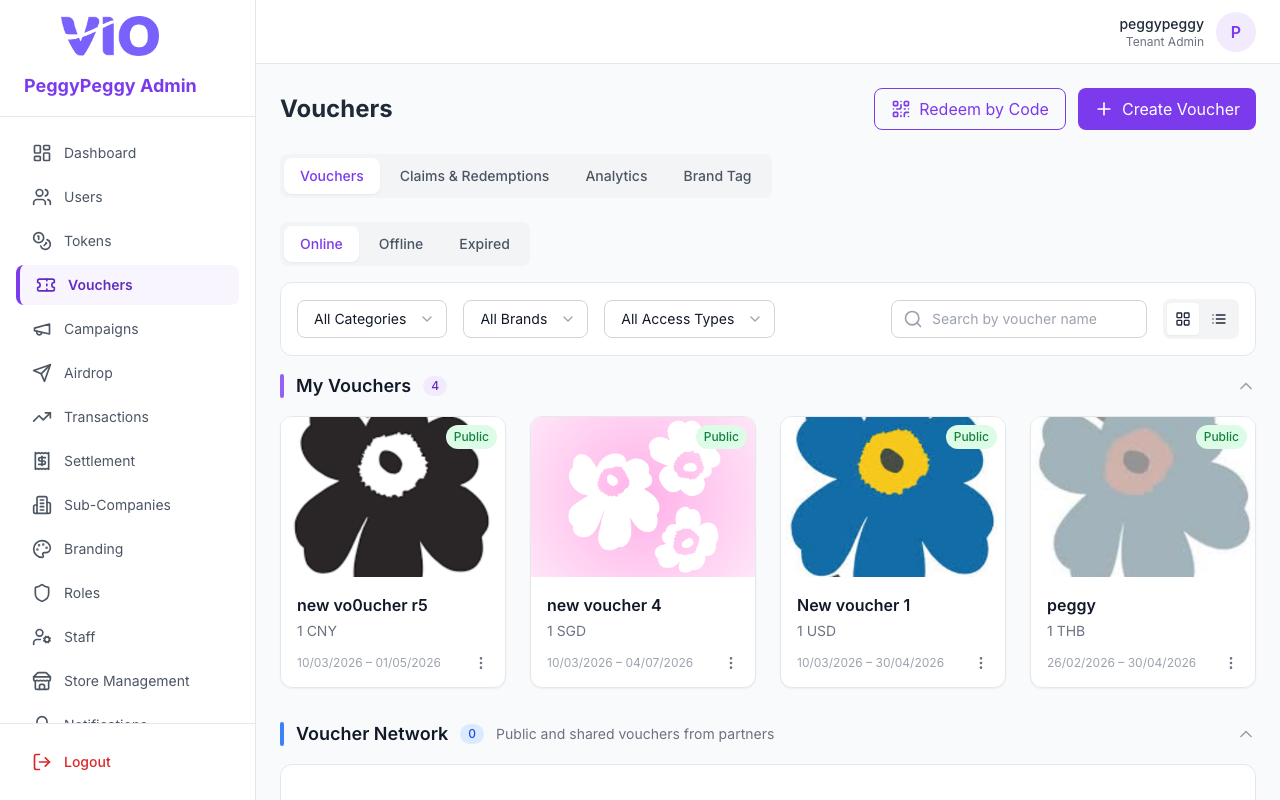
- Vouchers — Your tenant’s catalog. It is split into My Vouchers (vouchers you created) and Voucher Network (see below). Below that, Online, Offline, and Expired narrow which vouchers appear (by active/offline state and whether the offer has passed its end date). You can filter by category, brand tag, and access type (public / private / shared), search by voucher name, and switch grid vs list view. In list view, selecting rows can show a bulk bar with Activate / Deactivate (when your role allows).
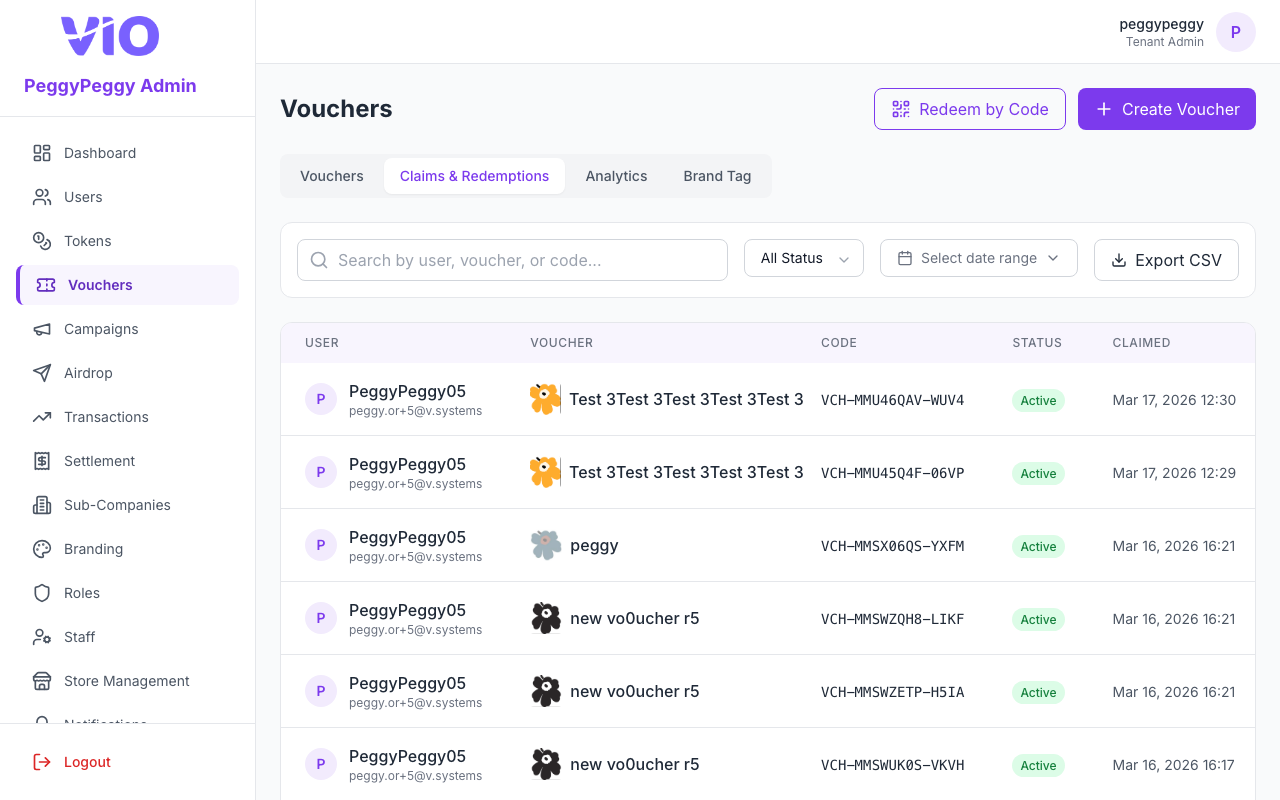
- Claims & Redemptions — Lists of voucher claims and redemption-related records (search and export where the UI offers it).
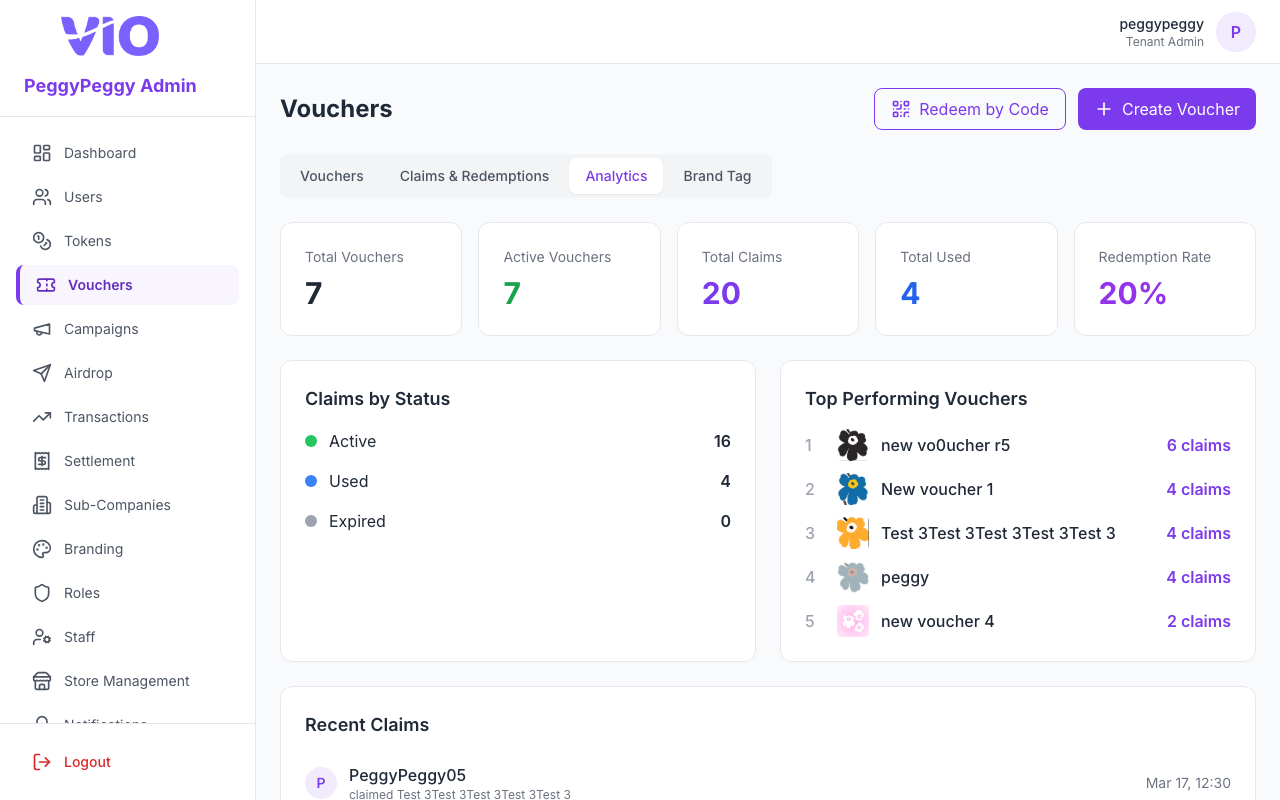
- Analytics — Summary metrics and charts for voucher performance.
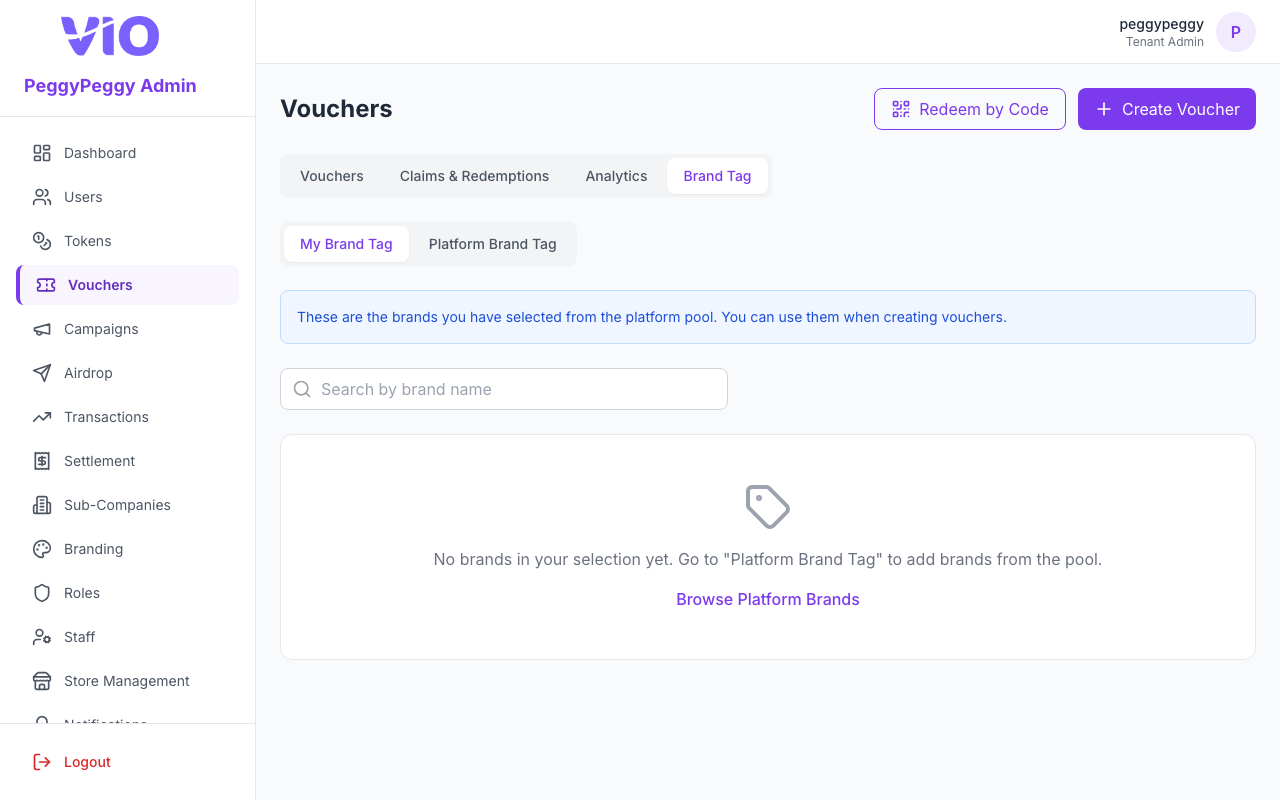
- Brand Tag — Manage My Brand Tag (brands you have added from the platform for use on vouchers) vs Platform Brand Tag (browse the platform pool and add brands to your selection).
At the top right of the page (on the main voucher flows), Redeem by Code opens staff redemption by code in a modal — it is not an item inside a voucher row’s ⋮ menu. Create Voucher opens the creation wizard when your role permits.
Voucher Network (under My Vouchers on the Vouchers tab)
Voucher Network is not a separate route — it is the second block on the same catalog tab, below My Vouchers. In the English UI, the line under the Voucher Network heading matches the product copy: “Public and shared vouchers from partners.” That pool shows vouchers that originate from other tenants or the platform catalogue so members can discover and claim them where your configuration allows. You do not create those vouchers here; you mainly inspect them. Row ⋮ on network vouchers only offers View Details — not Edit Voucher, Duplicate, or Set Offline / Set Online, which apply to My Vouchers only.
How to use:
- Use the four main tabs above to move between catalog (Vouchers), Claims & Redemptions, Analytics, and Brand Tag (with My Brand Tag / Platform Brand Tag under the last).
- On Vouchers, work in My Vouchers vs Voucher Network, then use Online / Offline / Expired plus category, brand, access type, and search; toggle grid or list view and use bulk activate/deactivate in list view when rows are selected and your role allows.
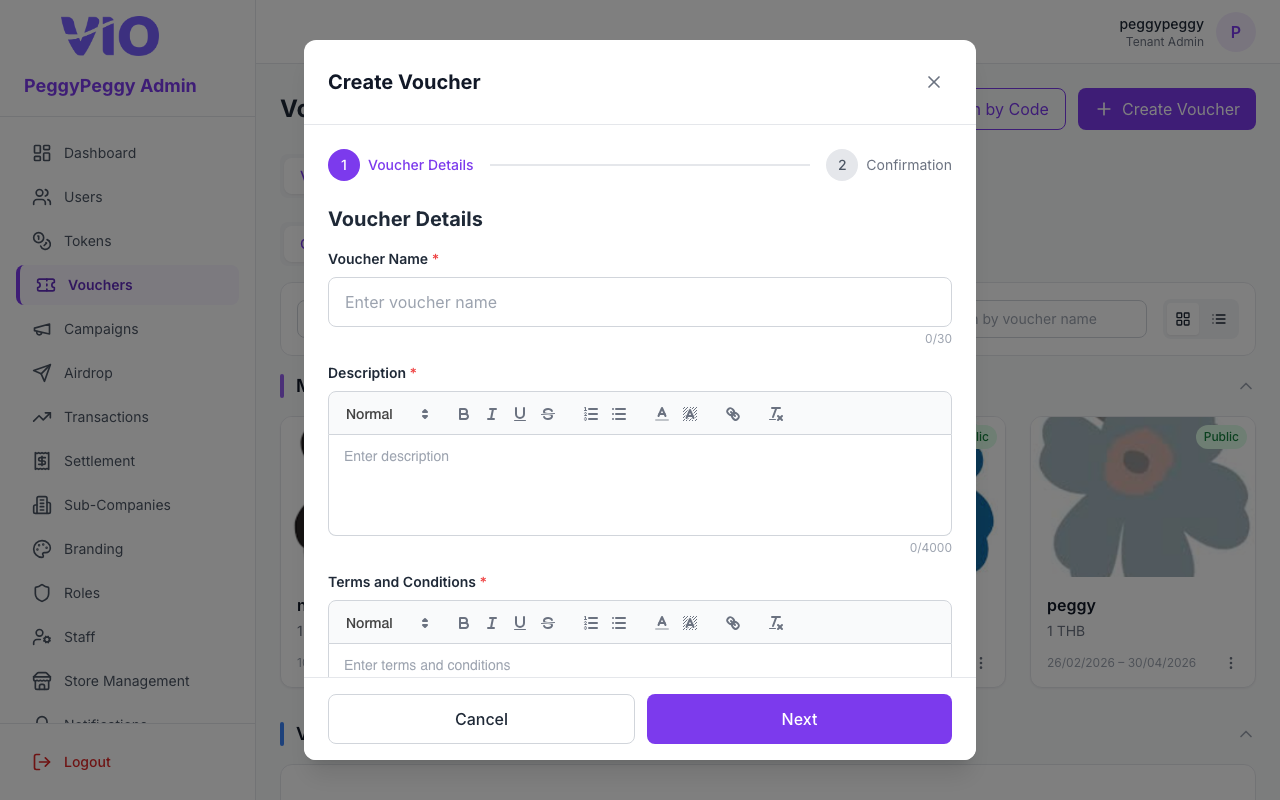
- Click Create Voucher (when permitted) to open the wizard — name, type, value, dates, visibility, outlets, consumption method, images, terms, and sharing options — then save or publish.
- ⋮ on a row: For My Vouchers, the menu is View Details, Edit Voucher, Duplicate, then Set Offline (when the voucher is currently online) or Set Online (when it is offline) — labels match the English UI. Voucher Network rows only include View Details in ⋮. Use Redeem by Code in the page header for code redemption; do not expect it under ⋮.
- Open Claims & Redemptions for claim and usage tables; Analytics for dashboards; Brand Tag to curate brands for voucher creation.
Consumption type: supplier code list (QR Code & Coupon Code)
When Consumption type is QR Code or Coupon Code, vouchers are fulfilled from a pool of supplier-issued codes that you upload as a CSV — not from a single shared image. VIO stores one row per code and gives each member a different code when they use the voucher in the app (or when staff/API redeem runs, depending on your process).
Upload Voucher (create wizard)
- A Upload Voucher area appears: drag-and-drop or tap Upload CSV; accepted files are CSV / TXT, up to 5 MB (see on-screen hint).
- Download Template — downloads a sample file with one code per line and no header row (same layout suppliers often use). You can also export your own list in that shape.
- After you select a file, the UI shows the file name and size; you can remove it with X.
- Voucher quantity is filled automatically from the number of unique non-empty lines in the file (header row
code/codes/voucher/idis skipped if present). - When you save the new voucher, the codes are imported to the pool in the background. Ensure unlimited quantity is off if you rely on a fixed cap — the cap should match the CSV for this flow.
Edit voucher
- Upload Voucher appears again for QR Code and Coupon Code: same drag-and-drop, immediate upload to add more codes (duplicates are skipped).
- The screen shows Total / Available / Assigned counts for the pool. If Voucher quantity (redemption cap) is greater than the total number of codes on file, the API rejects the save — upload more codes or lower the cap.
- Legacy note: Older QR Code vouchers may still have a single static image path in data; new configuration uses CSV only in the Admin Portal.
Other consumption types (VIO Code, URL, Manual, Direct recharge) are unchanged at a high level: no CSV pool is required for those modes.
Screenshots (main tabs — English UI)
Vouchers — catalog tab (My Vouchers above, Voucher Network below when you scroll; Online / Offline / Expired and filters apply to the catalog list)
Claims & Redemptions
Analytics
Brand Tag (sub-tabs My Brand Tag / Platform Brand Tag are on this screen)
Create voucher (wizard — details, type, value, dates, visibility, outlets, consumption, terms)
9. Campaigns
Campaign builder on a single Campaigns screen: list or grid of campaigns, filters (status, token, public vs private), search, Create Campaign, and per-campaign actions. Creating or editing a campaign uses a modal with schedule, linked token, banner images, and two toggles: Active and Public Marketing Page (accessible without login) (exact create label in English; edit uses the shorter Public Marketing Page label for the same setting).
Status badge vs Active toggle: The Active checkbox controls whether the campaign is enabled at all. The coloured status pill on each card/row (Active, Scheduled, Ended, Inactive) is computed: if Active is off → Inactive; if on → Scheduled before the start time, Ended after the end time, otherwise Active. So “Active” in the form is not the same thing as the “Active” status chip when dates put the campaign in Scheduled or Ended.
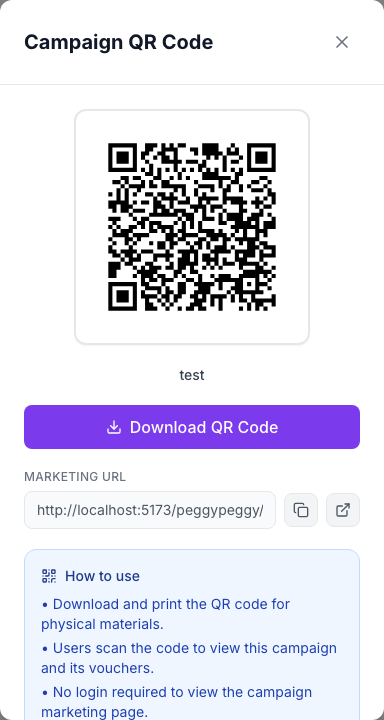
Public marketing page: When Public Marketing Page (accessible without login) is on, the member-app marketing URL for that campaign can be opened without signing in (see Campaign QR Code instructions in the modal). When off, treat the campaign as not shared via that public page.
Vouchers on a campaign: There is no separate top-level Campaign Vouchers tab in the current UI — you attach and edit vouchers per campaign via Manage (list view) or Manage Vouchers (grid ⋮ menu). That opens a large modal titled Vouchers in “… ” with step 1 Manage Vouchers (quantities, token price/type, add/remove) and 2 Confirmation before saving.
Qty & Max Qty columns: Each voucher row has a Qty input and a Max Qty toggle. When Max Qty is off, the Qty field is editable and represents a campaign-specific redemption cap. When Max Qty is on and the toggle is first enabled, the Qty field auto-fills with the voucher's current remaining stock (total minus claimed); once saved, the value is fixed and does not auto-decrease as vouchers are redeemed. If the voucher has unlimited stock, the field displays ∞.
Stock indicators: Each voucher row displays a stock status badge when relevant:
- Out of Stock (red badge) — the voucher's remaining global stock is 0 (fully claimed across all campaigns/tenants)
- Low Stock (yellow badge) — the voucher's remaining global stock is ≤ 10
These indicators appear in both the Campaign Voucher Management modal (for all companies' vouchers) and the Vouchers page (grid and list views for the creating company's own vouchers).
QR and links: The QR icon on a row/card and View QR Code in ⋮ open the Campaign QR Code modal (download PNG, Marketing URL, copy, open in new tab). ⋮ also offers Copy Marketing URL, Open Marketing Page, Edit Campaign, and Delete (when permitted).
How to use:
- Browse the Campaigns list or grid; filter by status (matches the computed chip: Active / Scheduled / Ended / Inactive), token, and public vs private; search by name; switch grid/list if shown.
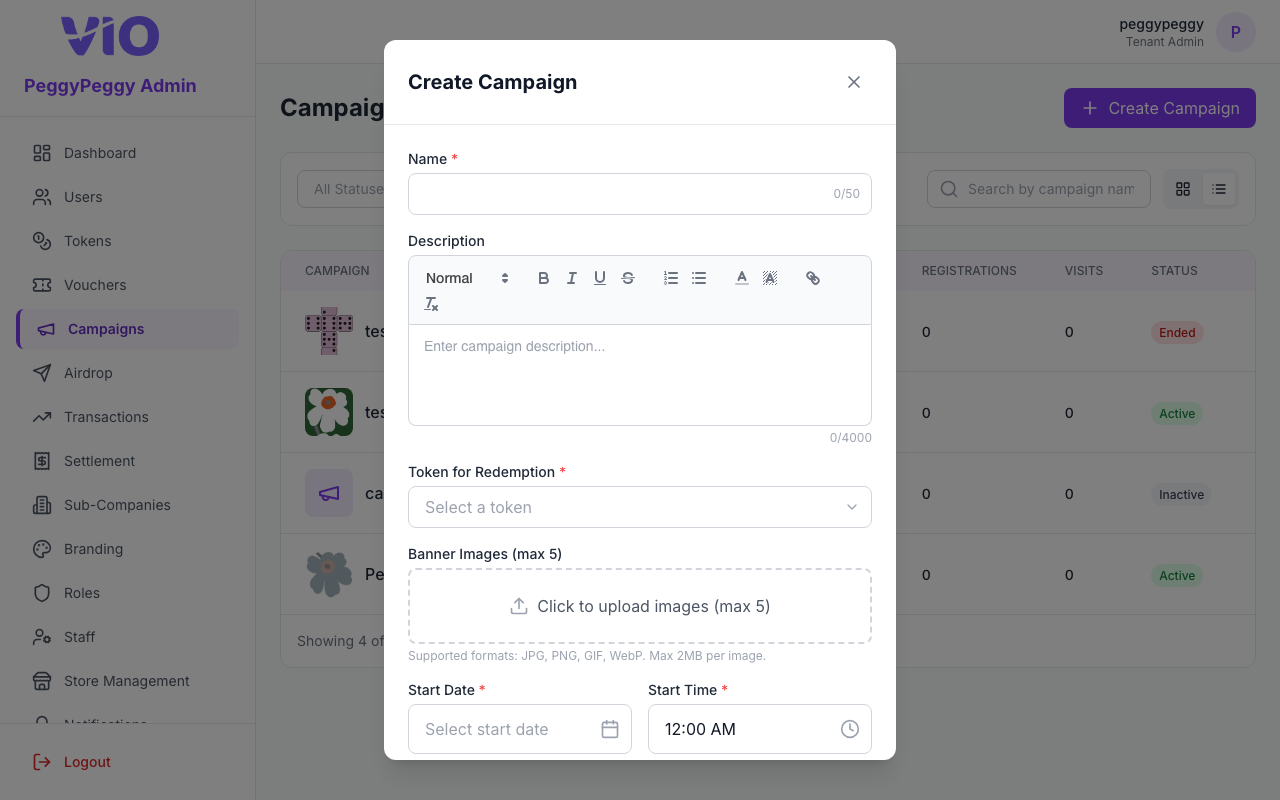
- Create Campaign (when permitted): name, description, Token for Redemption, banner images (limits shown in-app), start/end date and time. Enable Active so the campaign can run (subject to dates). Enable Public Marketing Page (accessible without login) if you want a shareable member URL without login. Save.
- Edit Campaign from ⋮ to change the same fields. Use Manage / Manage Vouchers to add or remove vouchers and set quantities and token pricing for that campaign; confirm on step 2 when the UI requires it.
- Use the QR icon or View QR Code for the Campaign QR Code popup; use Copy Marketing URL or Open Marketing Page from ⋮ as needed.
- Delete appears in ⋮ when your role allows; it removes the campaign and its voucher links (confirm the on-screen warning).
Screenshots
Campaigns (list / grid — your data may differ)

Create Campaign (modal — token, schedule, Active, Public Marketing Page (accessible without login))
Campaign QR Code (modal — QR, Download QR Code, Marketing URL, How to use)
Manage Vouchers (modal — title Vouchers in "…", steps Manage Vouchers → Confirmation)

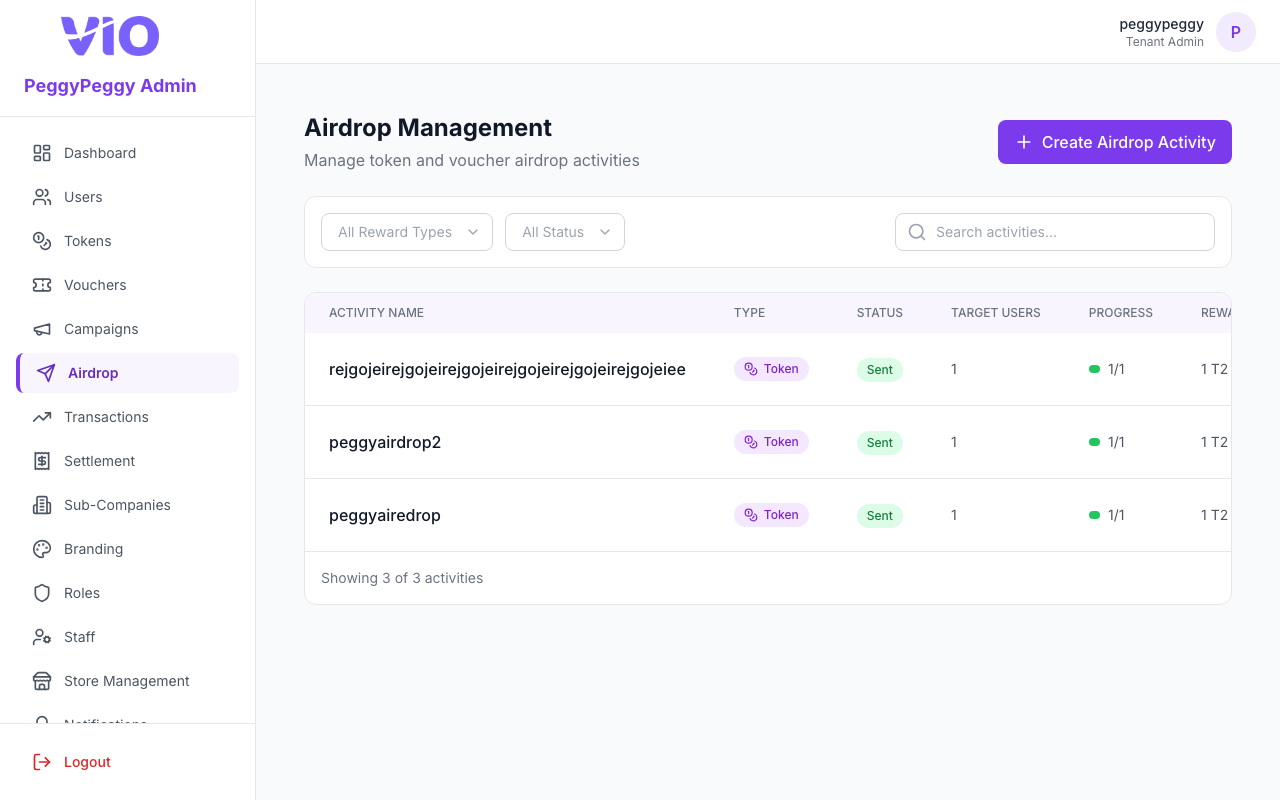
10. Airdrop
List past and in-progress airdrops (token or voucher distributions). Search and filter by type/status, open details, delete drafts, and create new runs from a large modal wizard — there is no separate /airdrop/create page; creation opens from here.
How to use:
- Browse the table with search and filters (e.g. airdrop type, status: draft, sending, sent, failed)
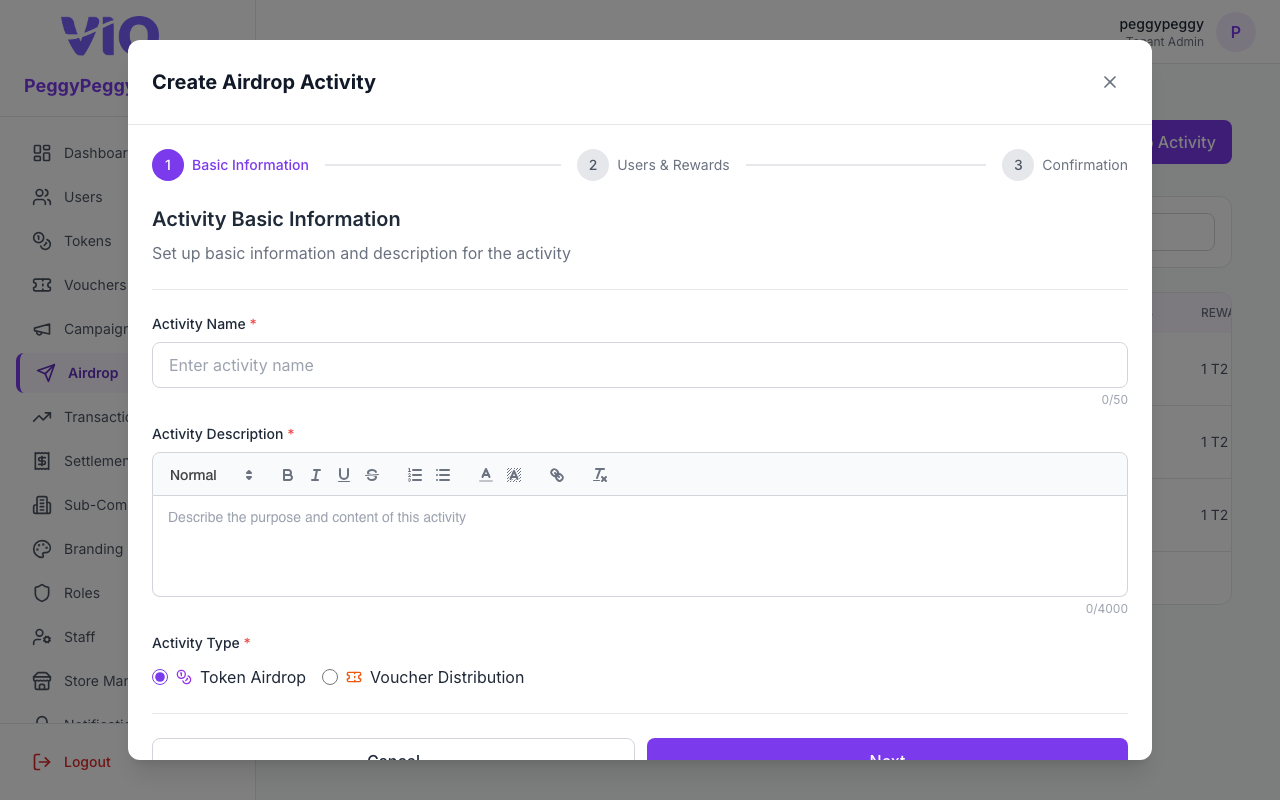
- Click Create Airdrop Activity (when permitted) to open the wizard modal — choose token or voucher mode, recipients (CSV upload and/or user selection), amounts, and messages
- Review the summary and confirm to queue sending; drafts can be removed from the ⋮ menu when allowed
- Click a row or View to open the details modal and watch progress, recipient breakdown, and any failure messages
- Use Delete or other ⋮ actions on eligible rows to clean up failed or draft activities
Airdrop list
Create airdrop (modal wizard — token or voucher, recipients, amounts)
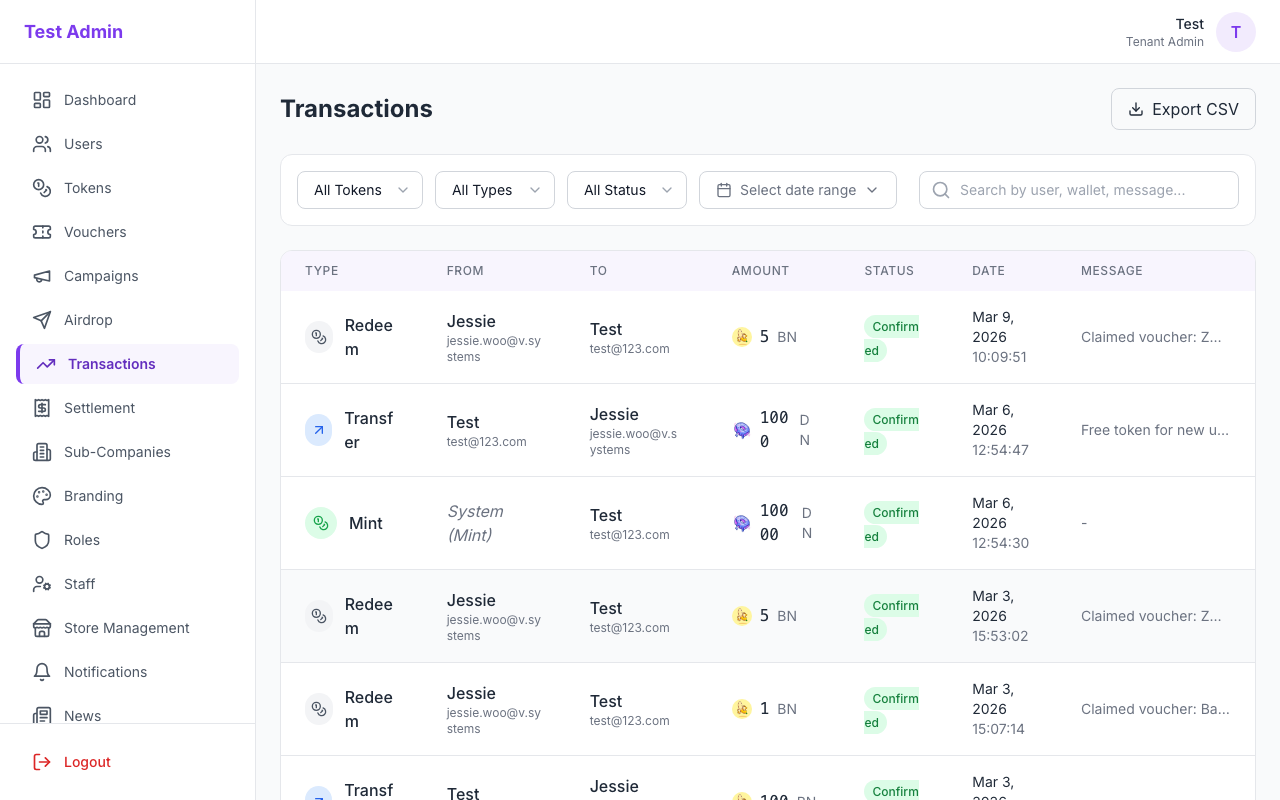
11. Transactions
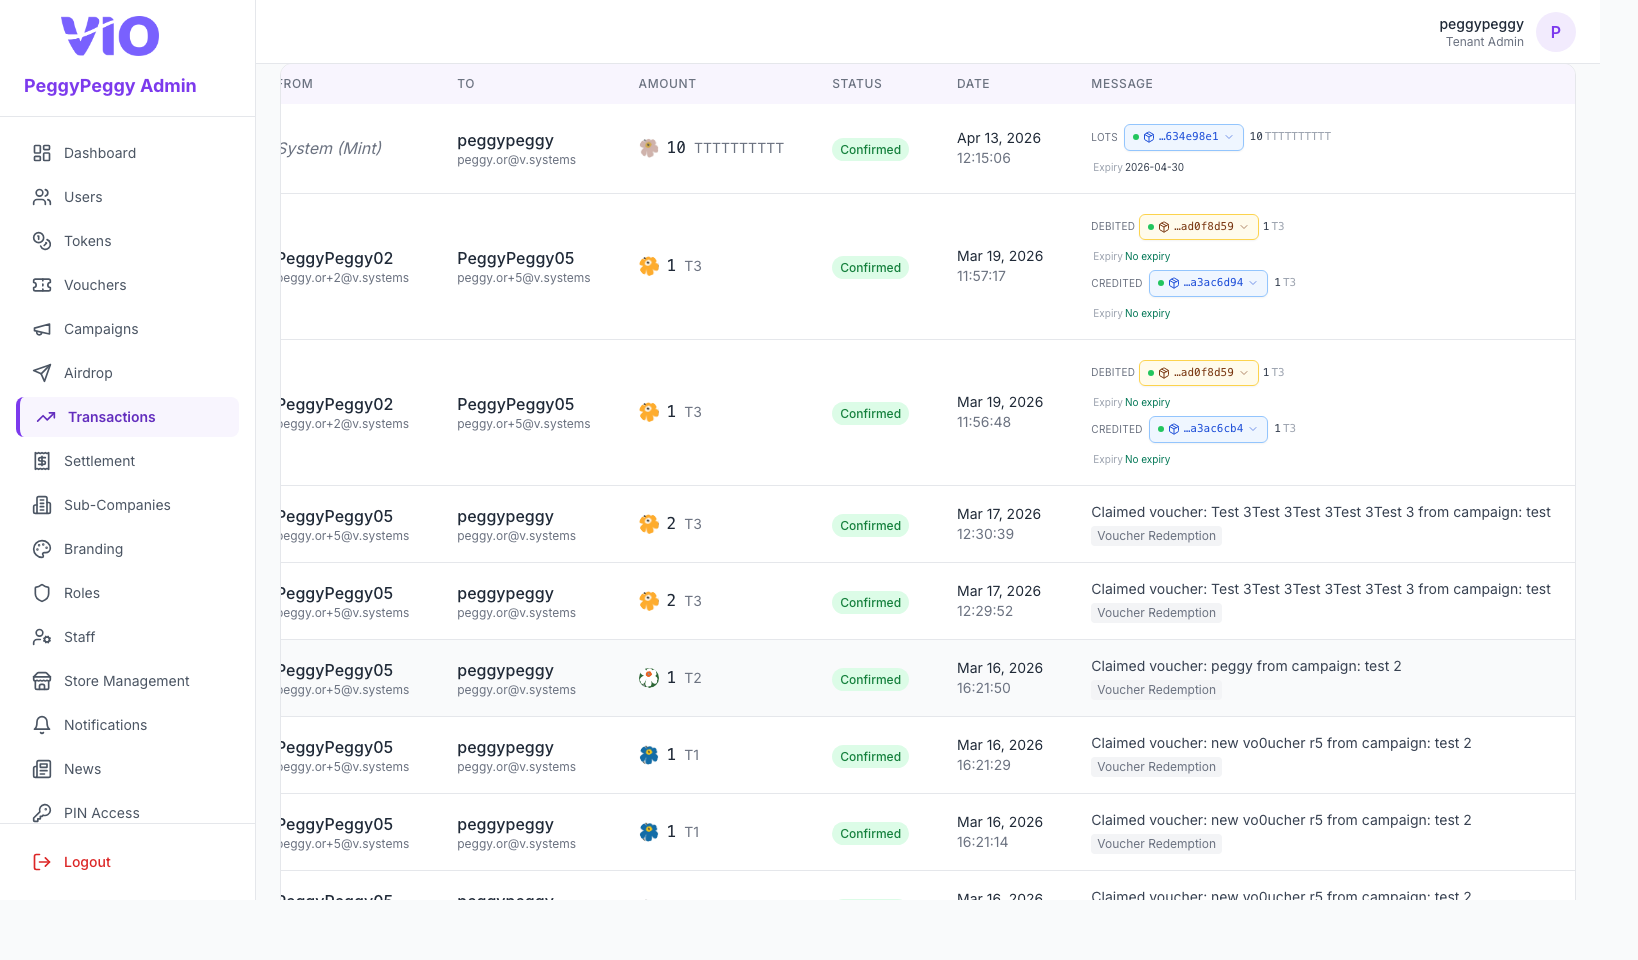
Tenant-wide token transaction ledger with free-text search, token/type/status filters, date range, CSV export, and rich Message rows that can include memos, errors, reference tags, and token lot movements with Expiry hints.
Message column (English UI label: Message) — Each cell can show, from top to bottom: optional memo text; for failed transactions, a red error line; an optional reference chip (type of linked object); and, when the API supplies relatedLots, a Lots block (see below). If nothing applies, the cell shows -.
Lots — Token balances are tracked in lots (batches). Inside Message, lot lines appear for types such as mint, transfer, and reward (the UI only renders the full debit/credit flow for those flows). You may see:
- Debited — The sender’s lot being reduced (with amount in token units). If the API embedded full lot data, a compact Expiry line appears under it; otherwise only a short lot id chip may show.
- Credited or Lots — The new or receiving lot and its amount.
- Split across N lots · total — When one transaction touches more than one lot, this summary line appears with the total amount; each lot is then listed underneath with a left border so you can see how the move was split.
Click a lot chip (package icon and last digits of the lot id) to open a popover with Lot ID (copyable), remaining / original balance, status (Active, Expired, or Depleted), and the same expiry date as in the inline hint.
Expiry — On each lot row, a small Expiry label (English UI) is followed by either a calendar date (yyyy-MM-dd) or No expiry for non-expiring lots. Dates may appear in red when the lot is expired (by status or past date). This is the lot’s own expiry, not the transaction timestamp (use the Date column for when the ledger event occurred).
Message column (screenshot) — Table scrolled horizontally so Message is visible; the automated capture shows at most 10 data rows to keep the image compact (see capture-transactions-message.js). Your tenant may show memos, -, lot lines, or voucher text.
How to use:
- Use search to match users, hashes, or other fields surfaced in the table
- Narrow by token, transaction type (mint, transfer, burn, reward, redeem, expire), and status; set a date range with the picker
- Open the Export or Download control to export the current result set to CSV (the export can append compact debited/credited lot ids and
exp:expiry snippets where available) - Read Message for memos, failures, references, and Lots / Expiry; click lot chips for full lot detail and copy id
- Deep links from other pages may pass
tokenId,type, orstatusquery parameters — filters initialize from the URL
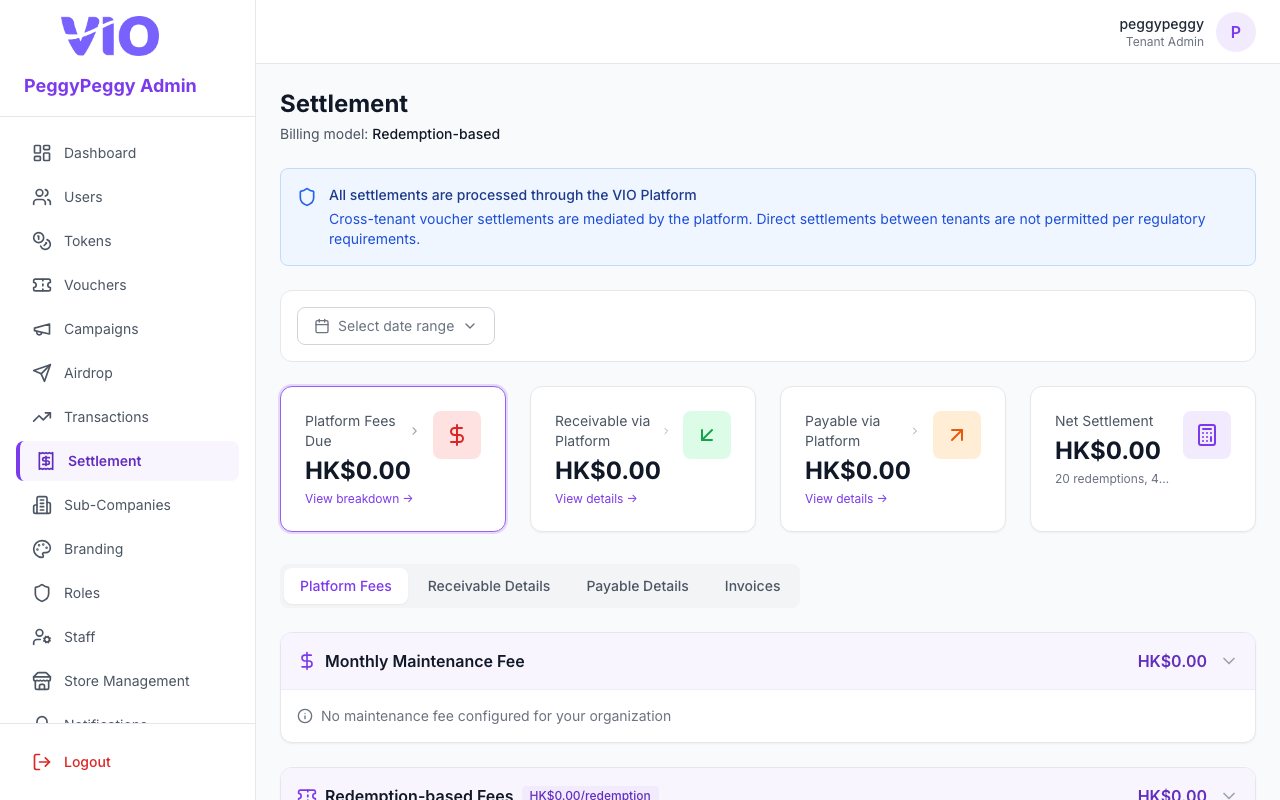
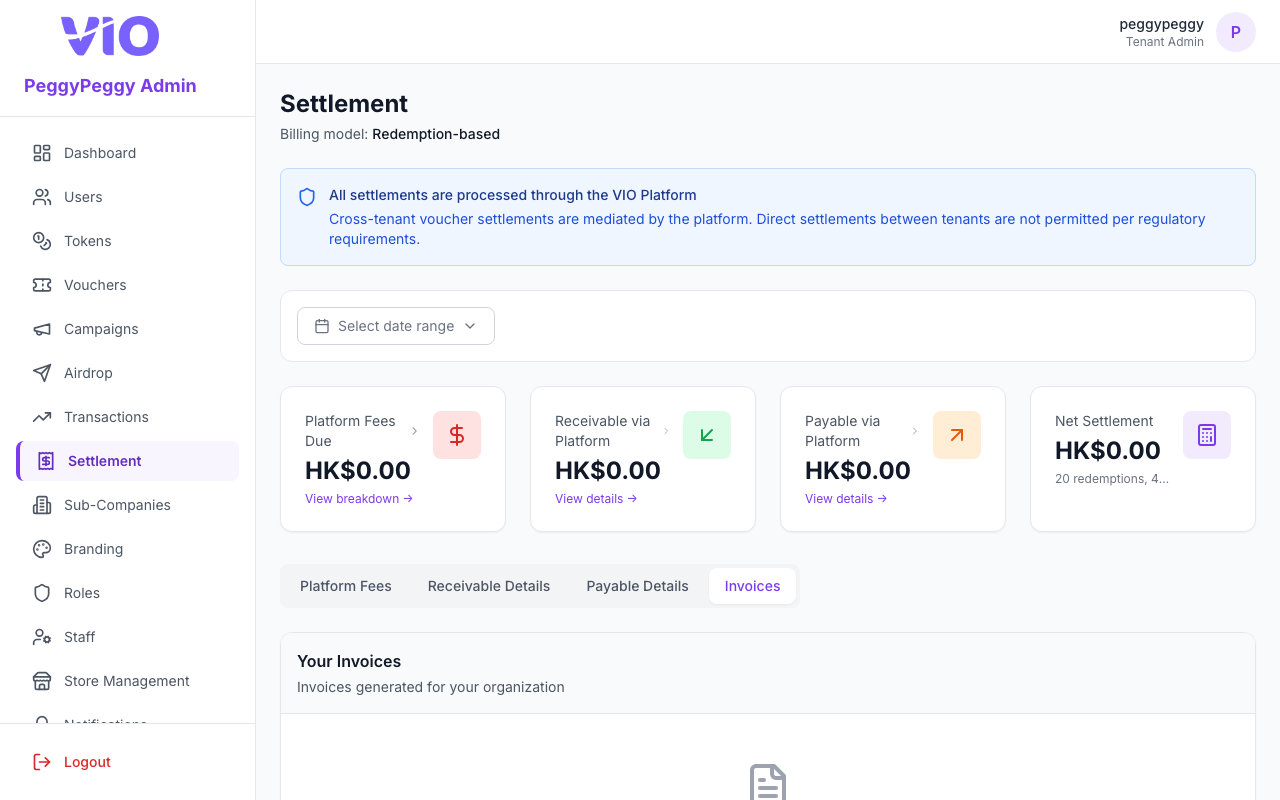
12. Settlement
Financial settlement and cross-tenant voucher billing: summary cards at the top, then four main tabs (English UI) — Platform Fees, Receivable Details, Payable Details, and Invoices — plus optional date-range filtering on the summary data.
How to use:
- Pick a date range (when shown) to reload settlement summaries, fees, and cross-tenant voucher lines
- Review platform fees, maintenance charges, variable fees, and cross-tenant marketing fees in the Platform Fees tab
- Expand any token or voucher row to see per-transaction detail (date, rate applied, minted/settled amount, and fee)
- Open Receivable Details or Payable Details to see vouchers your users consumed at other tenants (or the reverse)
- Switch to Invoices to list billing documents and download PDFs or review entries your plan exposes
- Use currency labels and totals at the top of each section to reconcile against your finance records
Platform Fees Tab
The Platform Fees tab displays a breakdown of all fees due to the platform for the selected period:
| Section | Description |
|---|---|
| Maintenance Fee | Fixed monthly platform fee |
| Token-Based Fees | Fees per token minted (per unit, percentage of issuance value, or percentage of token fiat value) |
| Redemption-Based Fees | Fees per voucher redemption event |
| Consumption-Based Fees | Fees per voucher consumption event |
| Cross-Tenant Marketing Fees | Fees charged when other tenants' users use your vouchers (grouped by voucher, showing redemption and consumption event counts) |
Each fee section shows a rate badge indicating the active rate type and value. Token-based, redemption-based, and consumption-based sections support expandable rows — click any row to reveal individual transaction details including date/time, applied rate, quantity, and computed fee.
The Cross-Tenant Marketing Fees section appears only when there are marketing fees in the period. It shows a per-voucher breakdown with event type counts (redemptions and consumptions), total settlement amount, and total marketing fee. Rows are expandable to reveal each transaction's date, event type, settlement amount, and fee.
The Total Platform Fees Due summary at the bottom includes maintenance fee + variable service fees + cross-tenant marketing fees.
Rate Types
The platform supports multiple rate types for variable service fees:
| Rate Type | Badge Display | Calculation |
|---|---|---|
| Per Unit | $X.XX /token or /redemption | Fixed amount per transaction |
| Percentage | X% (issuance value) or X% (settlement price) | Percentage of the transaction's settlement amount |
| Token Value Percentage | X% (token value) | Percentage of (voucher token price × token fiat exchange rate), converted to the tenant's billing currency if the token's fiat peg currency differs; falls back to minimum charge when no token price exists |
Screenshots (main tabs — English UI)
Platform Fees — maintenance fee, token-based fees, redemption/consumption fees, cross-tenant marketing fees (content depends on your billing model).
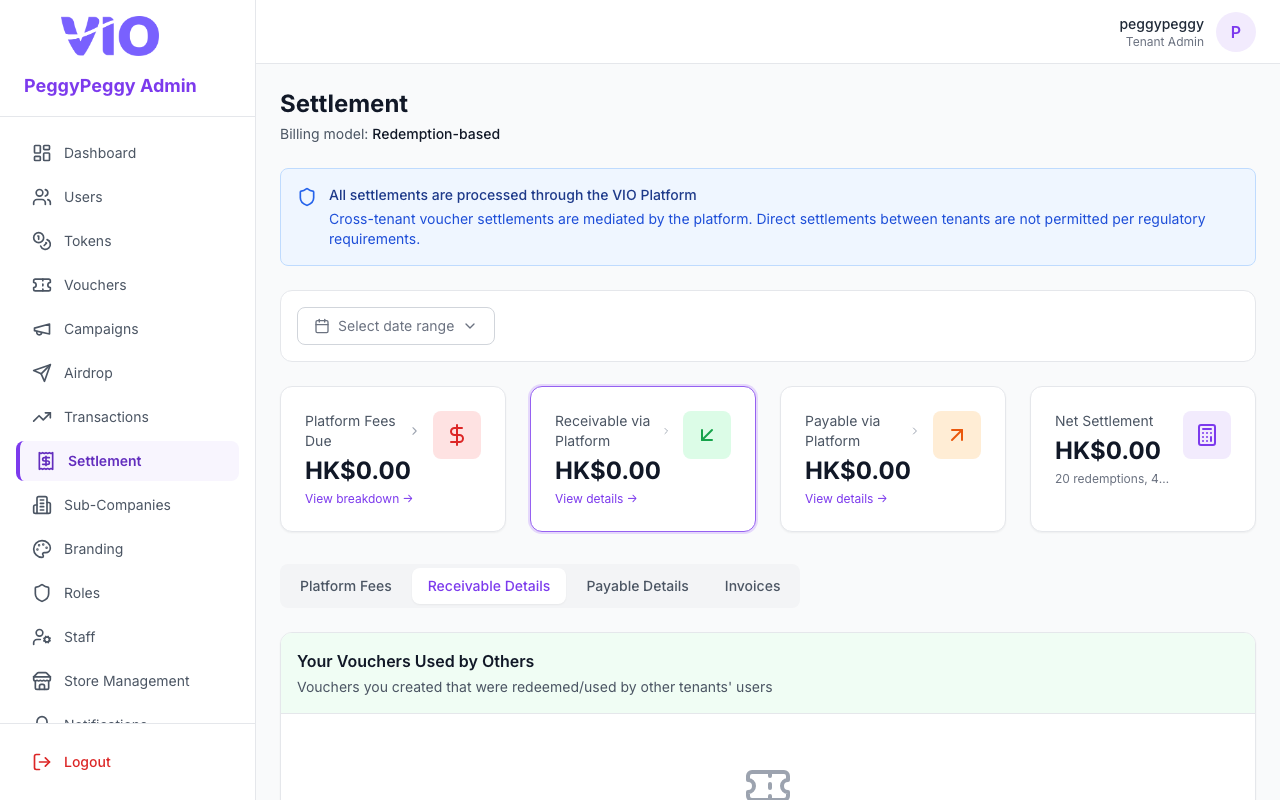
Receivable Details — amounts receivable when other tenants’ users use your vouchers (export CSV when rows exist).
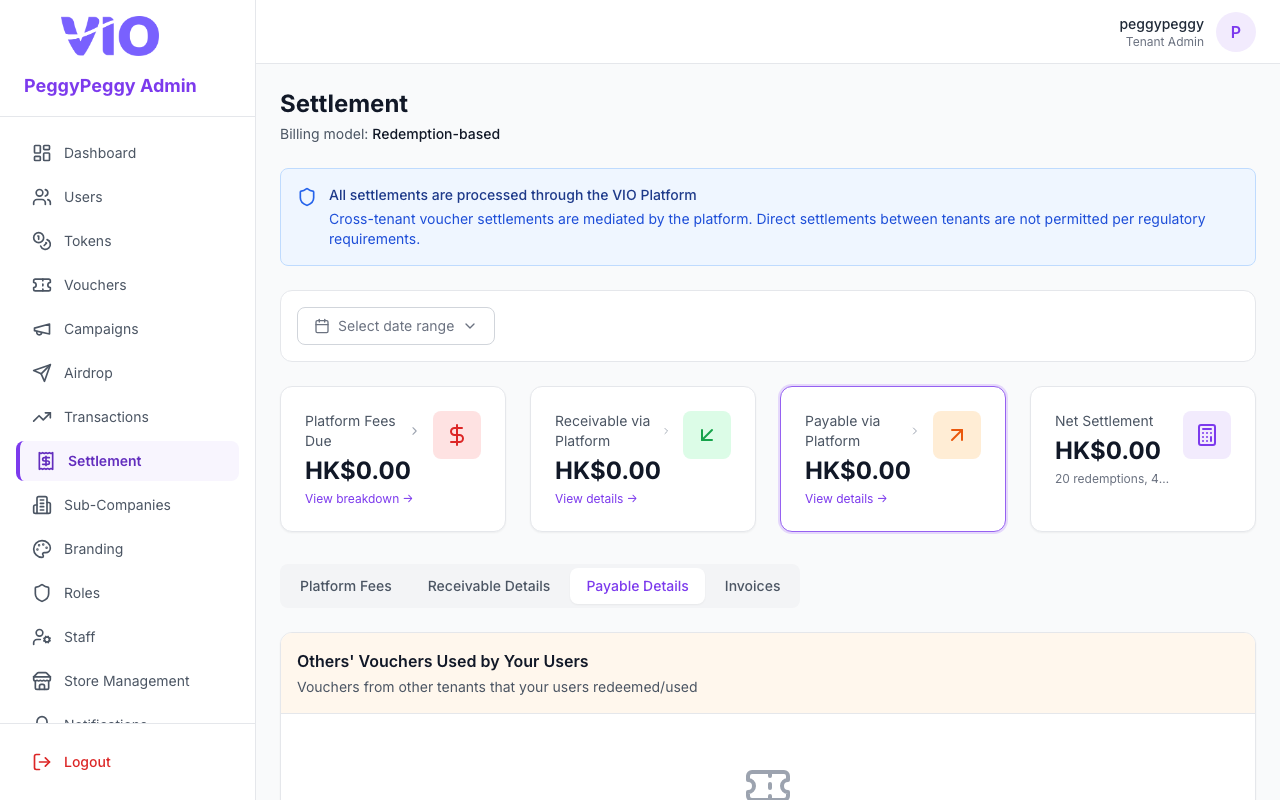
Payable Details — amounts payable for vouchers from other tenants used by your users.
Invoices — issued invoices for your organization (download PDF when available).
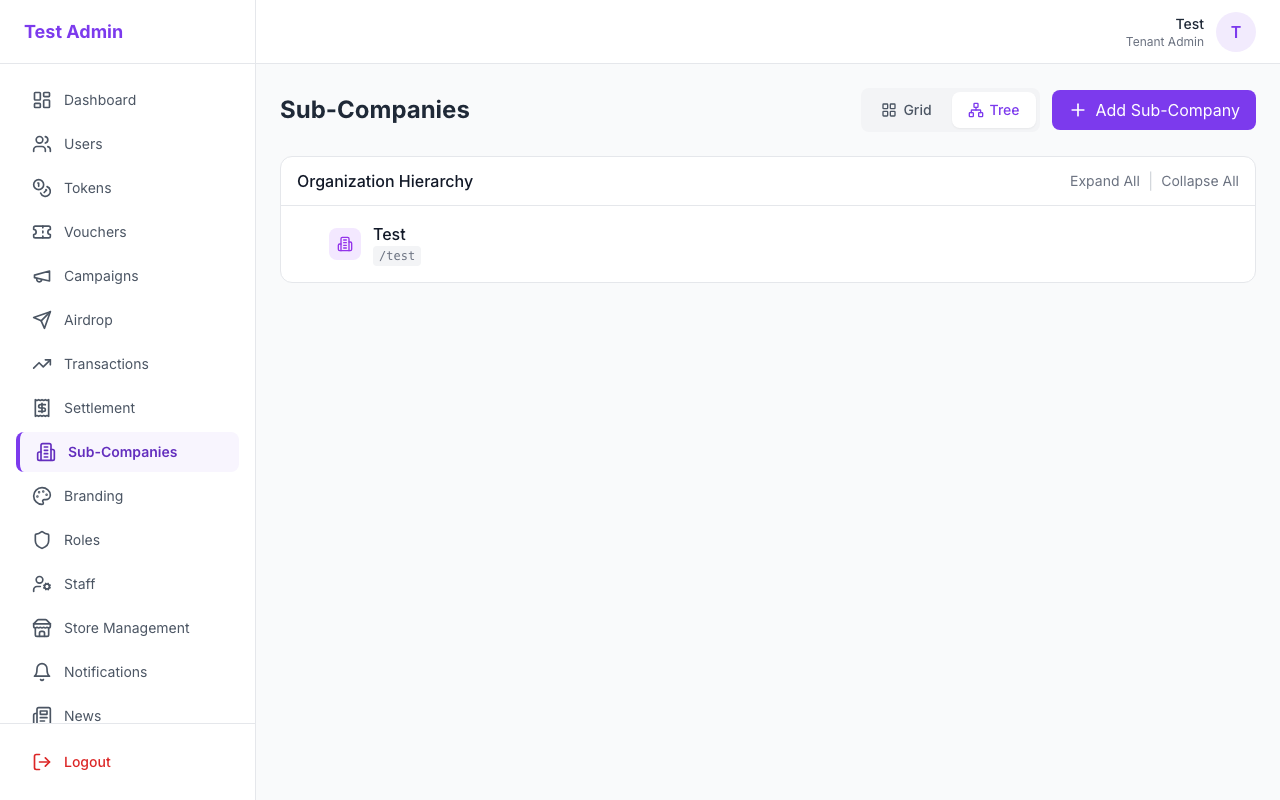
13. Sub-Companies
Hierarchy of sub-branches: switch between tree and grid views, create child companies, upload logos, validate slugs, provision optional sub-admin accounts, and manage users per branch.
How to use:
- Toggle Tree vs Grid to explore the org chart or card layout
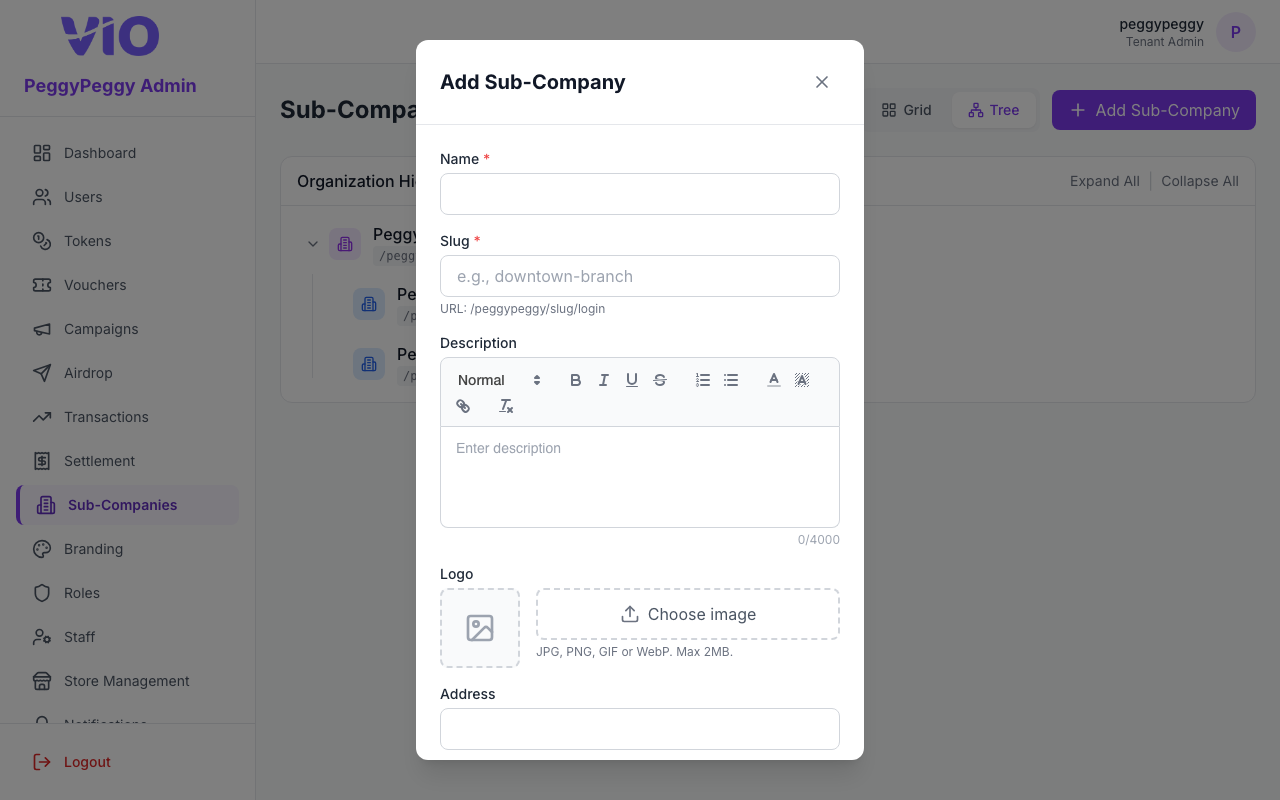
- Click Add or Create sub-company to open the form — name, slug, contact, address, logo, and optional dedicated admin credentials
- Use ⋮ on a row to view, edit, activate/deactivate, delete, or open the member list modal for that branch
- When creating under a parent, confirm the parent/child relationship in the UI before saving
- Copy or note each sub-company slug — it becomes part of member and admin URLs for that branch
Sub-companies (tree or grid)
Create sub-company (form — name, slug, contact, logo, optional branch admin)
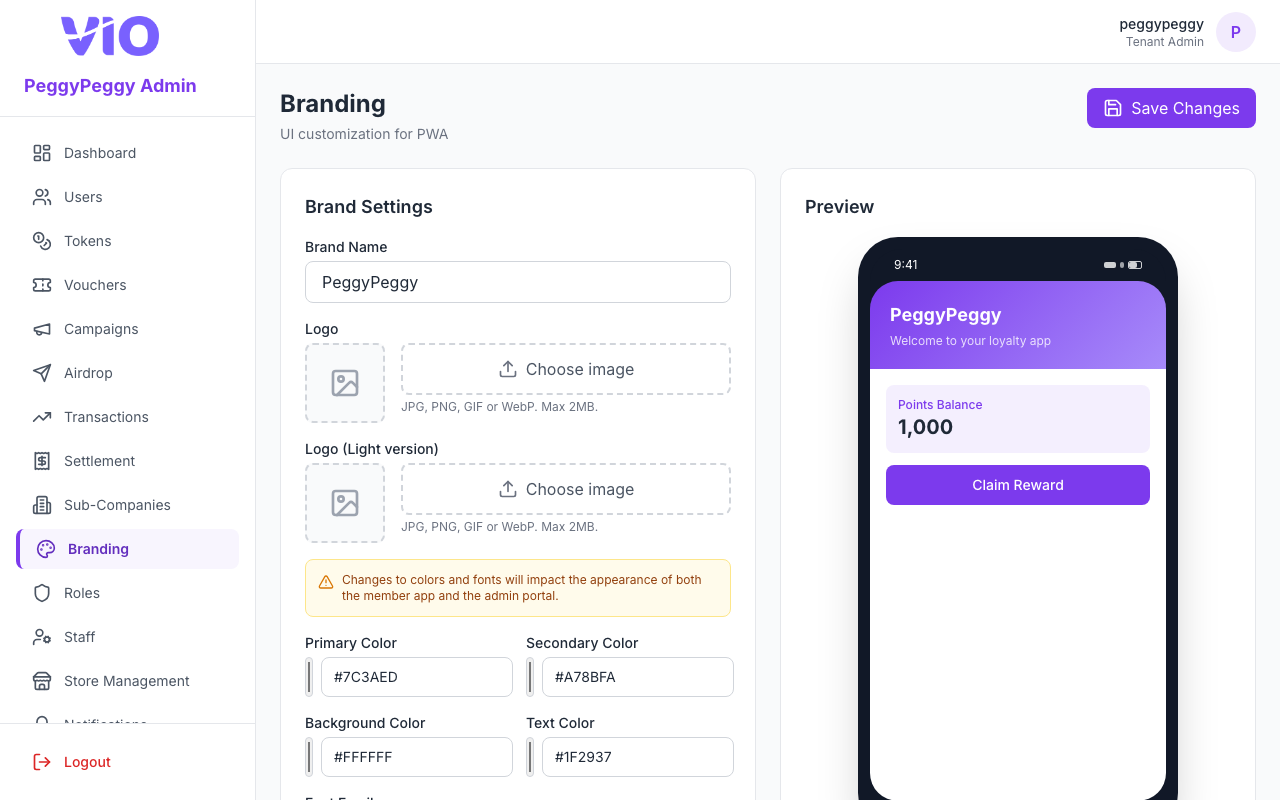
14. Branding
Upload standard and light-theme logos, tune primary/secondary/accent/background/text colors, choose a font family, edit the tenant display name, and save — the live theme can refresh for your session.
How to use:
- Load the page to preview current colors and logos
- Upload new logo files (including light variant for dark backgrounds) using the pickers
- Adjust hex colors and typography to match your brand guidelines
- Update the tenant Name field if your legal/marketing name changed
- Click Save and wait for confirmation; the portal theme may apply new colors immediately
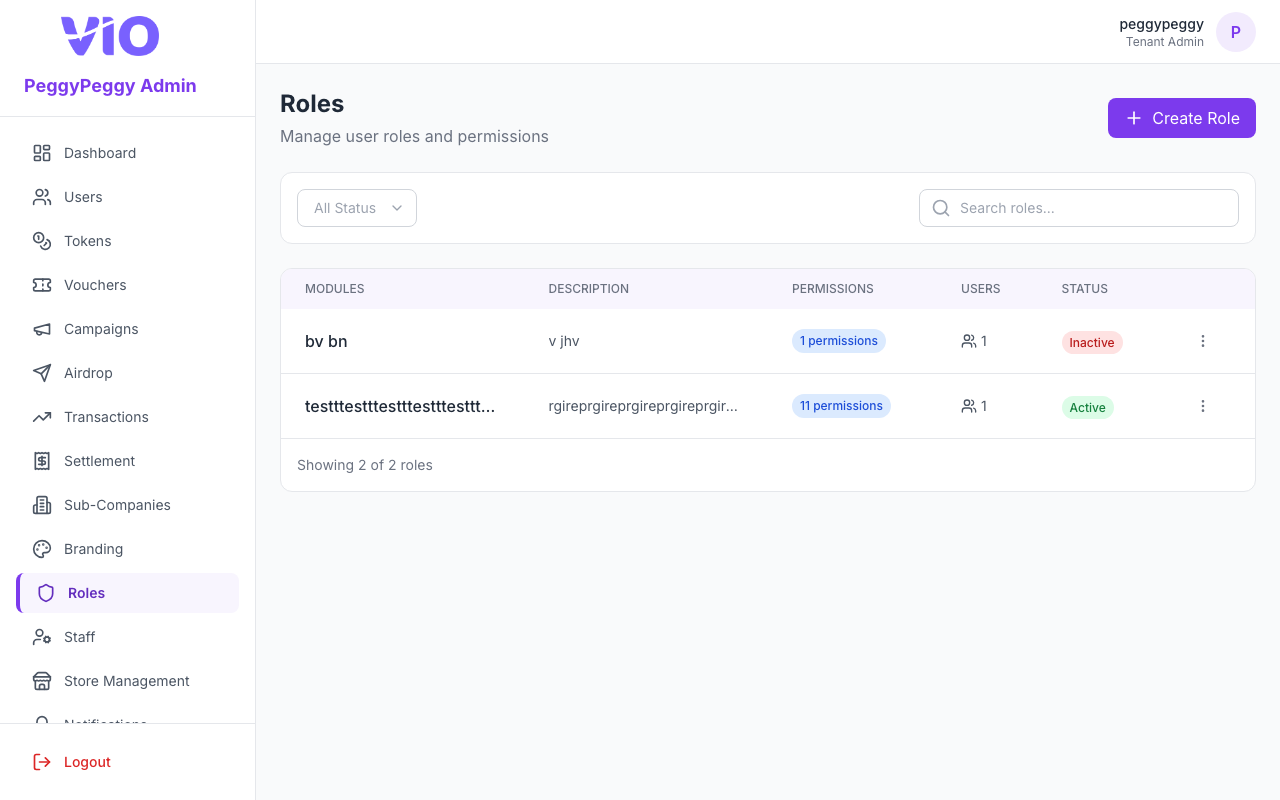
15. Roles
Custom staff roles: search and filter the directory, create or edit permission sets from the modular permission grid, assign users to a role, and deactivate roles you no longer need.
How to use:
- Search by role name and filter by active/inactive status; paginate through results
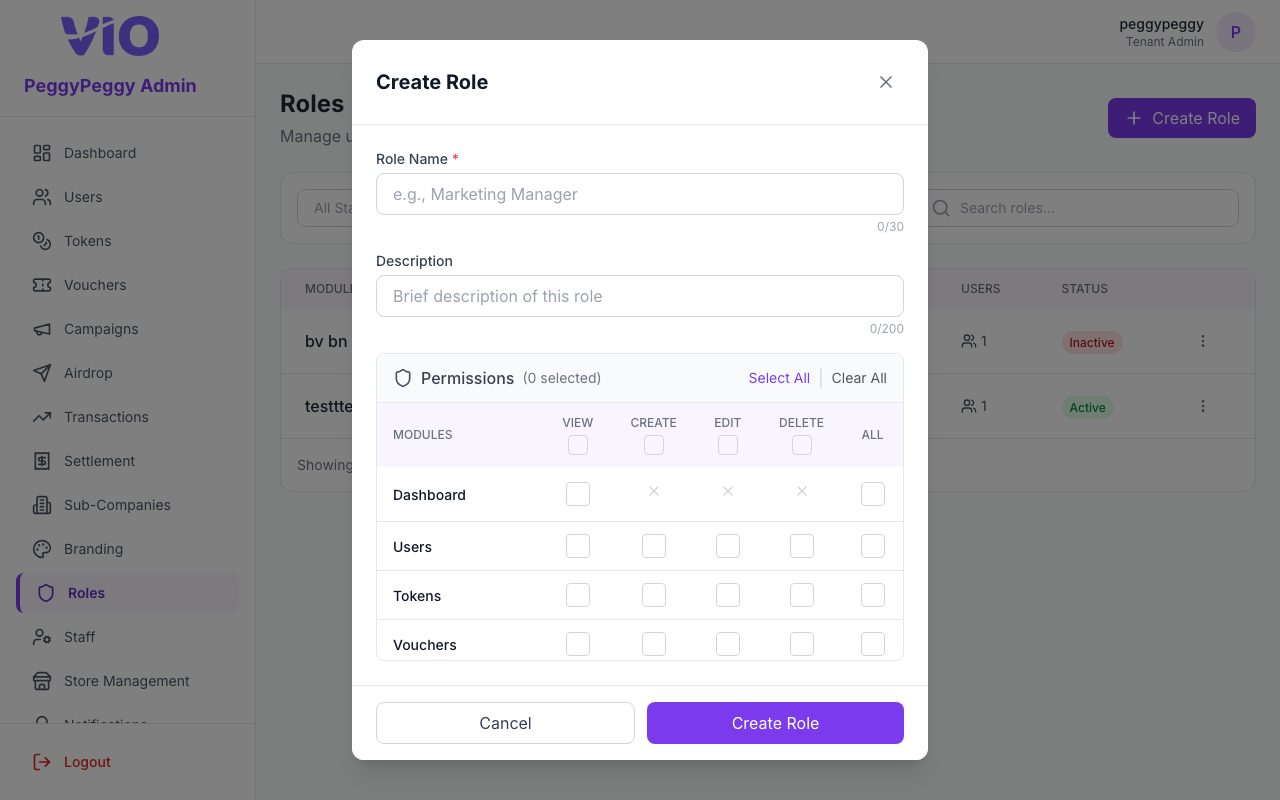
- Click Create role to name the role and tick fine-grained permissions (resources and actions)
- Use ⋮ → View to inspect a role, Edit to change permissions, Manage users to attach staff, or Delete when allowed
- Clone patterns from an existing role by opening Edit and adjusting only the differences your team needs
- After saving, ask affected staff to re-login if their menu does not update immediately
Roles list
Create role (modal — role name and permission grid)
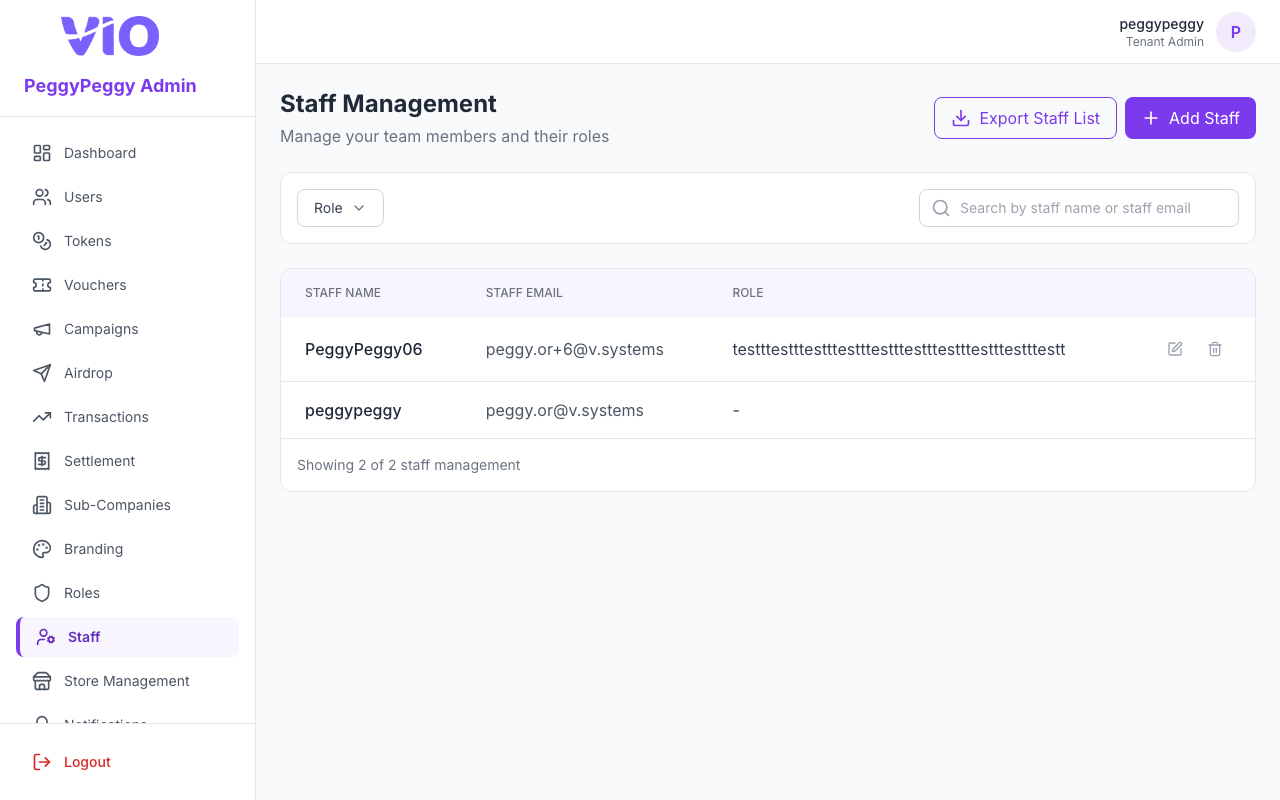
16. Staff
Administrative users for your tenant: searchable table with role filter, page size, CSV export, and modals to add, edit, or remove staff and assign custom roles.
How to use:
- Search by name or email; filter by assigned role; change rows-per-page for large teams
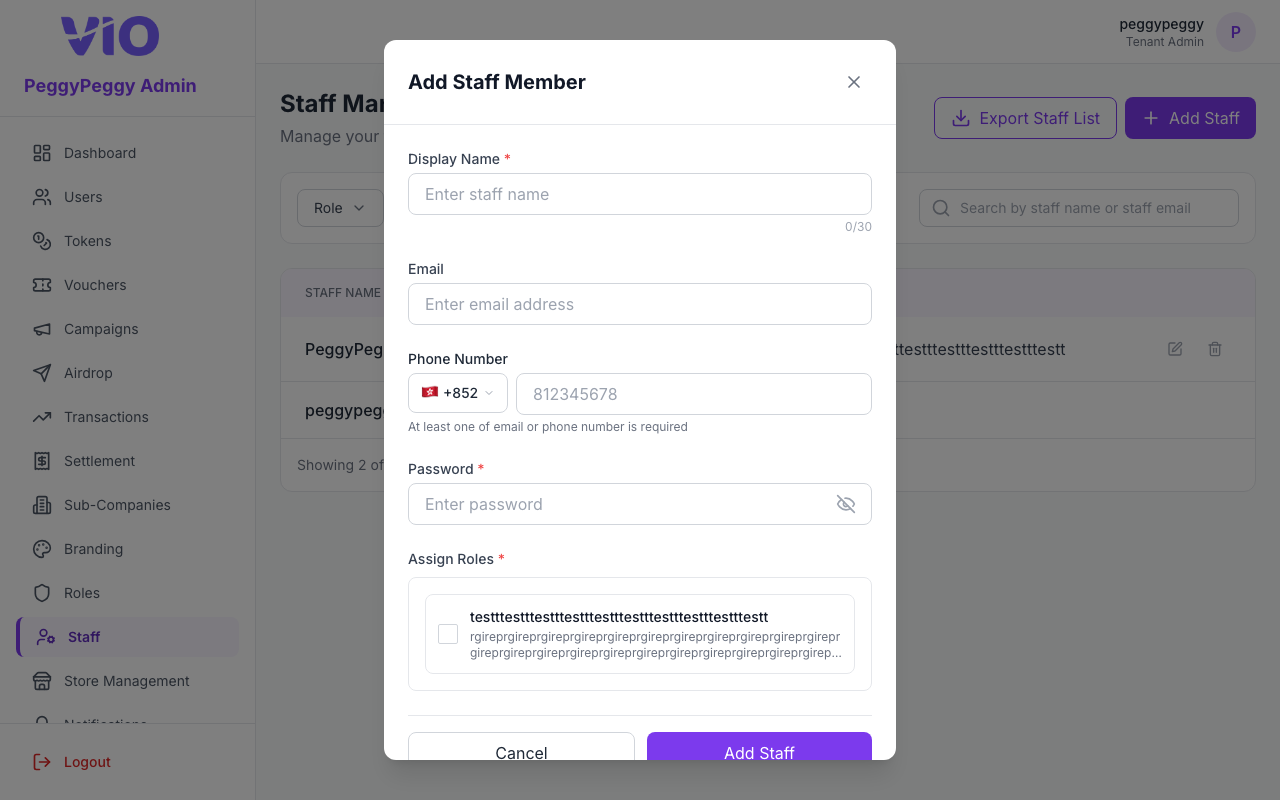
- Click Add staff (or equivalent) to invite someone — supply identity fields and attach one or more custom roles
- Use row actions to edit a staff member’s roles or deactivate/delete per policy
- Export the list when you need an offline roster for audits
- Coordinate password resets or MFA outside the portal if your organization requires it
Staff list
Add staff (modal — identity and custom roles)
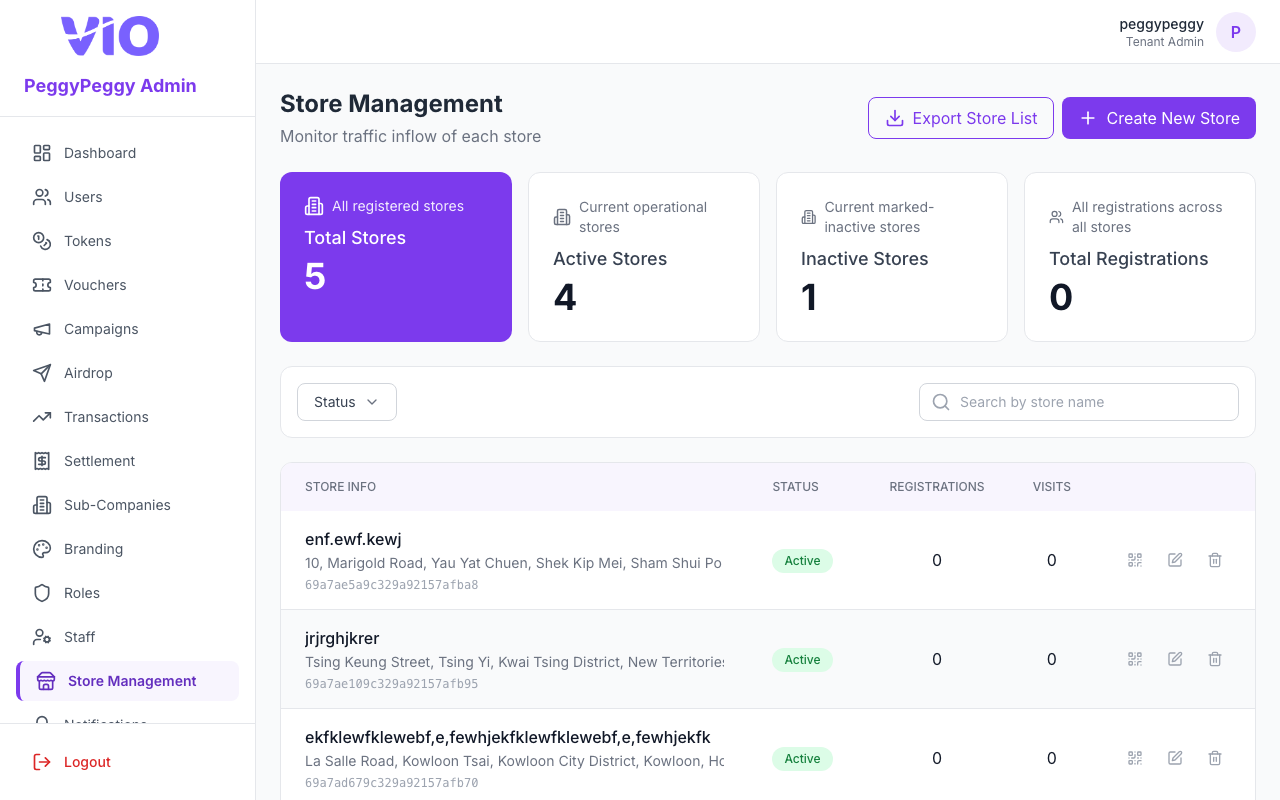
17. Store Management
Matches the sidebar label Store Management (/stores). Outlet registry with dashboard stats, search, status filter, pagination, CSV export, and modals to create or edit each location.
How to use:
- Review the summary tiles for totals, active/inactive counts, and registrations
- Search and filter by status; navigate pages for long lists
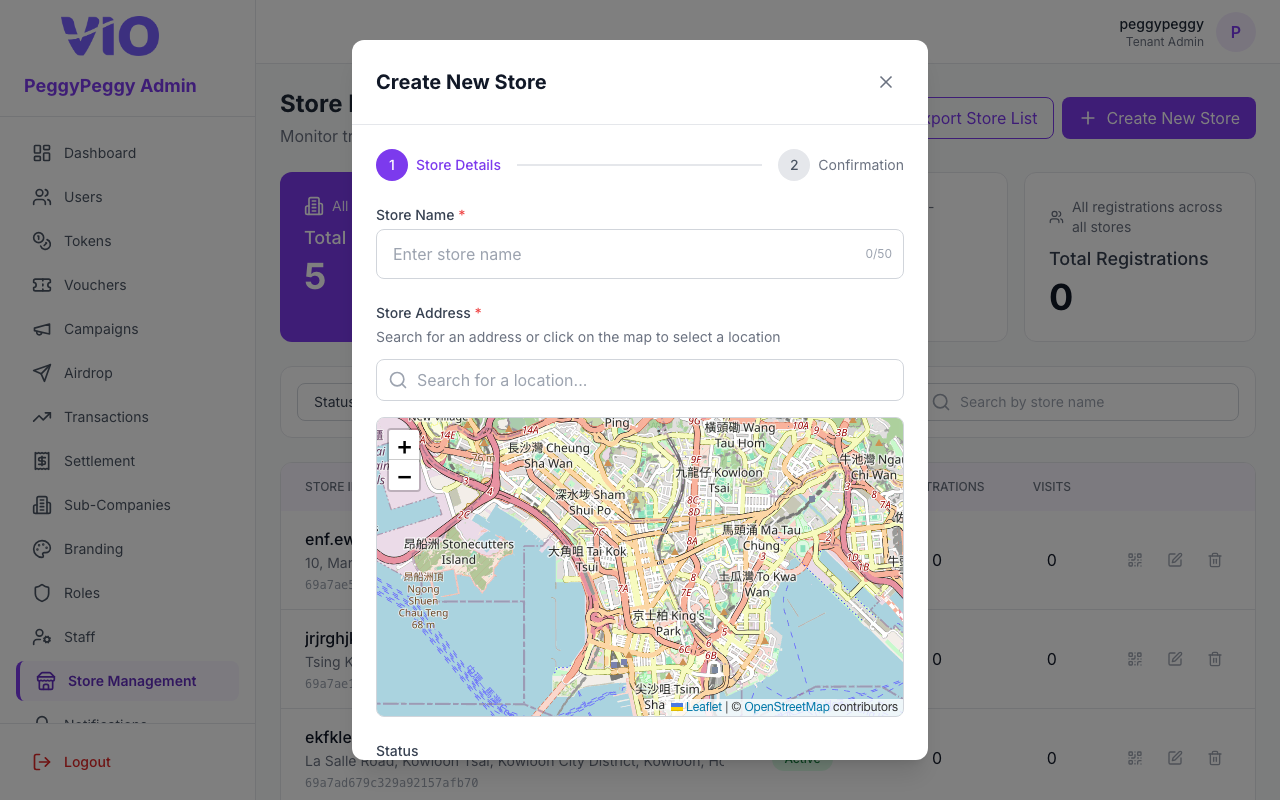
- Create or edit a store to capture name, address, geo/map pin, hours, and related metadata in the form
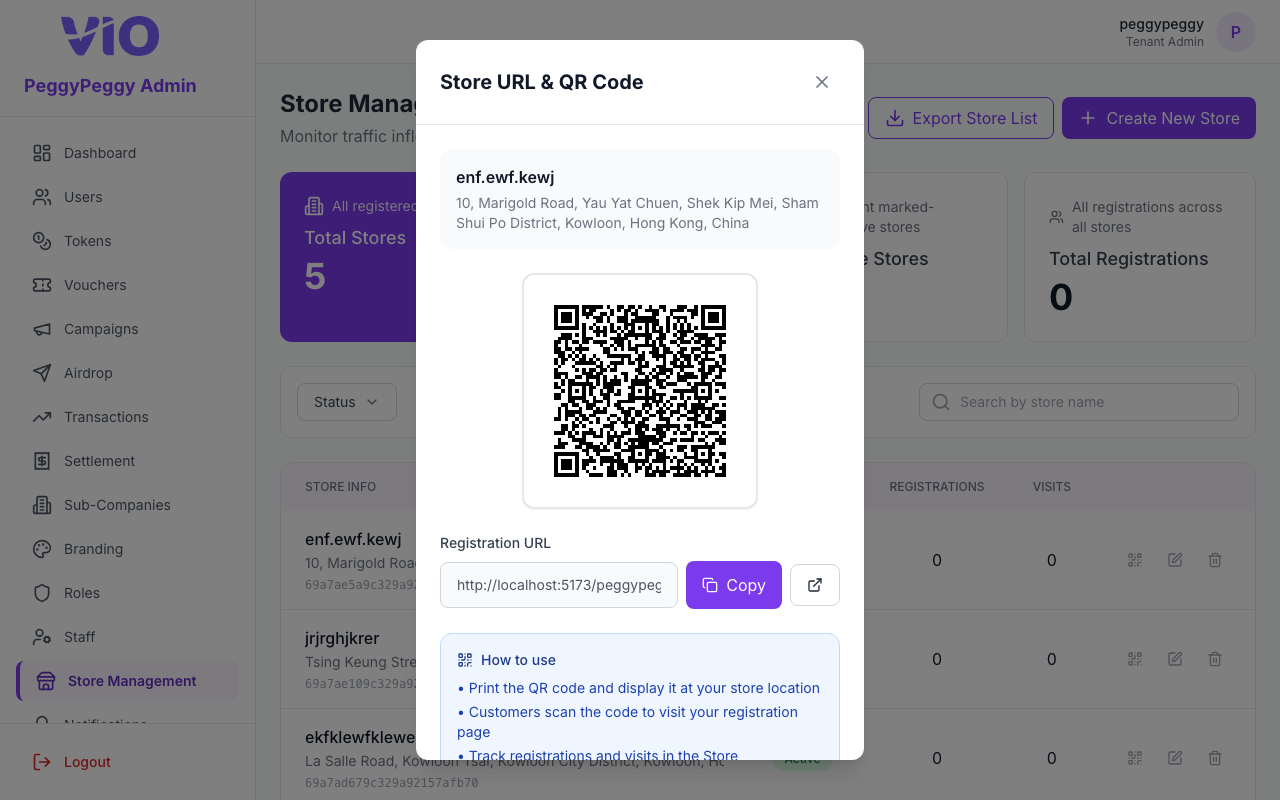
- On a store row, click the QR icon (tooltip View URL & QR Code) to open the Store URL & QR Code dialog — copy the registration URL, open it in a new tab, or use the QR code for in-store signage
- Export the directory for operations teams or deactivate stores that close
Store list
Create New Store (modal wizard — details, map, confirmation)
Store URL & QR Code (dialog — registration URL, QR, copy)
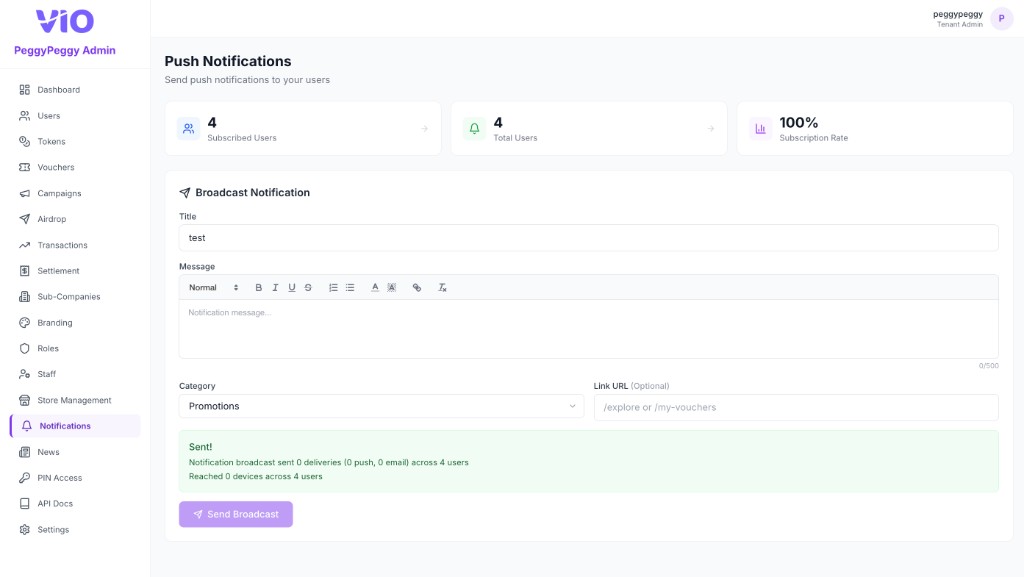
18. Notifications
Matches the sidebar label Notifications. Send push notifications to member app users, view subscription stats, and broadcast messages.
How to use:
- View push notification subscription statistics
- See subscribed users count and subscription rate
- Compose a broadcast notification with title and message
- Select notification category (News or Promotions)
- Optionally add a link URL for notification tap action
- Send broadcast to all subscribed users
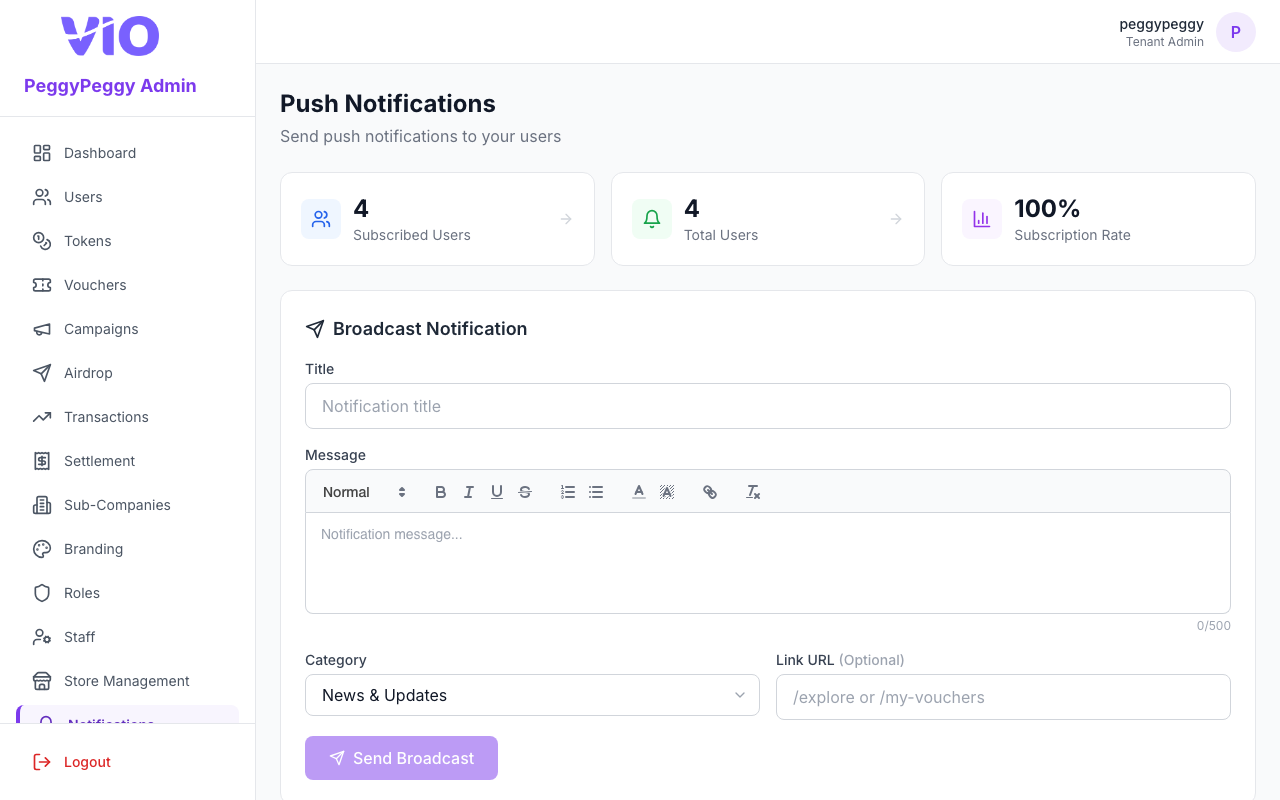
Push Notifications (subscription stats, broadcast form — title, rich message, category, optional link URL — and send result)
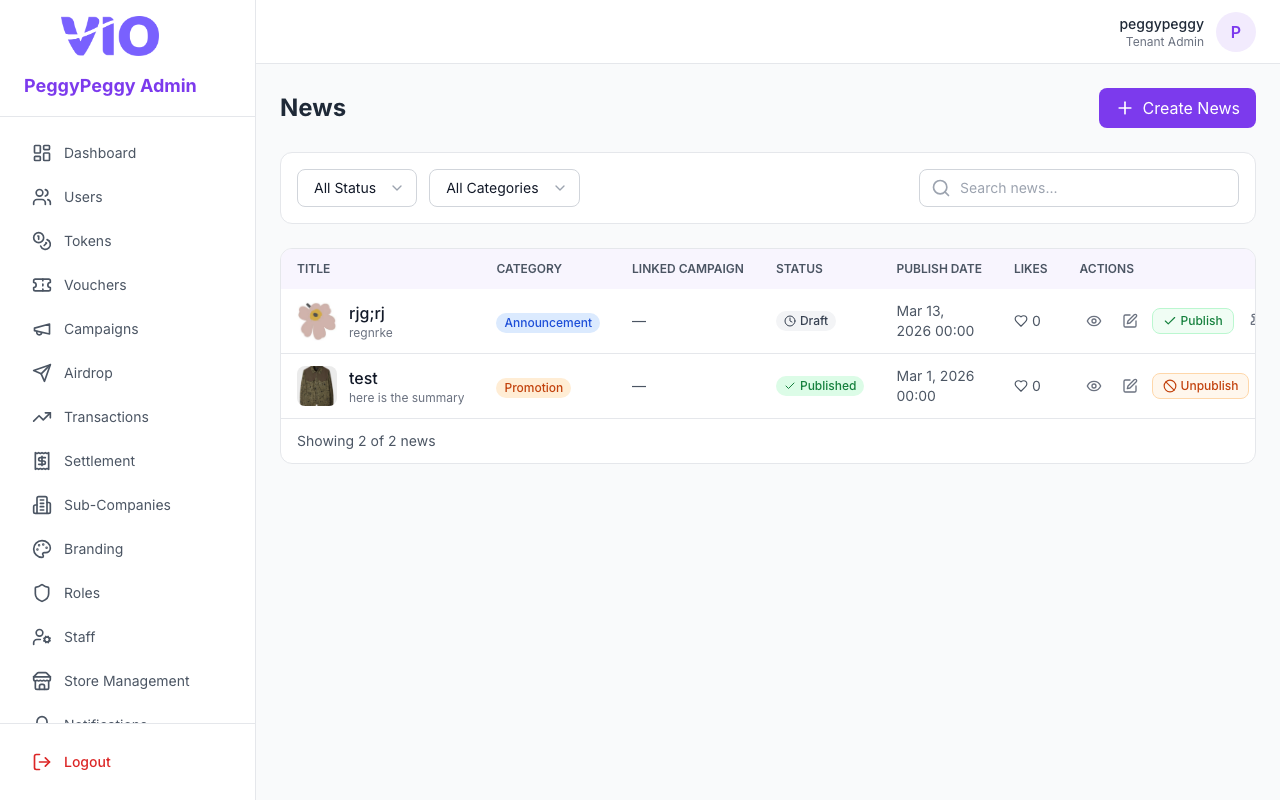
19. News
Create and manage news articles, announcements, and updates for your member app users. Supports rich media, categories, tags, draft/publish workflow, scheduled publishing, list filters, and pinning items for prominence in the member app.
How to use:
- View all news articles in a table with title, category, linked campaign (if any), status, publish date, likes, and actions
- Search: use the search field to match keywords in the list; the table reloads shortly after you stop typing and returns to page 1
- Filters: use the Status dropdown (All Status, Draft, Published, Unpublished) and/or the Category dropdown (All Categories, Announcement, Event, Promotion, Update, Other) to narrow the list; each change reloads results and resets to page 1. When a filter is active, click Clear to reset both dropdowns and page 1
- Pin: in the Actions column, use the pin icon — tooltip Pin or Unpin — to feature or unfeature an article (pinned rows show a small pin next to the title). Requires news → edit permission
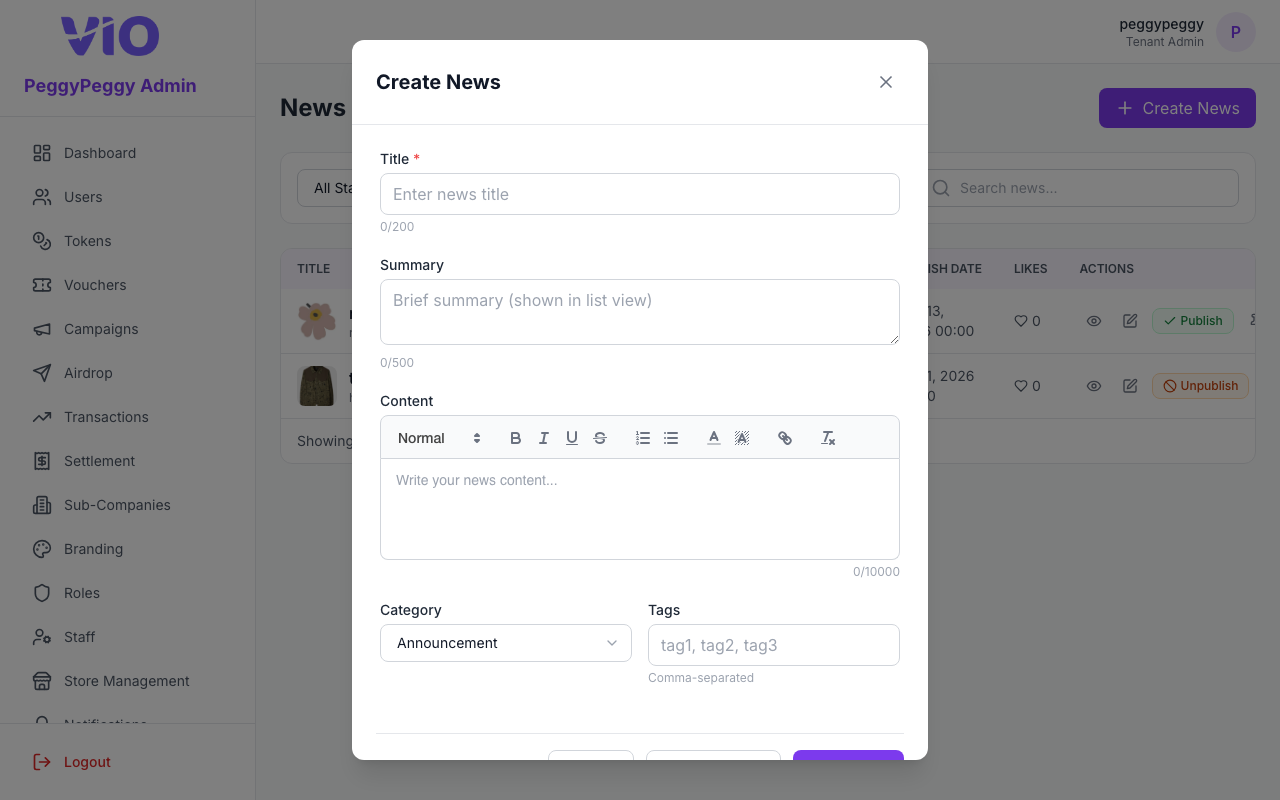
- Create a new article with title, summary, rich-text content, images, video, category, and tags
- Save as draft or publish immediately; set publish date/time and optional expiry date/time for scheduling and auto-hiding
- Publish, unpublish, edit, preview, or delete from the actions column as allowed
News list
Create News (modal — content, media, schedule)
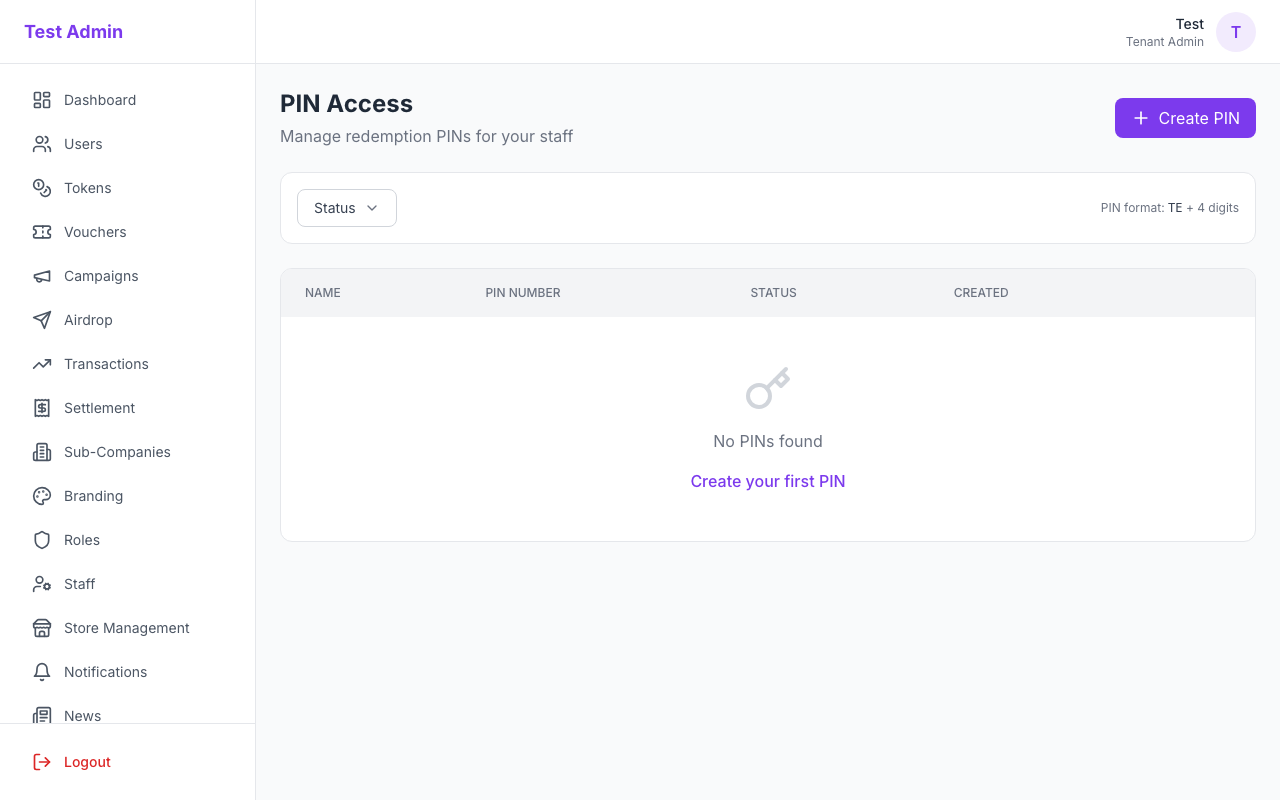
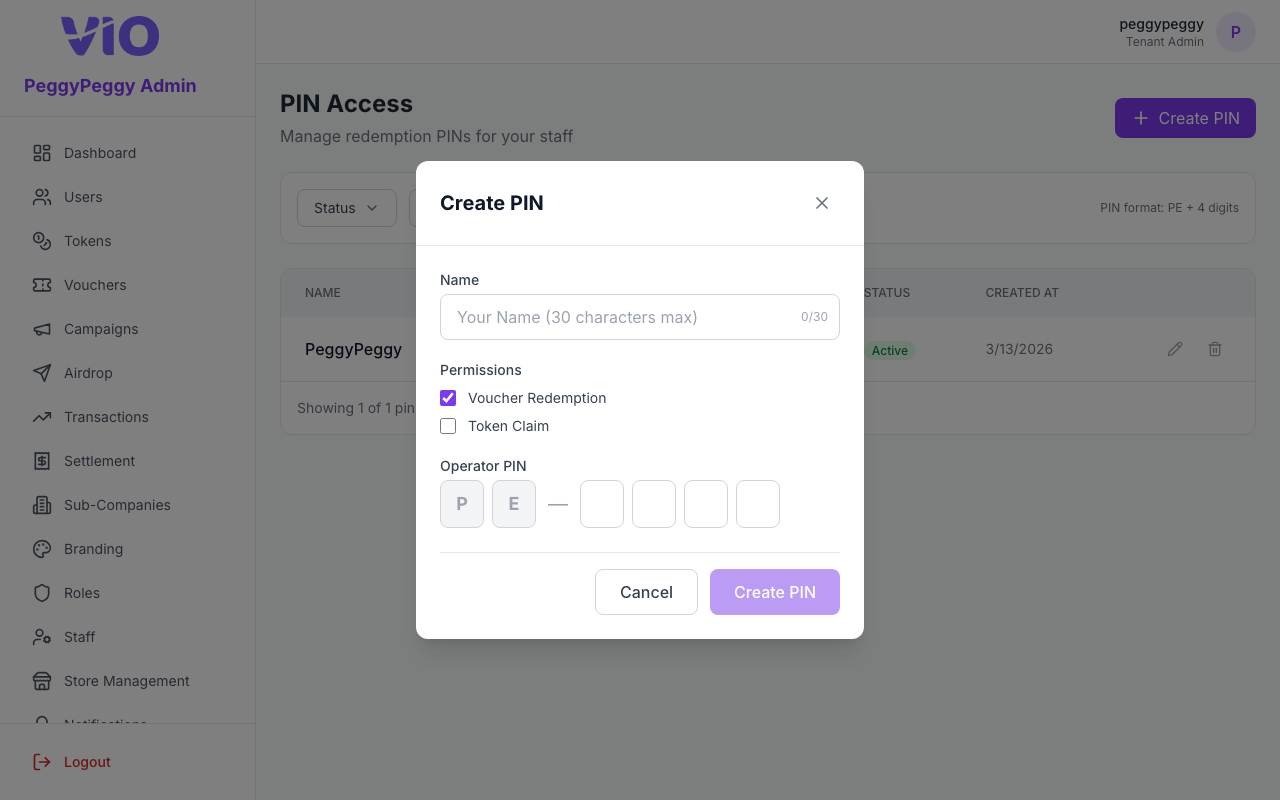
20. PIN Access
Manage redemption PIN codes (prefix, permissions such as voucher redemption or token claim, status). Filter, paginate, create, edit, delete, and reveal masked PINs when permitted.
How to use:
- Review the tenant PIN prefix shown at the top (if the API returns one) so staff know how codes are formatted
- Filter the table by status and by permission type; move between pages with the pagination controls
- Click Create (or Add PIN) to open the modal — set label, permission scope, usage limits, and validity window as the form provides
- Use row actions to edit, delete, or toggle visibility of a PIN’s secret (eye icon) when auditing codes
- Deactivate or remove compromised PINs promptly; new campaigns should use freshly generated codes
PIN list
Create PIN (modal — label, permissions, limits)
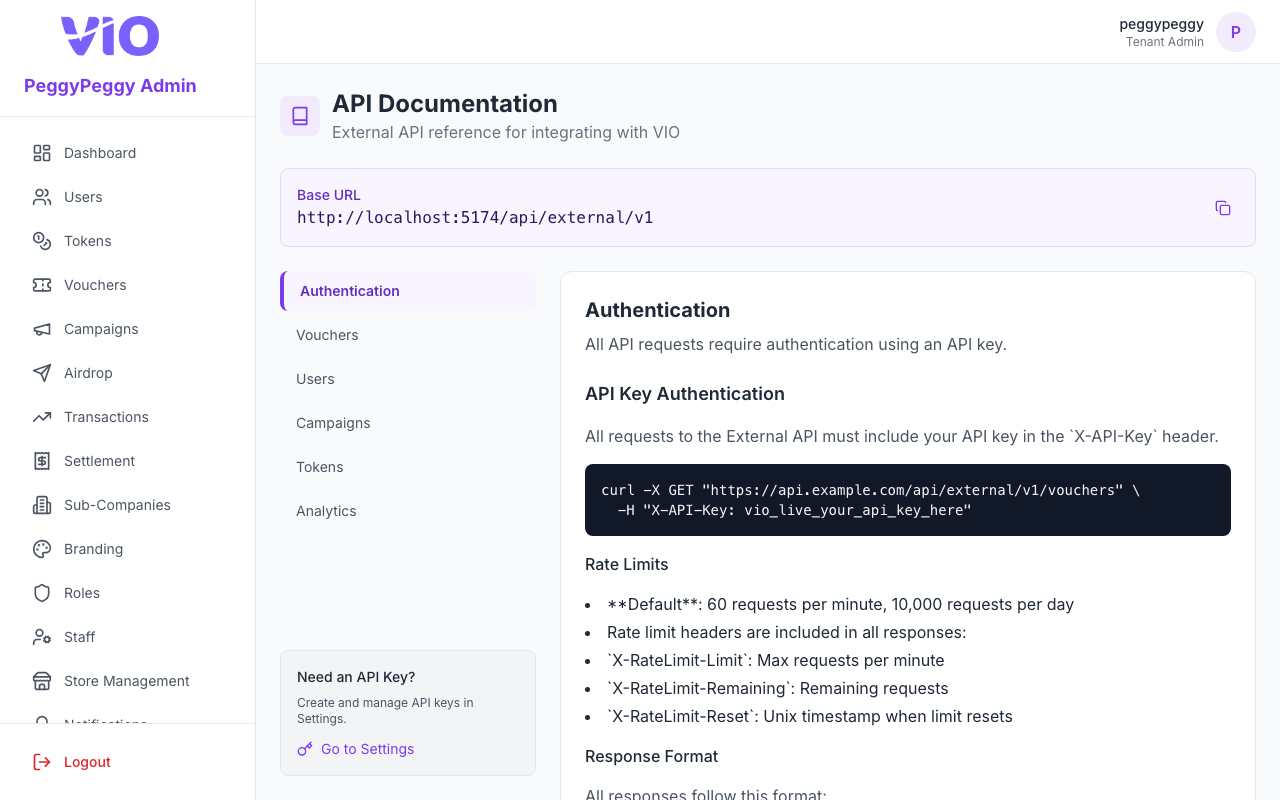
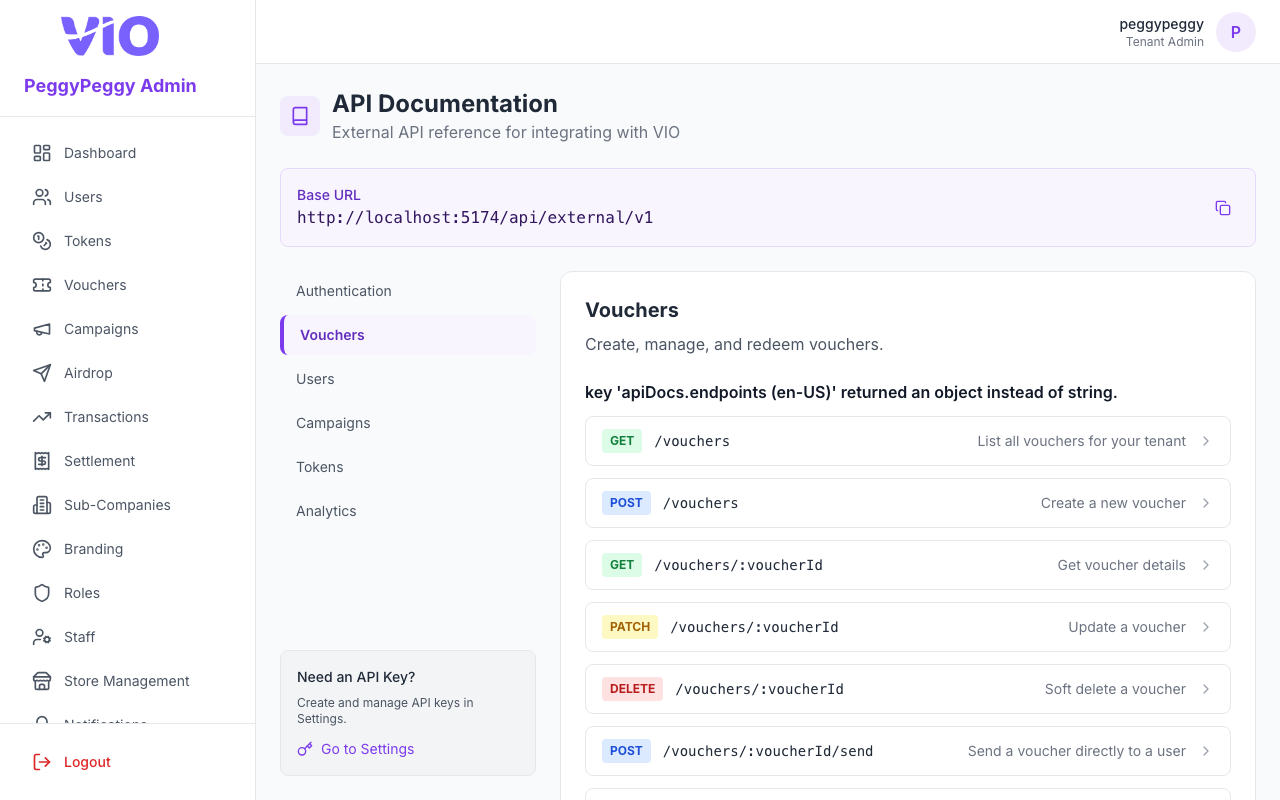
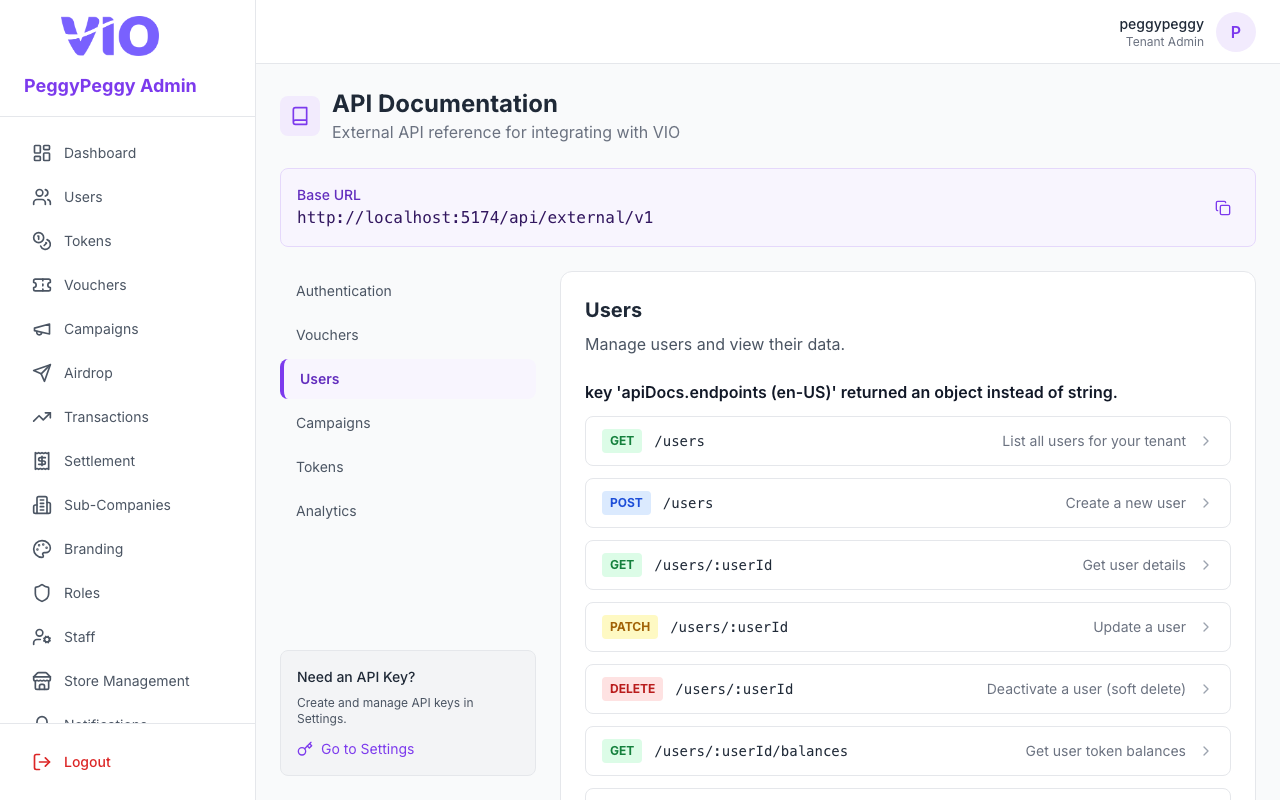
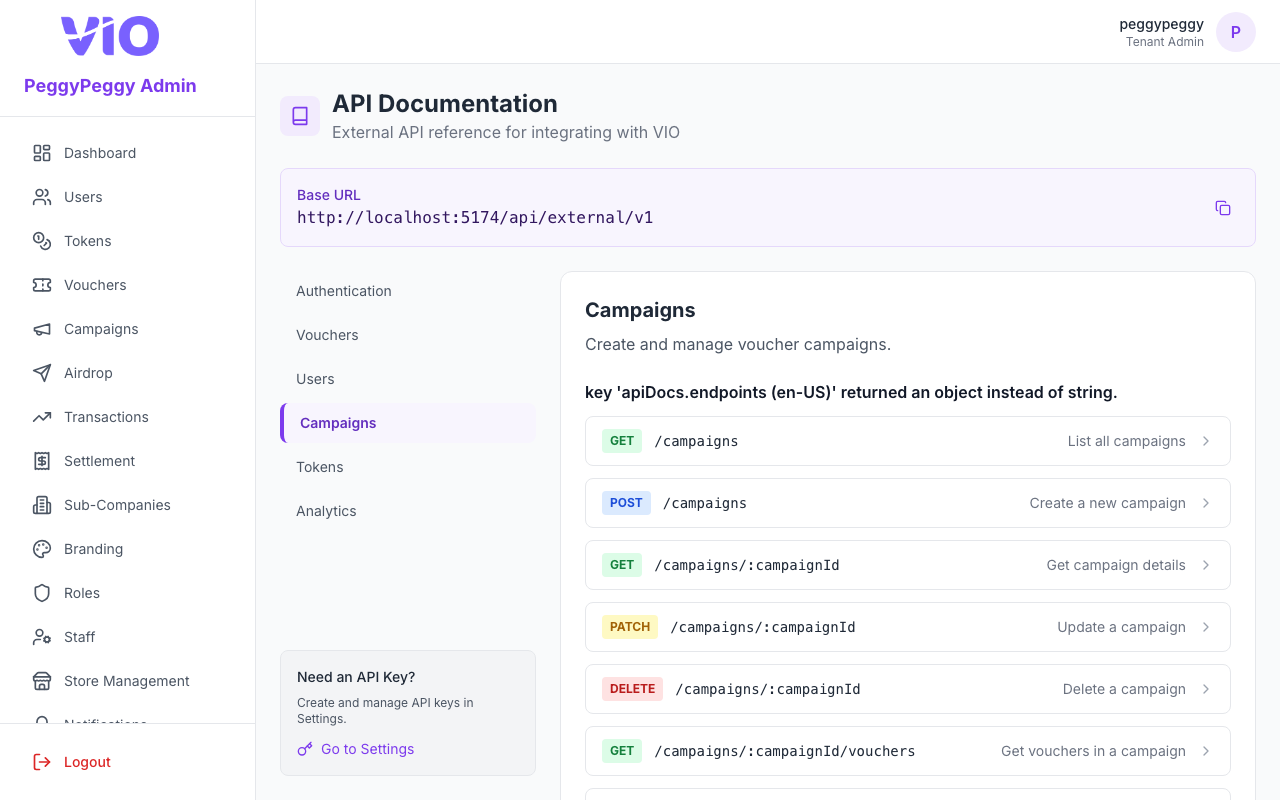
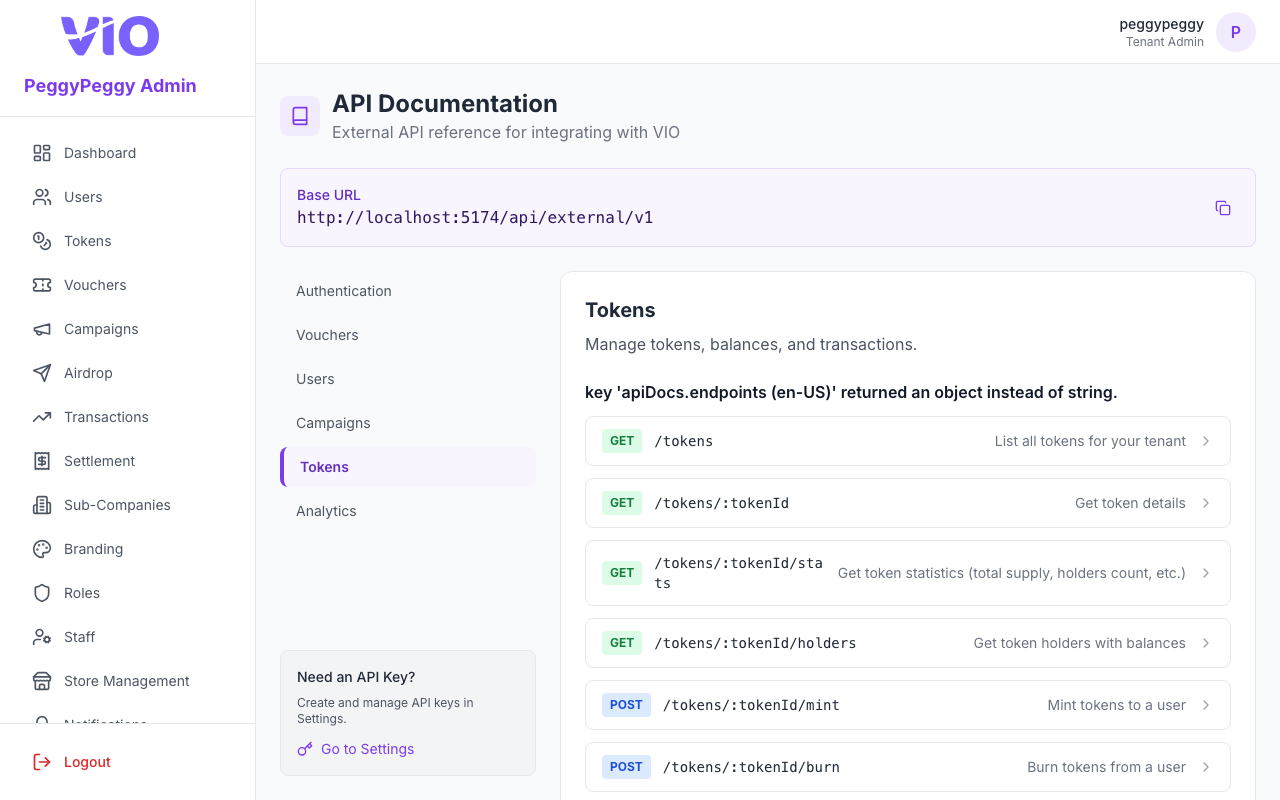
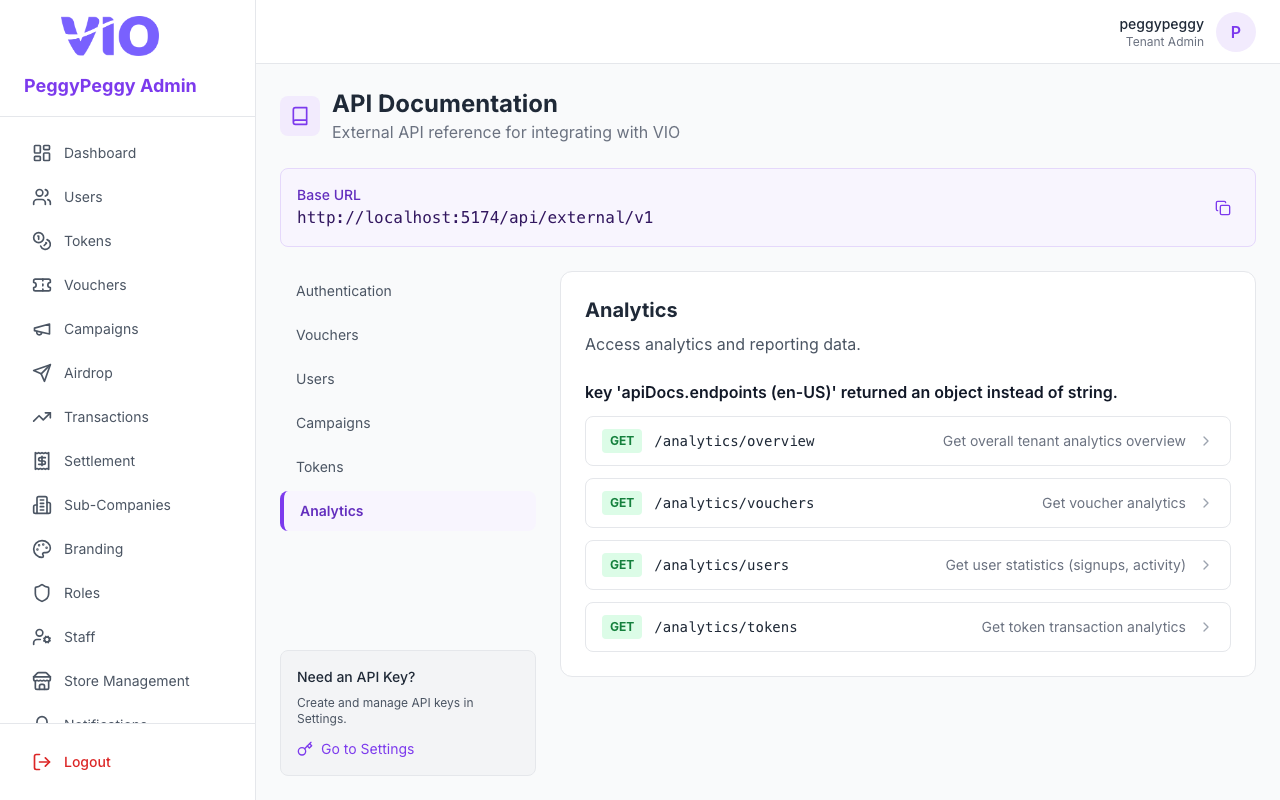
21. API Docs
Matches the sidebar label API Docs (/api-docs). In-portal reference for the External API (/external/v1): Base URL banner at the top, then a second column of tabs (in-page sidebar) to switch documentation by area — Authentication, Vouchers, Users, Campaigns, Tokens, and Analytics. Each area shows prose (where applicable), endpoint cards, parameters, example JSON, and example curl lines. API keys are created under Settings → API keys, not on this page.
How to use:
- Copy the Base URL from the blue panel if you need the exact external prefix
- Click a tab in the in-page left column (below the main app sidebar) to open that resource’s docs — order: Authentication → Vouchers → Users → Campaigns → Tokens → Analytics
- Under Authentication, read how to send
X-API-Key, rate limits, and response envelope shapes - For other tabs, expand or scroll through endpoint cards — review path, query/body fields, and example responses
- Use Copy on code blocks where shown to paste into a terminal or Postman
- Use Go to Settings (bottom-left on large screens) for API key management when you need to create or rotate keys
Authentication
Vouchers
Users
Campaigns
Tokens
Analytics
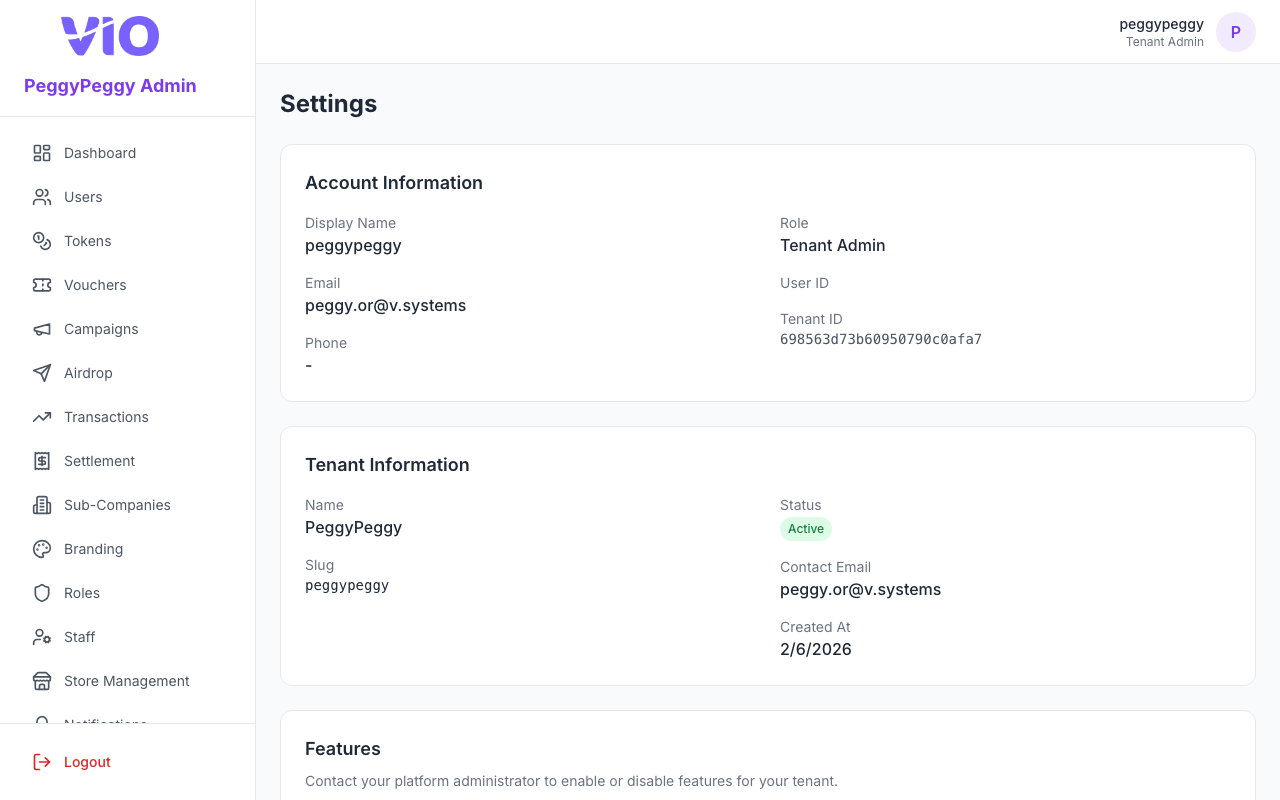
22. Settings
Read-only tenant profile, feature flags, and billing summaries for your login, plus self-service API key management (create, scope, copy once, revoke), interface language, and optional data export. Data export may show a “coming soon” notice.
How to use:
- Review Account information (your profile) and Tenant information (name, slug, status, contact)
- Scroll through Feature flags — toggles are informational; enabling/disabling is controlled by the platform operator
- Read Billing information: maintenance fee, active billing models (with rate type — per unit, percentage, or token value percentage), minimum charges, and cross-tenant marketing fee configuration shown by your contract. For token value percentage, fees are automatically converted to your billing currency if the token's fiat peg differs.
- Under Language (globe icon), choose English, 繁體中文, or 简体中文 — the admin portal UI switches immediately; the active language shows a checkmark. Your choice is kept for this browser (i18n)
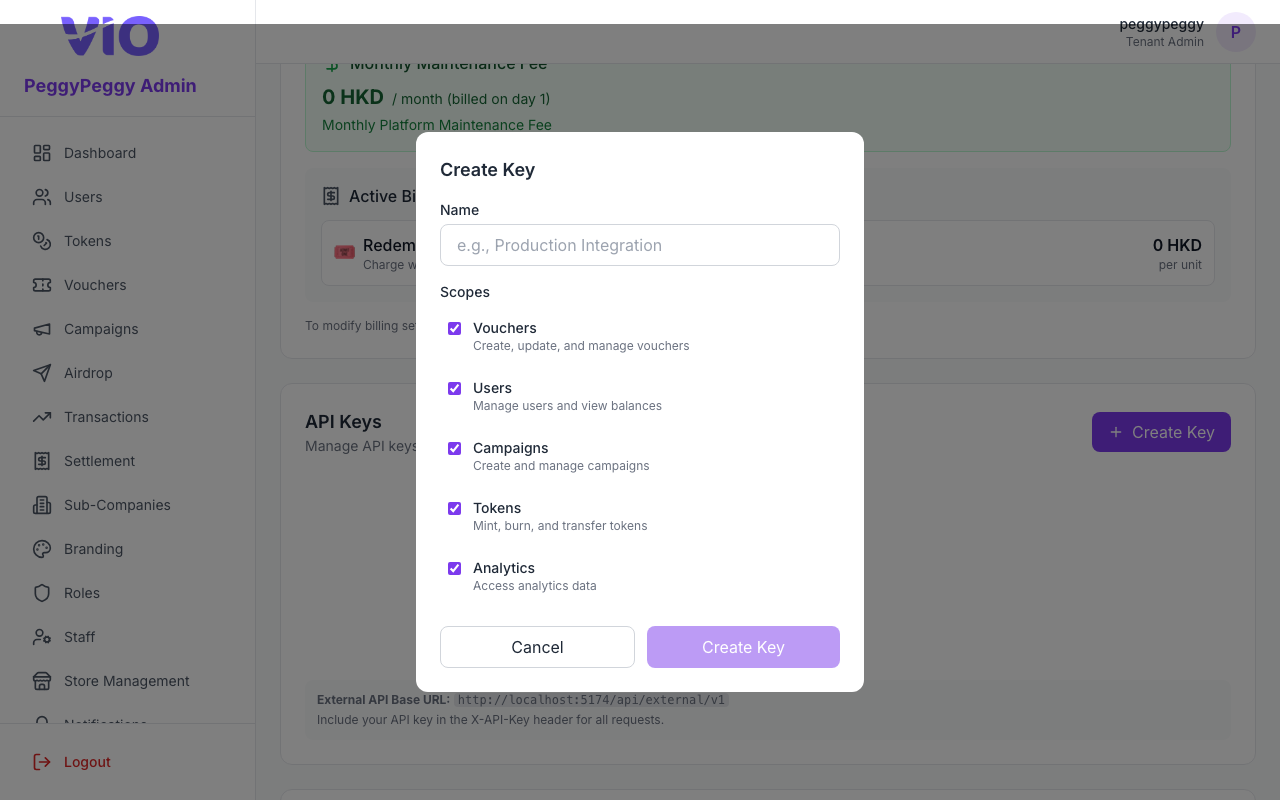
- Under API keys, click Create key, enter a label, pick scopes (vouchers, users, campaigns, tokens, analytics), copy the secret once, and revoke old keys when rotating
- Optional: in Danger zone, use Export if your tenant exposes data export — the app may show progress or a “coming soon” state
Settings
Create API key (modal — label, scopes, one-time secret copy)
23. Membership Tiers
Manage your loyalty programme tiers — configure how members earn growth points, progress between tiers, and enjoy tier-specific benefits. The page shows a statistics banner, a tier list (up to five tiers ordered by weight), and a growth-rules panel. This module is available only when the Membership Tiers feature flag is enabled for your tenant.
How to use:
- Navigate to Membership Tiers in the sidebar
- Review the statistics banner: total members enrolled, growth points awarded in the last 30 days, and transactions in the last 30 days — click any card to open the detail drawer
- Browse the tier list: each row shows the tier colour, name, required growth points, growth multiplier, and discount rate; click a row to expand the member list for that tier
- Click Initialise to run the three-step setup wizard if no tiers exist yet: Step 1 configure tier names and thresholds, Step 2 configure growth activities, Step 3 preview and confirm
- Click + Add Tier (visible when fewer than five tiers exist and you have the
createpermission) to open the create-tier modal - Use the edit (pencil) icon on a tier row to update its name, colour, required growth points, multiplier, discount rate, tier type, or expiration settings
- Use the delete (trash) icon to remove a tier — the base-level tier cannot be deleted
- Under Growth Rules, toggle each activity (
Voucher Redemption,Engagement,Profile Completion) on or off, and adjust the points per action and daily limit for each; save with the Update button
Need Help?
If you encounter any issues or have questions about administration features, please contact your system administrator or super admin.
This guide was automatically generated on 4/13/2026